
Internationalization or i18n is the design and development of a product, application, or document content that enables easy localization for target audiences that vary in culture, region, or language. Thus, React i18n is concerned with localizing React applications for different locales.
The aim of internationalization is to remove the barriers to localizing or deploying an application internationally. Unicode usage, legacy character encodings, string concatenation, etc. are some of the things which assist in designing an application to ensure successful internationalization.
This article is a thorough guide on how to work with React-intl to internationalize your React application. We will discuss the following topics:
- Popular libraries for React i18n.
- Getting started with React-intl.
- Using arguments in your translated text.
- Building a locale selector to switch between locales.
- Localizing date, time, numbers, and currencies to different locales.
- Pluralization with React-intl.
You may also be interested in learning how to translate React apps with I18next or how to localize React Native.
What is localization?
Localization refers to adapting a product, application, or document content to meet the linguistic, cultural, and other requirements of a specific target market (a locale). Commonly known as l10n, some mistake it for simply translating the content of an application to fit a locale. In fact, localization goes beyond translation. With localization, you can customize not only the language preference but also number formats, date and time formats, currency formats, keyboard layout, sorting and collection, text direction, and even colors and designs.
Not stopping there, localization might even bring about the need to rethink the logic of an application and its design. When you target a specific market, you have to adapt its customs to your own.
Prerequisites
This tutorial assumes that you have installed the latest version of Node.js and npm on your device. You also need to be familiar with HTML, JavaScript, and basic npm or Yarn commands before learning React i18n.
Introduction to React
Developed by Facebook, React is a popular JavaScript library for building user interface components. What’s different about React is that it does not directly manipulate the DOM, but creates a virtual DOM in the memory. Prior to making modifications in the browser DOM, it performs all the changes in the virtual one.
Installation
First, you need to install the create-react-app and you can do that by entering the following command in your command line tool/terminal:
npm install -g create-react-app
Create a folder in the desired location and open it with your text editor, and then open a terminal window in the text editor and type this command:
npx react-create-app <name_of_your_app>

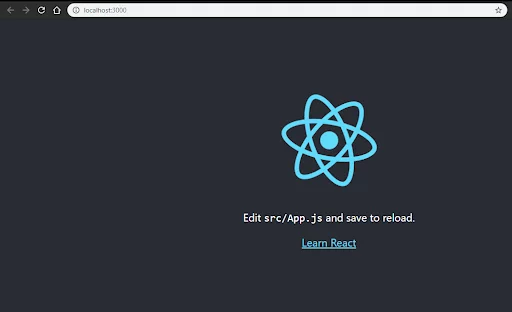
Once done, you will see that the application has been created with a predefined folder structure inside it. You will be prompted to go to the app you created and run npm start or yarn start, depending on what package manager you have installed on your PC.

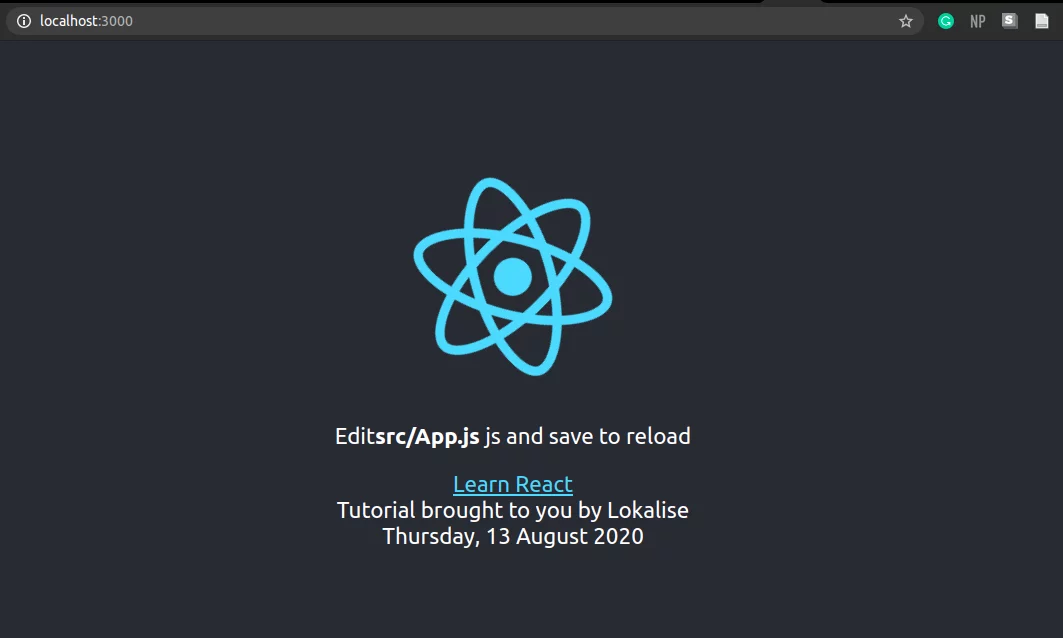
After running npm start or yarn start, a new tab will open in your default browser loading the react application you just created in localhost:3000, which will look like this:
Popular libraries for React i18n
Let’s explore and gather information about some of the well-known React i18n libraries. Choosing the right package or library may not be as easy as it sounds. React-intl and react-i18next are some of the most popular libraries for React i18n.
Consider the following factors when you are looking for the right package:
- Similar packages to those you are using for another project.
- Does the package meet your needs and those of your users?
- Is your team already familiar with a package in the list you are going to choose from?
- Documentation and maintenance of the package.
React-intl
The react-intl library comes as a part of the FormatJS internationalization libraries. It supports more than 150 languages globally. This product, which Yahoo offers, is mostly popular due to the features that are bundled in it. Standard locale settings, such as date and time, currency, and numbers, can be easily handled using react-intl. Also, it has rich documentation that follows advanced standards, using the built-in browser translations whenever possible. Polyfill options can be used with browsers that do not support the JavaScript API for i18n.
React-intl builds on JavaScript’s API for React i18n and offers improved APIs and components. When you need to load language modules dynamically, react-intl uses the React context and higher-order components that give translations.
You can refer to react-intl documentation here.
In this tutorial, we will be using the react-intl library to apply internationalization as it is the best and most popular library for React i18n to date.
React-intl-universal
The react-intl-universal internationalization package, which is built by Alibaba Group, is based on the react-intl library. The difference is, this library enables even the non-React components to make use of the library by providing a singleton object to load the locale. For instance, this can be used in Vanilla JS as stated in the documentation itself.
Moreover, this library is simple to use, in that it only contains three major APIs and an optional helper. You can use this to load numbers, currency, date, and time using different languages. Apart from this, pluralization is enabled, which allows you to define labels for strings. The message format is implemented using the ICU standards and even nested forms of data in JSON format are supported through this.
You can refer to react-intl-universal documentation here.
React-i18next
Based on the React i18n framework, react-i18next is another popular internationalization library which uses components to render or re-render the translated content of your application once users request a change of language.
This library is designed to allow the addition of new functionalities and accommodate changes with a wide range of plugins, configurations, and utilities. Detecting the user’s preferred languages, locale caching, loading the translated content from the backend server, and bundling the translations with a web pack are some of the functions performed by these plugins.
React-i18next also accommodates experimental support for the API on React suspense.
You can refer to React-i18next documentation here.
LinguiJS
Although quite new to the field of internationalization, LinguiJS offers a variety of good features for internationalizing your application. It’s a simple package with less overhead.
You can refer to LinguiJS documentation here.
Getting started with React-intl
Installation
You can install the react-intl library by entering the following command in your terminal or command line:
npm i -S react-intl
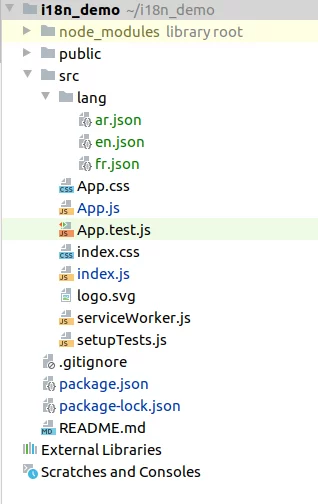
Application workflow
We will design our application according to the below folder structure:
Check out our full code at GitHub.
We will be using three languages in the demo application: English, French, and Arabic.
When we are designing our application to support internationalization, one of the major questions is how to detect the user’s preferred language. Normally, users will have defined their preferred language settings in their browsers. Thus, we can give them the best user experience possible by detecting their language and providing content in that language.
All modern-day browsers have a navigator.language object and this can be used to obtain the user’s language settings.
Now, this is how our index.js file will look at the beginning:
import React from 'react';
import ReactDOM from 'react-dom';
import './index.css';
import App from './App';
import * as serviceWorker from './serviceWorker';
import {IntlProvider} from 'react-intl';
import French from './lang/fr.json';
import Arabic from './lang/ar.json';
import English from './lang/en.json';

const locale = navigator.language;

let lang;
if (locale==="en") {
   lang = English;
} else {
   if (locale === "fr") {
       lang = French;
   } else {
       lang = Arabic;
   }
}
ReactDOM.render(
   <IntlProvider locale ={locale} messages={French}>
       <App />
   </IntlProvider>,
   document.getElementById('root')
);

serviceWorker.unregister();
Here, as you can see, we have carried out 4 imports: IntlProvider and three language files: en.json, fr.json, and ar.json.
The provider pattern is used by the react-intl library to set the scope of the internationalization context into a tree of components. This will wrap the application’s root component and the whole application will be configured within the internationalization context. Then we’ll declare a constant variable to navigate the language using the navigator.language.
Adding translations
We have to add the relevant translated messages to the language files. Create a subdirectory in the src folder as ‘lang’ and add three files named en.json, fr.json, and ar.json if you haven’t already done so. Next, add the following content to the files accordingly. Note that you can always modify and add your own text.
lang/en.json file
{
 "app.header" : "Edit the files and save to reload" ,
 "app.content" : "Learn React" ,
 "app.channel.plug": "Tutorial brought to you by Lokalise"
}
lang/fr.json file
{
 "app.header" : "Modifiez les fichiers et enregistrez-les pour recharger" ,
 "app.content" : "Apprendre React" ,
 "app.channel.plug": "Tutoriel présenté par Lokalise"
}
lang/ar.json file
{
 "app.header" : "قم بتحرير الملفات وحفظها لإعادة التحميل" ,
 "app.content" : "تعلم React" ,
 "app.channel.plug": "يقدم لك البرنامج التعليمي Lokalise"
}
Declaring Messages
FormatJS uses ICU syntax with some advancements in declaring its messages. There are several ways of calling the APIs of FormatJS to declare and extract the messages. Let’s check out some of them now.
1. intl.formatMessage – an imperative API
intl.formatMessage(
   {
       description: 'A message',
       defaultMessage: 'My name is {name}',
   },
   {
       name: userName,
   }
);
Both description and defaultMessage should be string literals while values should be object literals. As an AST is used in extracting messages from the codebase, the function must be called intl.formatMessage() exactly as it is. Using other forms such as formatMessage, const{formatMessage: f} = intl; f() will not work.
2. FormattedMessage – ReactAPI
import {FormattedMessage} from 'react-intl';
<FormattedMessage
   description="message"
   defaultMessage="Welcome {username}"
   values={
       {
           username: userName,
       }
   }
/>;
Again, for the same reason as mentioned above, you have to use FormattedMessage exactly as it is. const F = FormattedMessage; <F /> or other such methods will not work.
3. defineMessage – pre-declared for later use
import {defineMessage} from 'react-intl';
const message = defineMessage({
   description: 'message',
   defaultMessage: 'Welcome {username}',
});

intl.formatMessage(message, {username: 'Shanika'}); // Welcome Shanika

<FormattedMessage
   {...message}
   values={{
       username: 'Shanika',
   }}
/>; // Welcome Shanika
This method of message declaration is less recommended. As the FormatJS documentation states, we can declare messages without having to immediately format them using defineMessage and their extractor will still extract them. The issue is the linter rule; the enforce-placeholder would not be able to analyze it.
Reflecting the changes
Once we have the above code, we’ll modify the App.js file to reflect the changes. Here, we have carried out the message declaration using the second method we discussed.
App.js:
import React from 'react';
import logo from './logo.svg';
import './App.css';
import {FormattedMessage} from 'react-intl';

function App() {
 return (
   <div className="App">
     <header className="App-header">
       <img src={logo} className="App-logo" alt="logo" />
       <p>
         <FormattedMessage
         id = "app.header"
         defaultMessage="Edit the files and save to reload"
       />
       </p>
       <a
         className="App-link"
         href="https://reactjs.org"
         target="_blank"
         rel="noopener noreferrer"
       >
         <FormattedMessage
           id = "app.content"
           defaultMessage="Learn React"
         />

       </a>
       <FormattedMessage
         id = "app.channel.plug"
         defaultMessage="Tutorial brought to you by Lokalise"
       />
     </header>
   </div>
 );
}

export default App;
We have imported FormattedMessage to here to get the messages. As we have now defined the translated strings in a JSON file, the declared IDs must be used when we are naming the strings. For example, the ID for the Learn React message is app.content.
Employing defaultMessage, along with its usage, is encouraged by the FormatJS community for the reasons listed below:
- Messages that are collocated with something else, especially with their usages, will become self-managed and if the usages are removed or changed, the messages will be too.
- Developers write messages assuming a particular grammar type and they are highly contextual.
- The text styling of the message depends on the message. For instance, capitalization, truncation, etc. has an impact on the messages.
- This caters to better integrations when used with toolchains as many toolchains are not able to verify or confirm cross-file references in validating syntax.
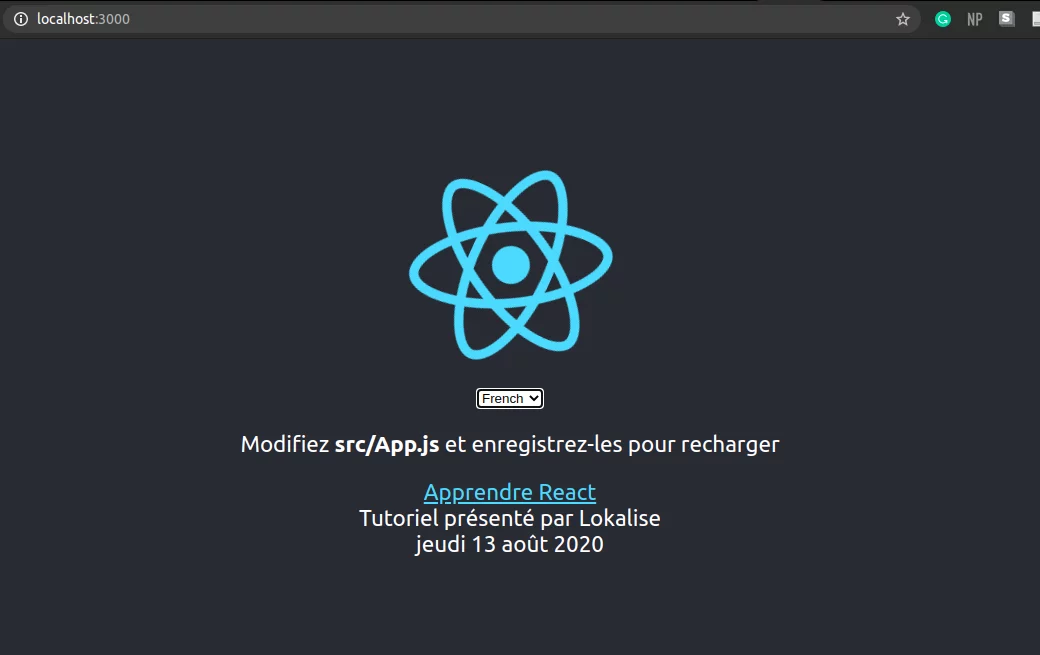
After you are done making the changes run npm start and load http://localhost:3000/ in your browser. If you have already run the command, and the server is up and running, these changes will take place automatically.
These changes will render the user interface as below:

If you have done everything right so far, your interface’s content now will be in French.
Adding arguments/placeholders
Now that we are off to a great start, let’s see how we can make some small modifications. Not everyone simply wants to say “Tutorial brought to you by Lokalise” now, do they? You should be able to add whatever you want, which means we should be able to have a variable in there instead of a hardcoded blog title. For example, you could add a personalized welcome message with the user’s name in it.
In React i18n, it’s really simple to add a variable among the translated strings. All you have to do is to include the variable in the JSON file within a pair of curly brackets and access it from where you are using the string. Check out the following example:
lang/en.json
{
 "app.channel.plug": "Tutorial brought to you by {blogName}"
}
As you can see, I have not included our blog’s name, “Lokalise” here. Instead, a variable as blogName is included in curly brackets.
Now, in the formatted message in the App.js file, include another key as ‘values’ and there you have to mention your variable name, and the value for that variable is given below:
<FormattedMessage
 id = "app.channel.plug"
 defaultMessage="Tutorial brought to you by Lokalise"
 values = {{blogName: "Lokalise"}}
/>
You will still see an output like before if you did it right.
Going a little further into the addition of variables, you may see that your original App.js file contains the message ‘Edit the files and save to reload’ as 'Edit<code>{fileName}</code> js and save to reload'. There’s not only a variable but also a code tag in the string. So, how do we incorporate tags into our translated content? Easy!
Let’s see how the lang/en.json file changes this time.
{
 "app.header" : "Edit<code>{fileName}</code> js and save to reload" ,
//
}
Now, to reflect the changes, all you have to do is to add a little something in your FormattedMessage.
<FormattedMessage
   id = "app.header"
   defaultMessage="Edit the files and save to reload"
   values = {{fileName: 'src/App.js', code: (word)=> <code>{word}</code>}}
/>
The only thing you need to remember is that the tag you specified in the language file should be the same word you are using as the key here. Others can be changed as you wish. Take the below code snippet, for example:
<FormattedMessage
   id = "app.header"
   defaultMessage="Edit the files and save to reload"
   values = {{fileName: 'src/App.js', code: (word)=> <strong>{word}</strong>}}
/>
This will still produce the output in a bold font — a different style:

Get a demo of Lokalise
Get a demoBuilding a locale selector in React i18n
Next, let’s see how we can change the language using a dropdown menu, and not in a hardcoded way.
Adding a wrapper
Create a new subdirectory in the src folder and name it ‘components’. Then add a JS file within it and name that ’Wrapper.js‘. Include the code shown here in your file and next I’ll explain what has been done in this file.
components/Wrapper.js:
import React, {useState} from 'react';
import {IntlProvider} from 'react-intl';
import French from '../lang/fr.json';
import Arabic from '../lang/ar.json';
import English from '../lang/en.json';

const Context = React.createContext();

const local = navigator.language;

let lang;
if (local === 'en') {
   lang = English;
}else {
   if (local === 'fr') {
       lang = French;
   } else {
       lang = Arabic;
   }
}

const Wrapper = (props) => {
   const [locale, setLocale] = useState(local);
   const [messages, setMessages] = useState(lang);

   function selectLanguage(e) {
       const newLocale = e.target.value;
       setLocale(newLocale);
       if (newLocale === 'en') {
           setMessages(English);
       } else {
           if (newLocale === 'fr'){
               setMessages(French);
           } else {
               setMessages(Arabic);
           }
       }
   }

   return (
       <Context.Provider value = {{locale, selectLanguage}}>
           <IntlProvider messages={messages} locale={locale}>
               {props.children}
           </IntlProvider>
       </Context.Provider>

   );
}

export default Wrapper;
What does this Wrapper do? You can’t always hardcode the user’s language into your application nor will your user always like it when the application is only rendered in their preferred language. The user should be able to change the location whenever required. That is why we are introducing a Wrapper class.
const Context = React.createContext();
The React.createContext creates a Context object. What happens here is when React is rendering a component that subscribes to this object, it will read the context value currently in the closest matching Provider just above it. You can also provide a default value here as ‘en’ but it’s not necessary as we are using a language navigator.
const Wrapper = (props) => {
   const [locale, setLocale] = useState(local);
   const [messages, setMessages] = useState(lang);

   function selectLanguage(e) {
       const newLocale = e.target.value;
       setLocale(newLocale);
       if (newLocale === 'en') {
           setMessages(English);
       } else {
           if (newLocale === 'fr'){
               setMessages(French);
           } else {
               setMessages(Arabic);
           }
       }
   }
Have you heard about hooks in React? They were a new addition in React v16.8. What they do is let the developers use a state and some other features in React without having to write a class. The useState is a basic hook. The use state returns a stateful value and also a function that can be used to update it. Here’s the basic syntax for a useState:
const [state, setState] = useState(initialState);
When rendering for the first time, the state that is rendered is the same compared with the value passed as the first argument: the intialState. The selectLanguage function takes care of swapping between languages. It contains a simple if/else function and sets the language by checking the value of the newLocale. This if/else method is feasible when you only have a small number of languages associated with your application. However, it is not so when you have many languages and you may have to think of a better solution.
<Context.Provider value = {{locale, selectLanguage}}>
           <IntlProvider messages={messages} locale={locale}>
               {props.children}
           </IntlProvider>
</Context.Provider>
Now, every Context object brings a Provider React component. It enables using components to subscribe to any context modifications. As I mentioned, the createContext returns a Provider. It also provides a Consumer component.
Rendering the language switcher
The provider component wraps the components in the tree that requires access to the context values. Can you see how the Context.Provider is only a thin wrapper around the Provider component? Here, the context value is passed to the provider with the use of the prop value and then the Context.Provider’s children are rendered.
App.js
import React, {useContext} from 'react';
import logo from './logo.svg';
import './App.css';
import {FormattedMessage, FormattedDate} from 'react-intl';
import {Context} from "./components/Wrapper";

function App(props) {
 return (
   <div className="App">
     <header className="App-header">
       <img src={logo} className="App-logo" alt="logo" />
       <p>
         <FormattedMessage
             id = "app.header"
             defaultMessage="Edit the files and save to reload"
             values = {{fileName: 'src/App.js', code: (word)=> <strong>{word}</strong>}}
         />
       </p>
       <a
         className="App-link"
         href="https://reactjs.org"
         target="_blank"
         rel="noopener noreferrer"
       >
         <FormattedMessage
           id = "app.content"
           defaultMessage="Learn React"
         />

       </a>
       <FormattedMessage
         id = "app.channel.plug"
         defaultMessage="Tutorial brought to you by Lokalise"
         values = {{blogName: "Lokalise"}}
       />
       <br/>
       <FormattedDate
           value={props.date}
           year = 'numeric'
           month= 'long'
           day = 'numeric'
           weekday = 'long'
       />
     </header>
   </div>
 );
}

export default App;
Props stands for properties in React and they are used to pass data from a component to another. The important thing to note about props is that they are read-only and data that is generated from the parent should not be modified in the child components.
Now, we’ll see what Context is. It provides a way to pass data via the component tree so that the manual passing down of props is not needed at every level.
If you are already familiar with React, you may know that data is passed down in a parent-child manner through props. However, this is not always a feasible choice. For instance, the locale preference is required by many components, in addition to globally in our application. Therefore, we need to use Context, as it provides a way to share such values among components, not requiring us to pass the props down every level of the component tree.
Index.js:
import React from 'react';
import ReactDOM from 'react-dom';
import './index.css';
import App from './App';
import * as serviceWorker from './serviceWorker';
import {IntlProvider} from 'react-intl';
import Wrapper from "./components/Wrapper";

ReactDOM.render(
   <Wrapper>
       <App date = {Date.now()}/>
   </Wrapper>,
   document.getElementById('root')
);

serviceWorker.unregister();
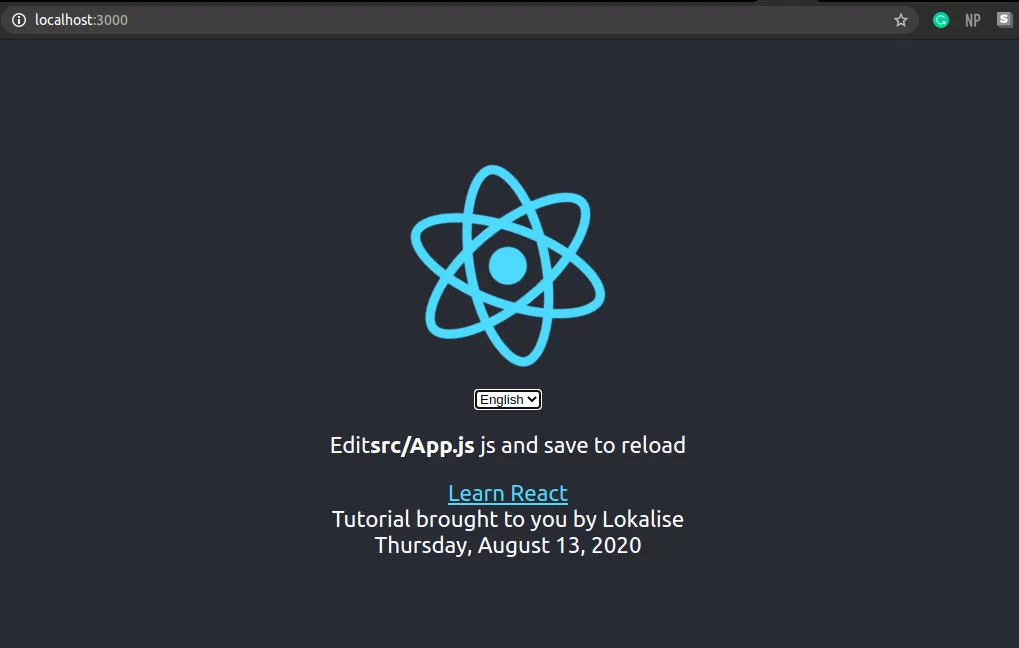
Output
Now to use the created context, we should export it so that the other modules can import it:
export const Context = React.createContext();
App.js:
import React, {useContext} from 'react';
import {Context} from "./components/Wrapper";
function App(props) {
const context = useContext(Context);
return (
<div className="App">
<header className="App-header">
<img src={logo} className="App-logo" alt="logo" />
<select value = {context.locale} onChange={context.selectLanguage}>
<option value= 'en'>English</option>
<option value= 'fr'>French</option>
<option value= 'ar'>Arabic</option>
</select>
</header>
</div>
);
}
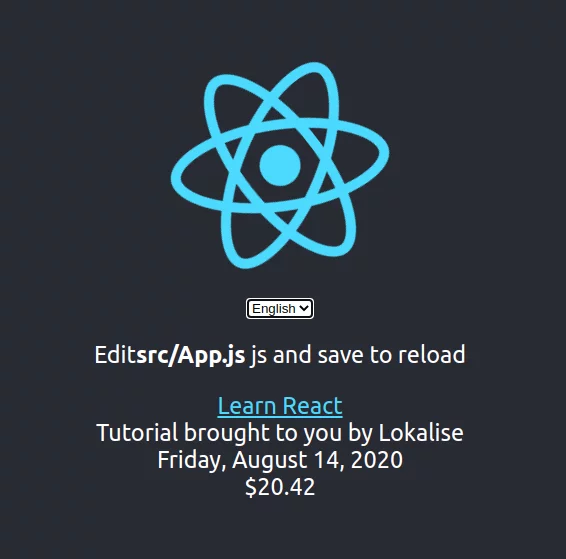
export default App;
In the return function, we have written the code to include a drop-down menu which will change with the selectLanguage function that is imported with the context.
Output

DateTime formatting in React i18n
FormattedDate
I have already shown you how to localize a date. But here we’ll discuss the basic syntax and how it takes place. The FormattedDate component takes care of changing the date according to the selected locale. When you are inserting a date, you should define what formats you want for the year, month, day, and weekday.
<FormattedDate
           value={new Date()}
           year = 'numeric'
           month= 'long'
           day = 'numeric'
           weekday = 'long'
       />
The format ‘numeric’ indicates that you want the year and day in a number format and ‘long’ in month and weekday indicates that you want the month and weekday in a string with both words written out in full.
FormattedTime
The FormattedTime component can format locale-specific times, just like the FormattedDate component.
<FormattedTime
   value={new Date()}
   hour="numeric"
   minute="numeric"
   second="numeric"
   timeZoneName="long"
/>

Numbers and currency formatting in React i18n
FormattedNumber
If you have been following our internationalization and localization articles, you may know that different countries use different ways to represent numbers. For instance, the USA uses commas to separate long numbers into clusters of three. However, in France, a single space is used to accomplish the same thing.
The FormattedNumber component is provided by react-intl to format numbers and decimals in a locale-specific manner.
<FormattedNumber
   value={10000}
/>

Another use for this is that it can be used to format currencies as well. See the below example:
<FormattedNumber
  value={20.42}
  style="currency"
  currencyDisplay="symbol"
  currency="USD"
/>

The French use commas to separate dollars/euros and cents.
Simplifying the translation process with Lokalise
Applying internationalization to an application is not the hard part. Many developers spend so much time translating texts and it’s the most difficult thing when you don’t make use of the right tools for it. Lokalise is the perfect solution to this problem. Integrating Lokalise into an application is quite easy, and after that, translating texts is a piece of cake. Follow the below steps to get on board:
- Enter a free trial to continue.
- Next, install the Lokalise CLI. This can be used to create projects, upload, and download translation files.
- Navigate to the “API tokens” section on your personal profile page and generate a read/write token.
- Create a new project and set English as the base language.
- Go to Settings by clicking on “More” on the project page.
- Copy the project ID and the generated token and then run:
lokalise2 file upload --token <token> --project-id <project_id> --lang_iso en --file PATH/TO/PROJECT/src/lang/en.json. - The above step should upload English translations to Lokalise. To upload further languages, run the same command for the other JSON files.
- Head over to the project overview page. All your translation keys and values will be there. You can modify them as much as you like by editing, deleting, and adding new ones. You can filter the keys. For example, you can find the untranslated ones which is very convenient.
- Download the edited translations and run:
lokalise2 file download --token <token> --project-id <project_id> --format json --dest PATH/TO/PROJECT/src/lang.
If you want to know more, please head on over and apply Lokalise to your application. There are multiple platforms and formats that support Lokalise and you can also request translations from experts in the field.
Final thoughts
When it comes to React i18n, the go-to solution, or the general choice is the react-intl library. Having 4.5k stars on GitHub has made it a lot more popular than the other libraries out there.
However, like any other React i18n library, this famous library does come with some disadvantages as well. One of them is that you can’t use react-intl for non-react components. It demands the top-level component to inject the context into the children. This is why some people are moving towards the react-intl-universal library as a solution.
I hope you enjoyed this React i18n tutorial. Don’t forget to read our React Native i18n guide here.
Thank you and happy coding!