The process of localizing iOS apps is often tedious and unorganized. Thankfully, Lokalise is here to help you solve this problem!
In this tutorial, you’ll learn how to localize iOS apps as well as add, manage, and integrate translations into your project, including handling localized time.
This tutorial is based on Xcode 13.0, and shows you how to set up localization from zero to hero using Lokalise to easily manage translation across your apps. Even if you’re a seasoned localization master, we’d still recommend going through and taking notes of some specific localization details (and iOS localization best practices).
Get a demo of Lokalise
Get a demoWhat is iOS localization?
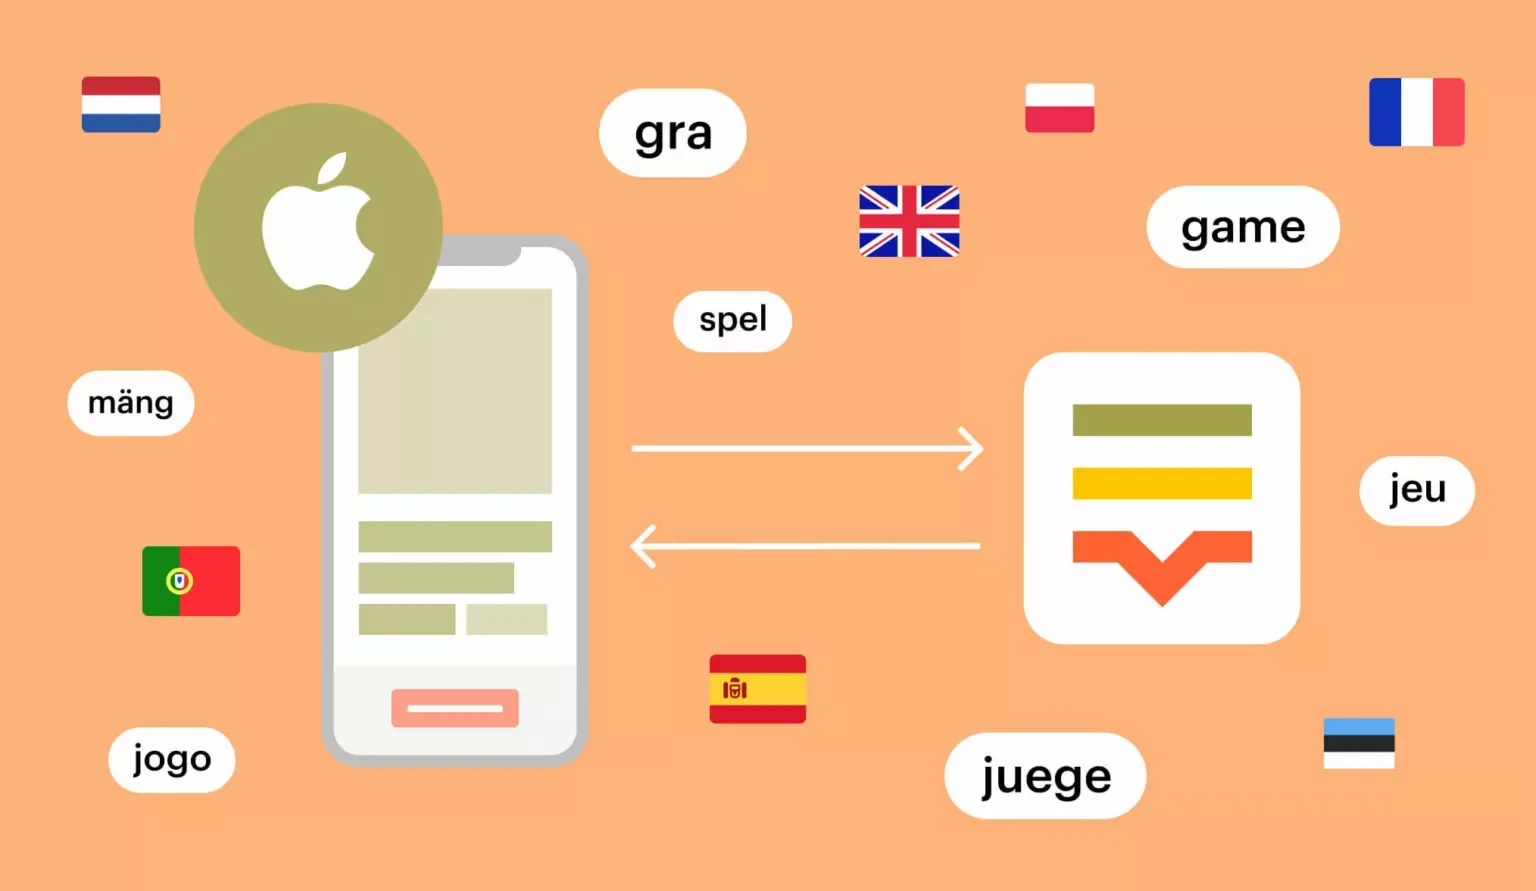
First up, a quick intro: iOS localization is the process of rendering the content in your app into different country-specific versions.
Translation is one side of the localization equation. App users in different regions may want to use your app, but they likely won’t even consider it if it isn’t offered in their language. If they can’t understand it, then they won’t use it, plain and simple. Incorporating software internationalization into your iOS app from the start can make it easier to adapt for multiple languages and regions without slowing down development.
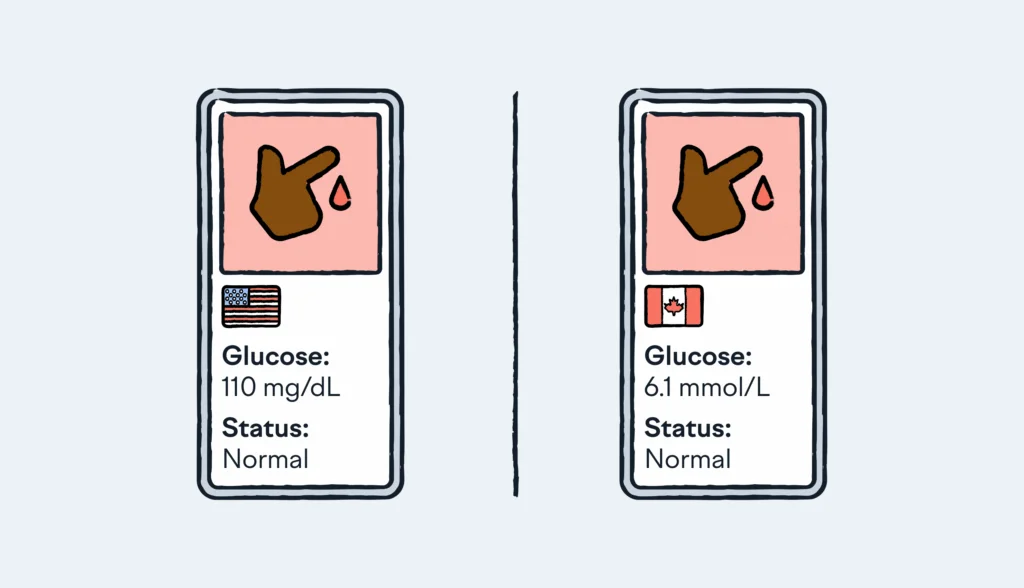
The other side of the equation is ensuring your app is culturally and regionally relevant. It should be compatible with the payment, currency, and navigation preferences of each region.
Even though it’s a crucial step, it’s typically overlooked in the beginning stages of the development process and implemented only at the end of the process, resulting in delayed production, longer development, and pushed-back launch dates.
But, there are plenty of other reasons why localizing your iOS should be a top priority:
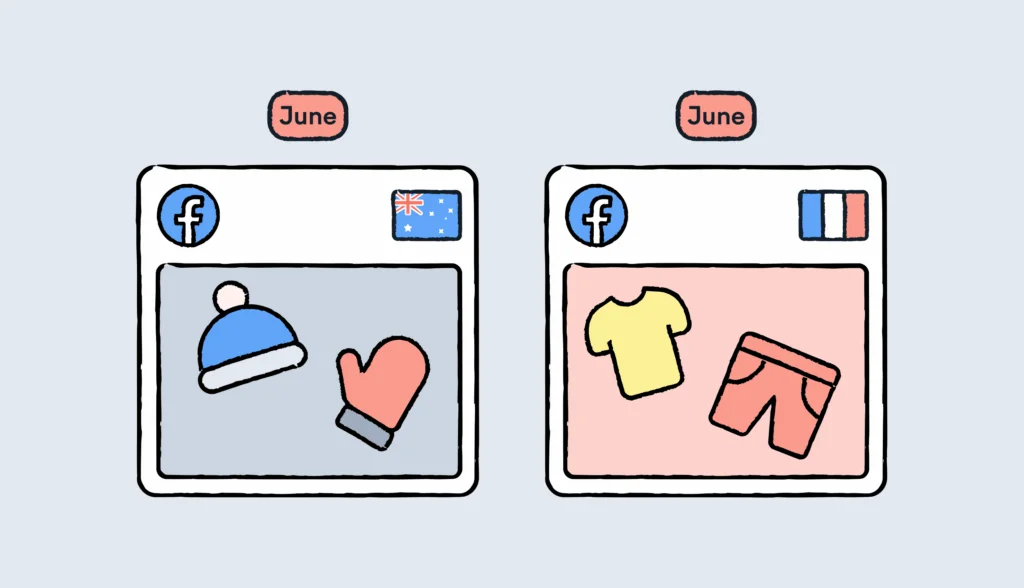
- Reach new audiences: Translating your app helps you expand internationally but also within a country. For example, if your iOS app is targeting the United States, translating it into Spanish can help you reach the 42 million Americans who speak Spanish as their primary language.
- Greater app visibility: If you only release your app in English, you need to keep in mind that you won’t even show up on the radar of iOS users who speak another language. The reason? The App Store has different versions for different languages, like Italian, French, and Japanese. Limiting your App Store to just English means less visibility, fewer users, and less revenue.
- Maximize revenue potential: A translated and localized app means a greater market potential. You’ll be able to tap into new markets and, in turn, a larger user base. Whether you offer a paid app or in-app purchases, this means you’ll be able to generate more revenue long term.
Part I: Setting up your app
Localizable.strings stores application strings as key-value pairs for each language. Let’s create this file for the base language first. Select File → New → File… or just tap Ctrl+N or Cmd+N. Search for strings, and you will see Strings File in the Resource window:
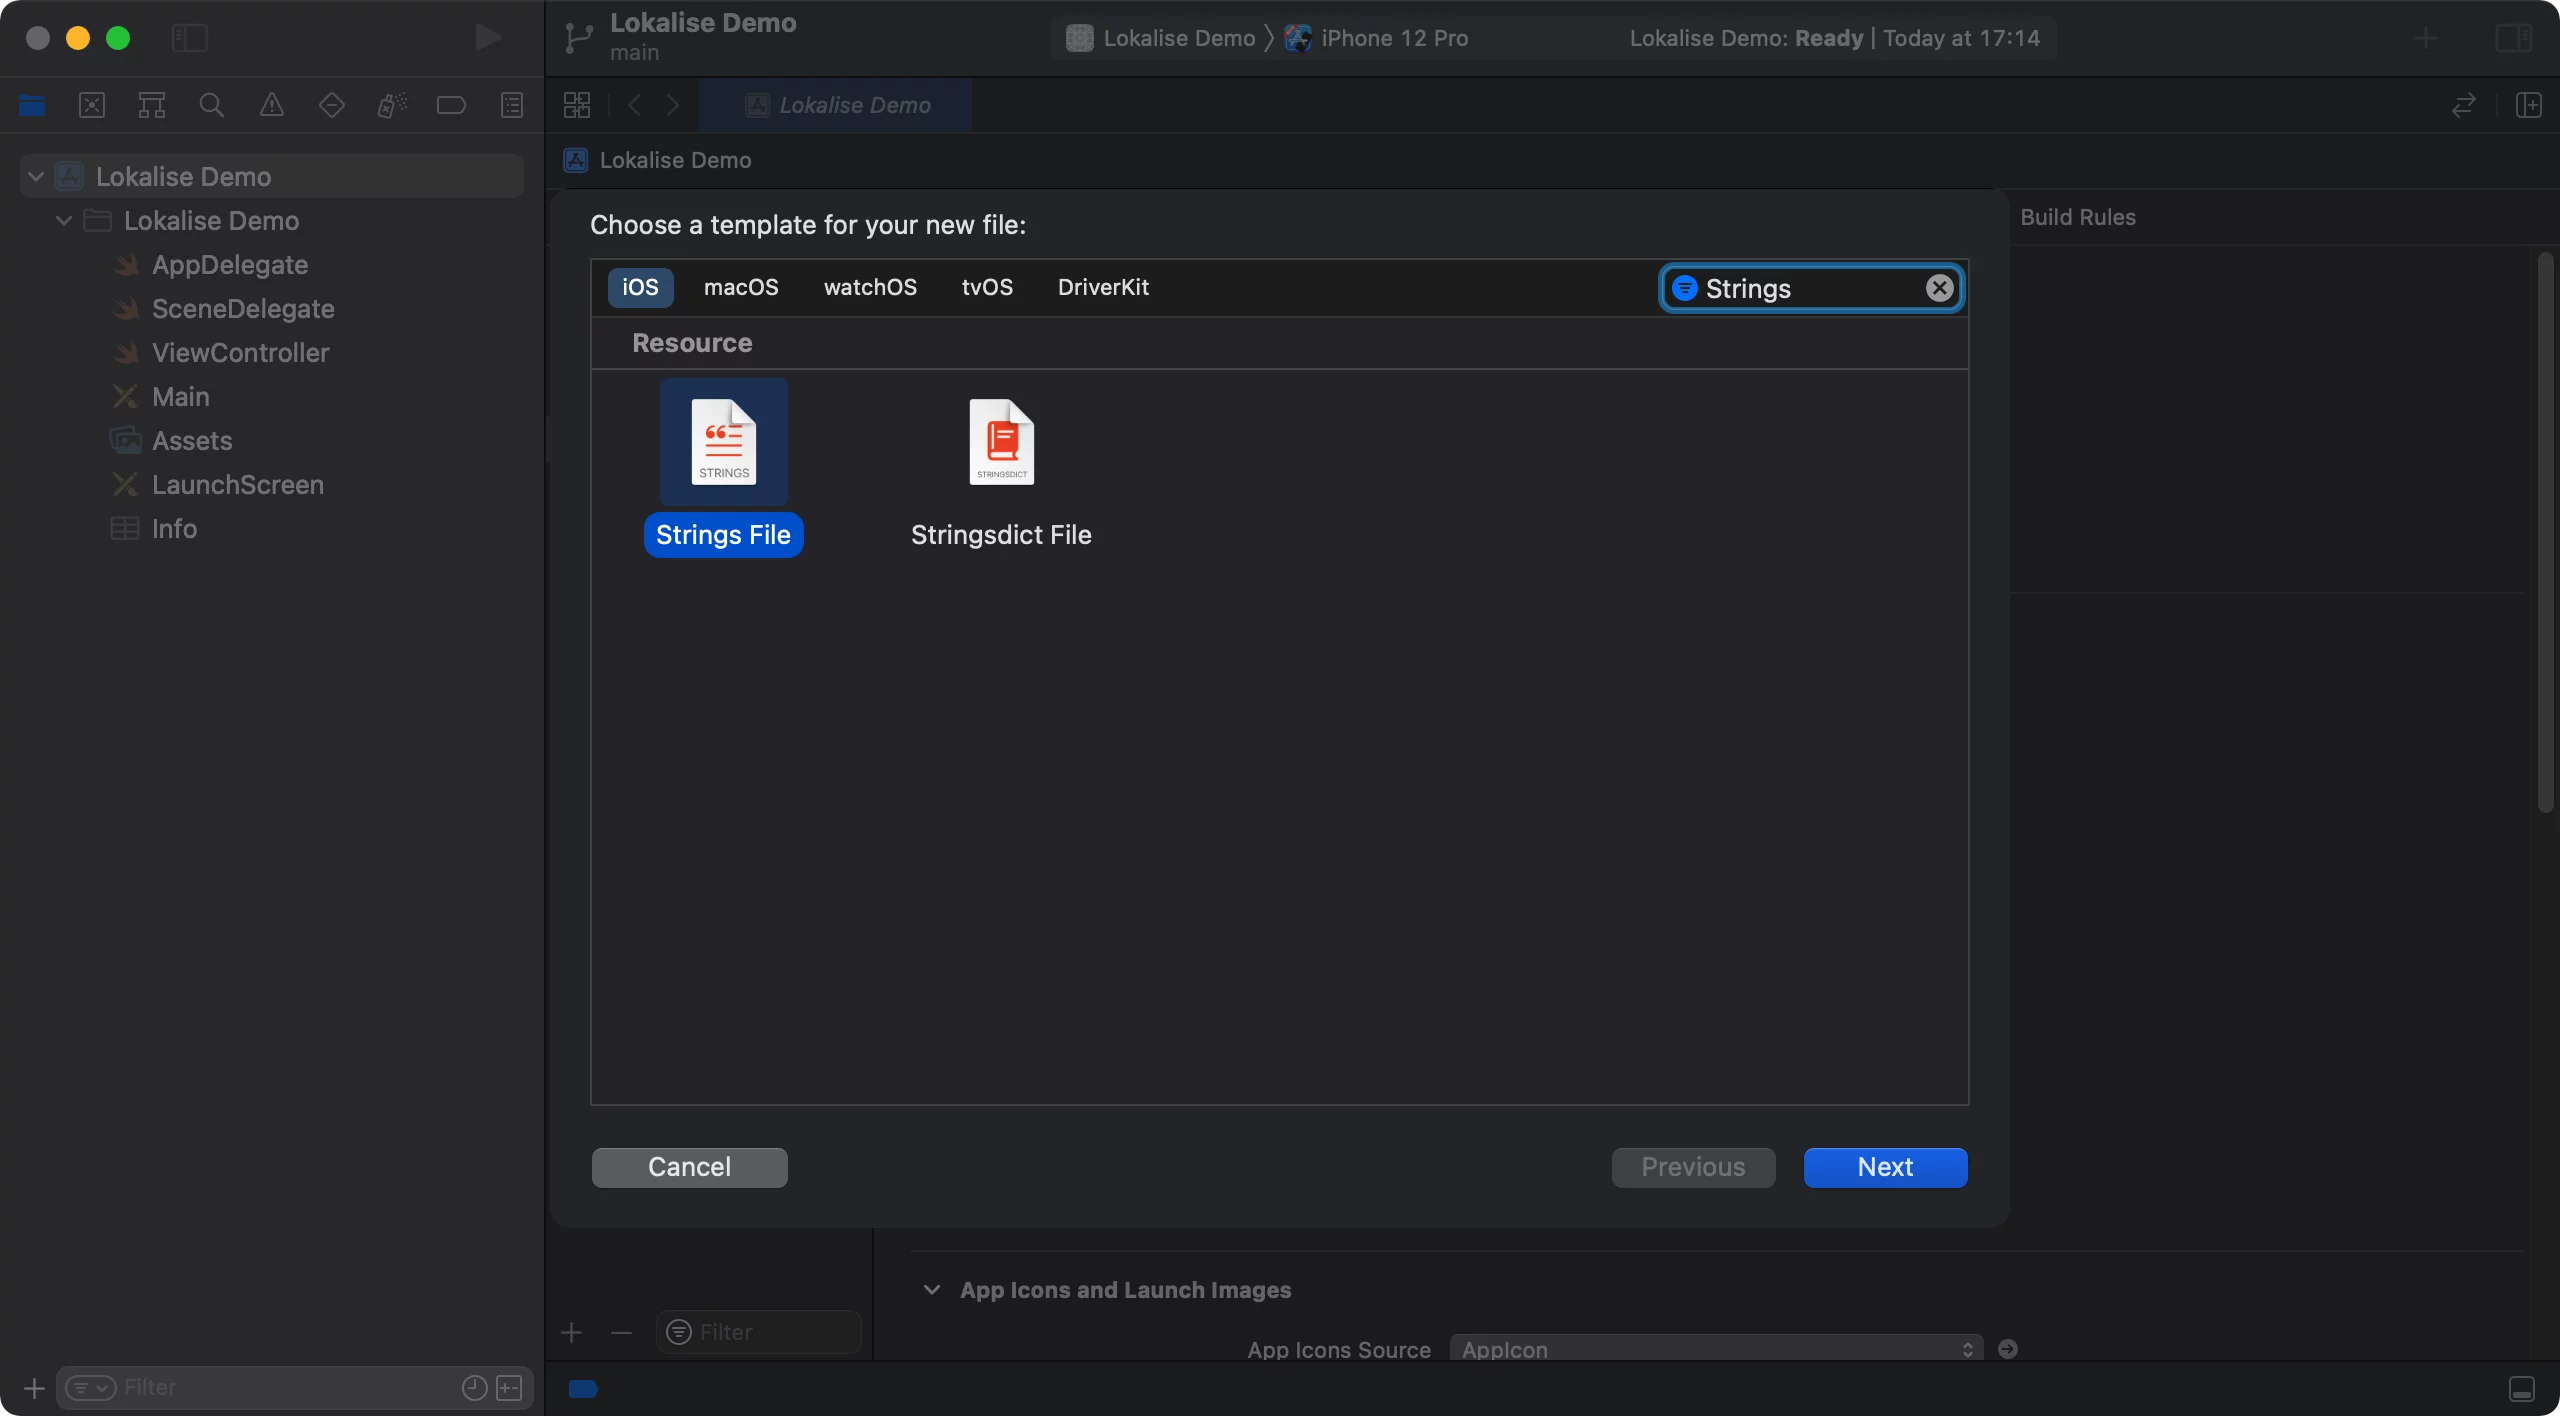
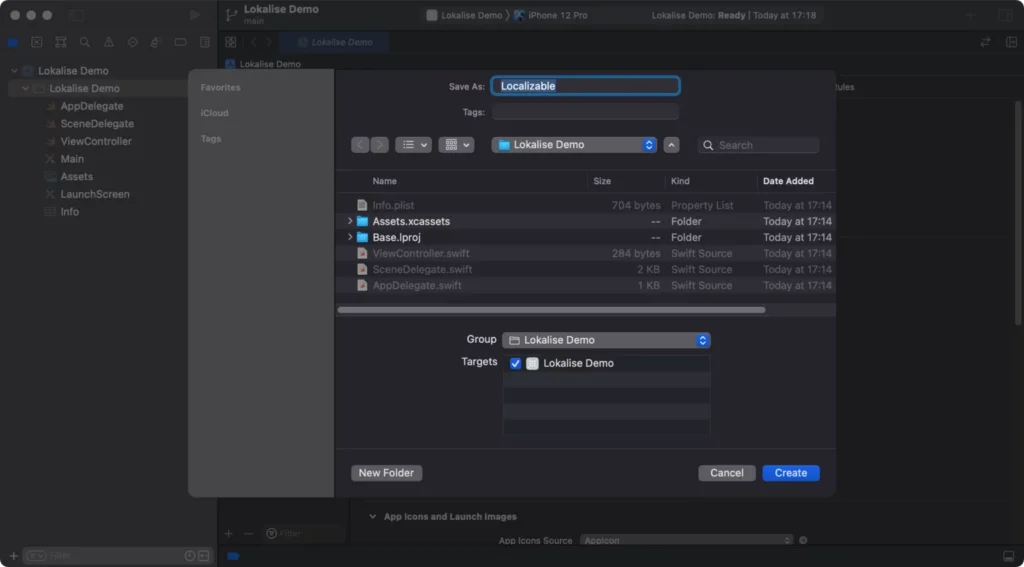
Choose Strings File and name the file Localizable:

Now, let’s select the Localizable.strings file in Navigator. In Utilities, you will see localization panel.
Click Lokalise… and continue to the next step.
Step 2: Adding languages
Let’s add some languages to the application and create .strings files for each language.
Select your root project file, and then proceed to the project panel. Find the Localization section section, click the “plus” (+) icon, and add the desired languages. Select only the Localizable.strings file for localization. In this tutorial we’ll add German and Russian languages.
In the Choose files and reference language… dialog select the Localizable.strings file for Localization (we are not covering .storyboard localization in this post):
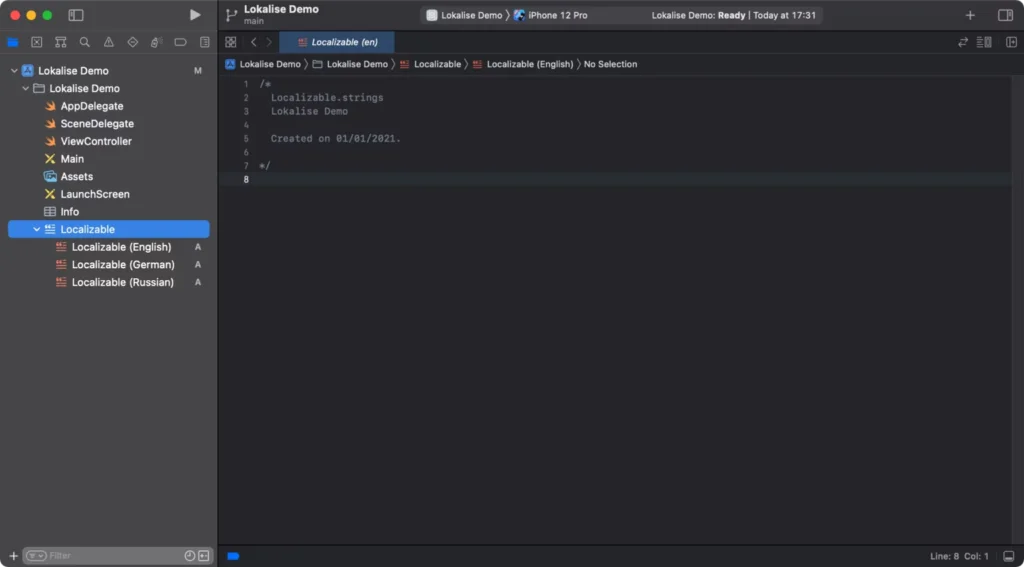
Let’s find Localizable.strings using Navigator. Now you can expand it and see Localizable.strings file for every language:

Step 3: Working with translations
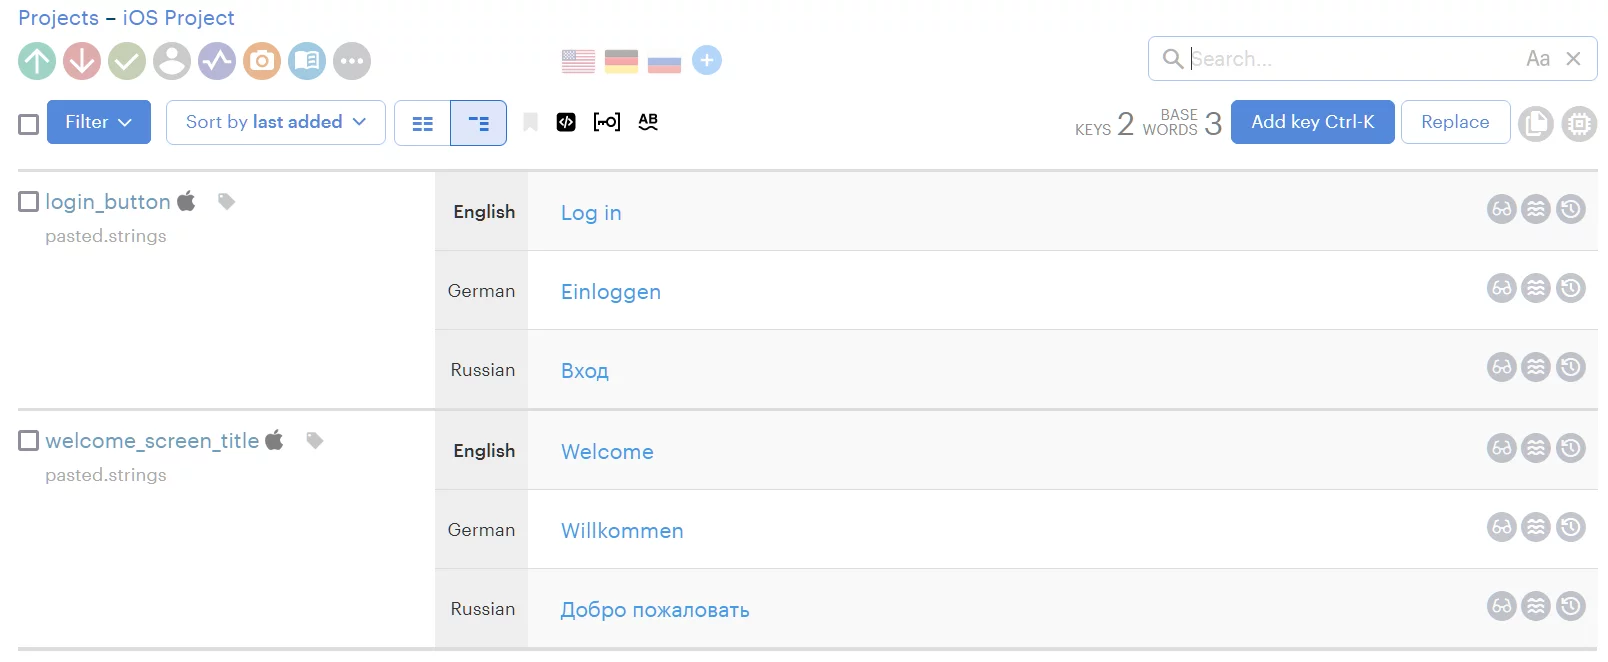
Our Localizable.strings files are ready, so let’s populate these. As mentioned before, the localization process involves keys and values. Key is a unique identifier that is used in the source code; when the application is served to the user, keys are replaced with the corresponding translations for the language set by the user. Let’s add two entries into the .strings files:
Localizable.strings (English):
"welcome_screen_title" = "Welcome";
"login_button" = "Log in";
Localizable.strings (German):
"welcome_screen_title" = "Willkommen";
"login_button" = "Einloggen";
Localizable.strings (Russian):
"welcome_screen_title" = "Добро пожаловать";
"login_button" = "Вход";
Once the keys are set up, let’s learn how to get the translations for these. To do that, we will use NSLocalizedString, String(localized:), or a custom shortcut method. Modify the application(_:, didFinishLaunchingWithOptions:) method of your delegate to test-drive the localization system:
func application(_ application: UIApplication, didFinishLaunchingWithOptions launchOptions: [UIApplication.LaunchOptionsKey: Any]?) -> Bool {

  print(NSLocalizedString("welcome_screen_title", comment: ""))
  print(String(localized: "login_button")) // New in Xcode 13
  print("""
\("welcome_screen_title"~)

\("login_button"~)
""")

  return true
}
Hurray! You should get multiple statements printed in the console.
Tip #1: The shortcut
Typing NSLocalizedString("key", comment: "comment") every time is tedious and make your code look heavier and harder than it needs to be. To make your life easier you can implement a custom post-fix operator:
postfix operator ~
postfix func ~ (string: String) -> String {
    return NSLocalizedString(string, comment: "")
}
Tip #2: Easy testing
You can change the language of your app by modifying your Scheme. Select your scheme and click Edit Scheme…
Then under the Options tab select Application Language that you want to test:
Part II: Managing translations
Now your application is set up and you know the basics of the localization process on iOS, so let’s see what the fuss is all about. Imagine thousands of keys across tens of language files, making sure all are in sync, translated, and proofread using the Lokalise API. Pretty scary, huh? Lokalise will help you avoid all the chaos!
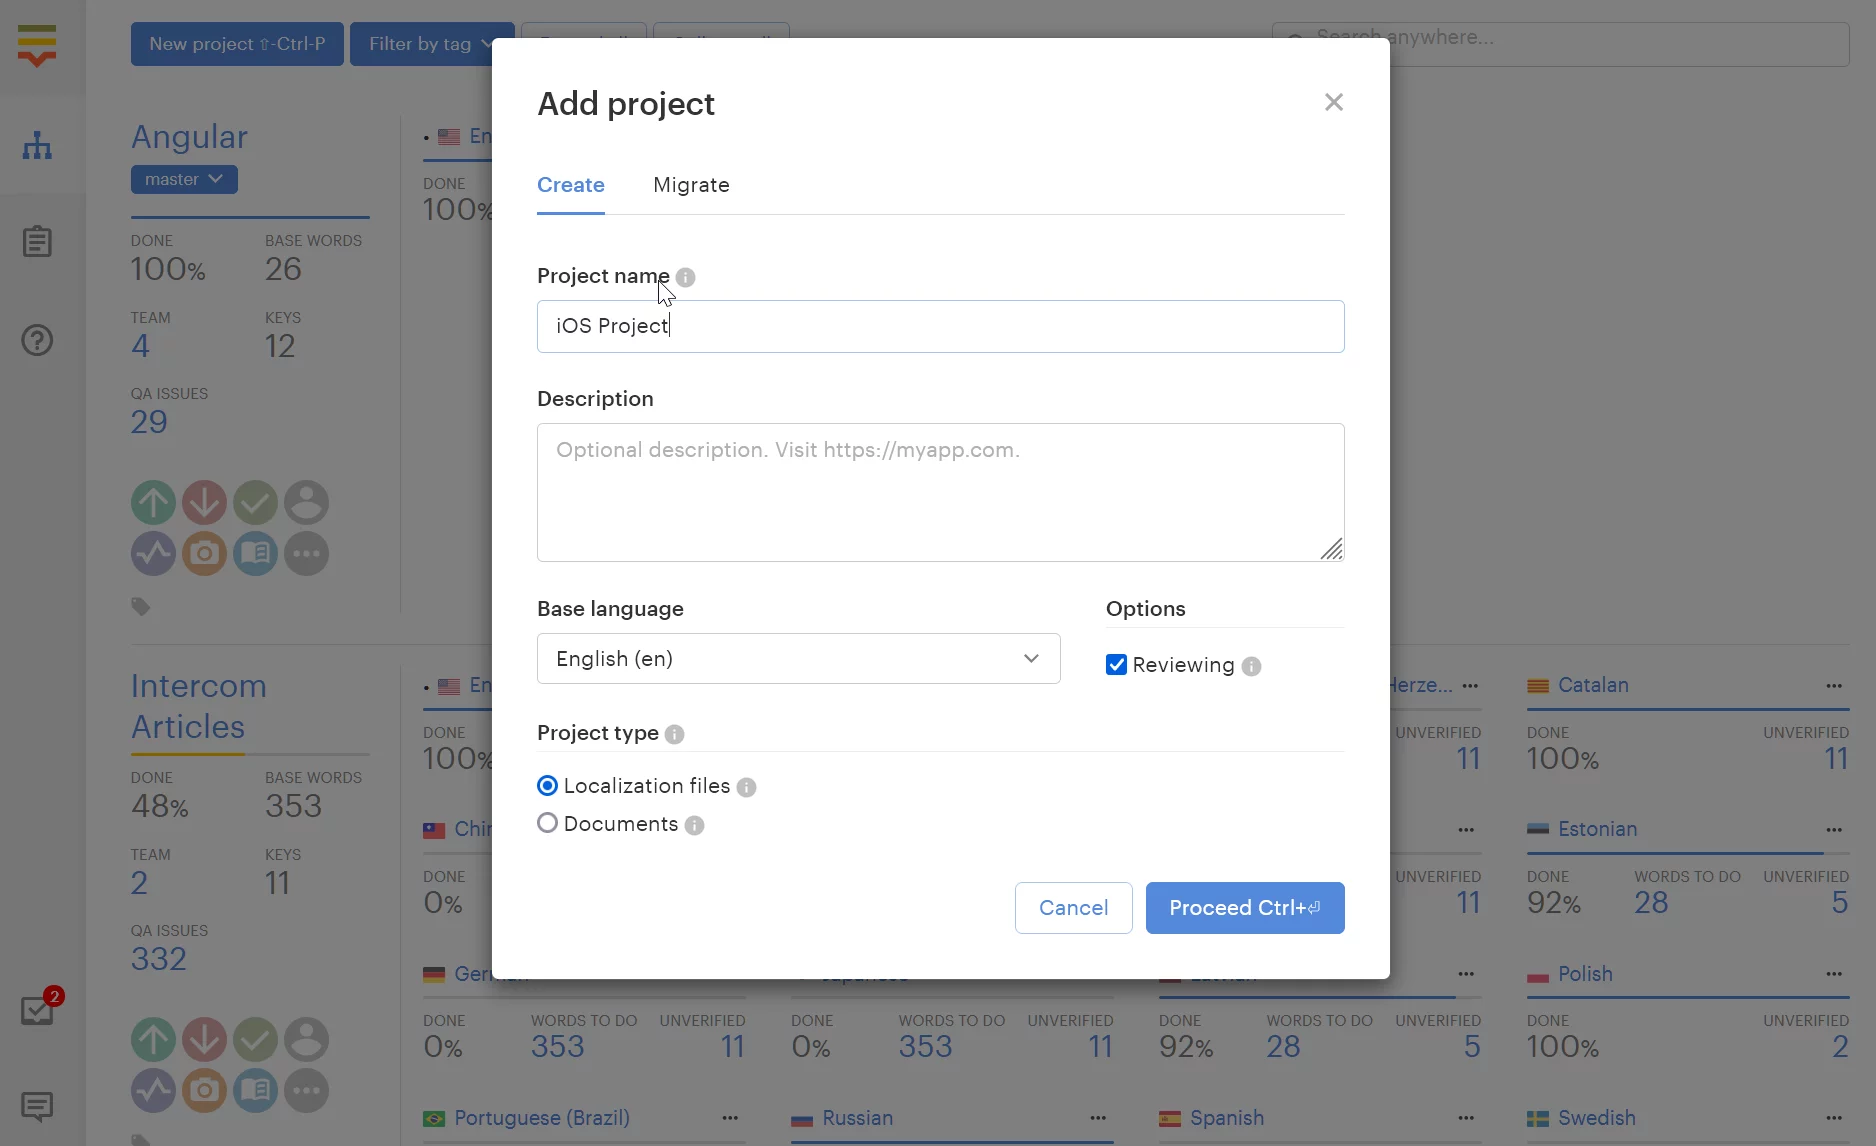
Step 1: Create a project in Lokalise
Once you sign up to Lokalise (you can grab a free 14-day trial, no credit card is required), just tap the New project button (or explore the Sample Project if you wish to get more familiar with Lokalise features first). Give your project a name and optionally a description. You can modify the base language setting later if you change your mind about it.
Each project has a unique ID (you can see it in the project settings), that is used when referring to a project over API.
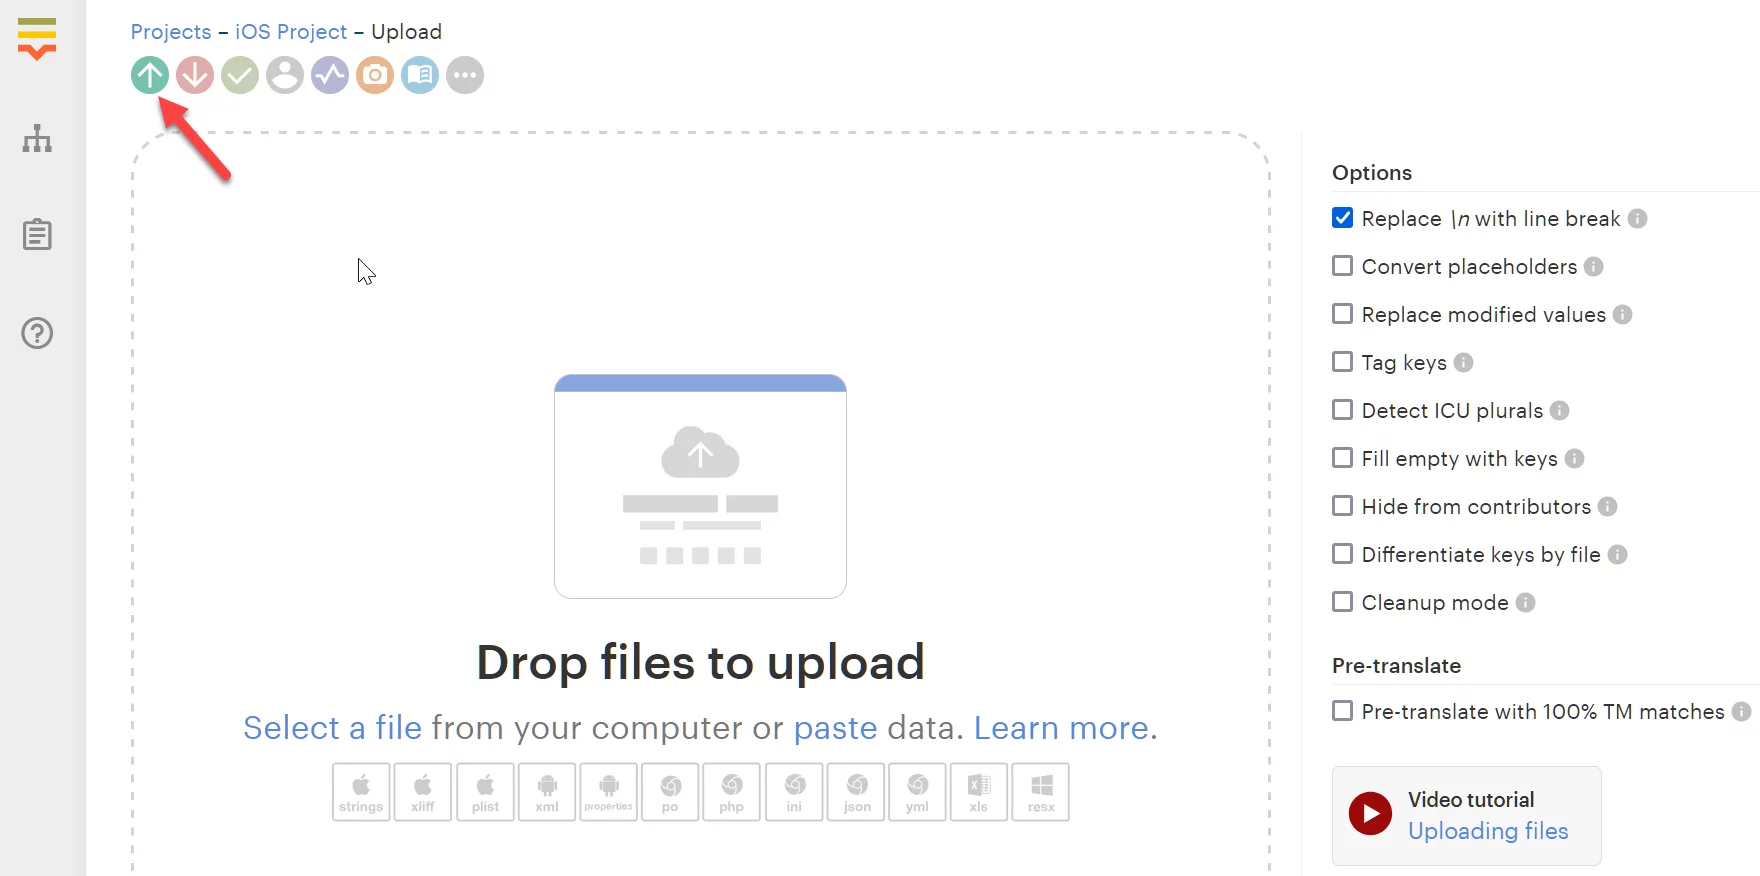
Step 2: Upload your files or add new keys
To import your .strings file to Lokalise, click Upload in the top menu and drag Localizable.strings to the drop area. Alternatively, you can translate keys manually in your project.
Lokalise also has integrations with repositories and headless CMSs like Webflow, Hygraph, and Storyblok, allowing you to import and export content automatically.
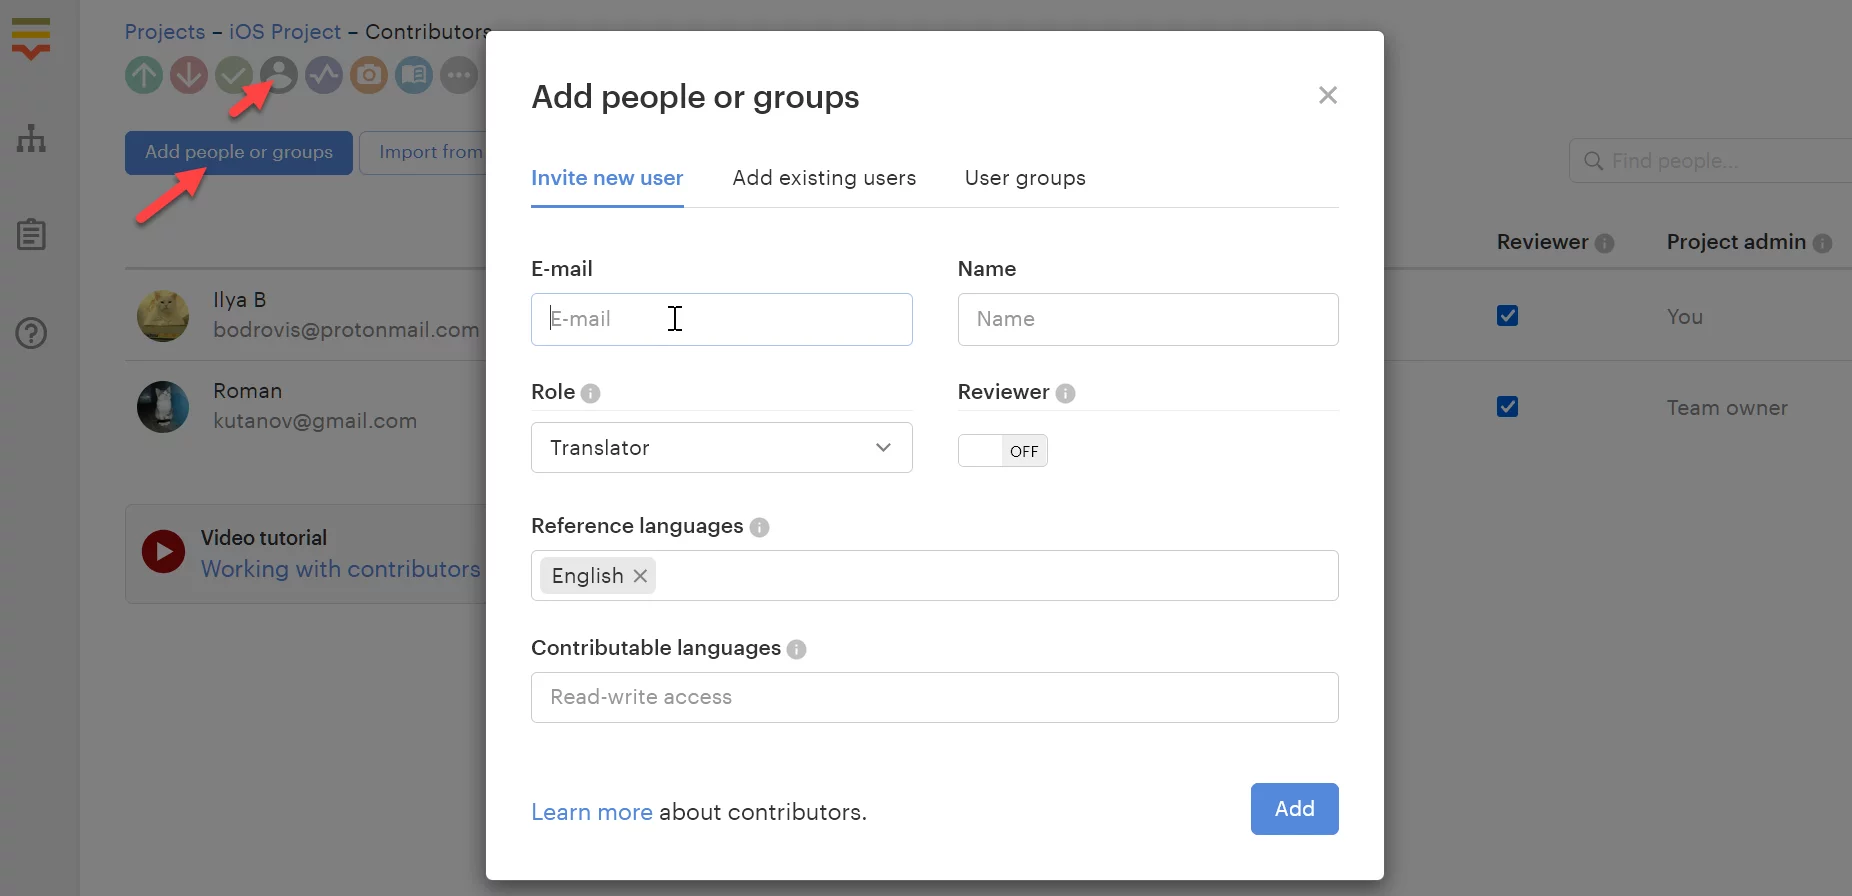
Step 3: Invite team members
Getting localization work done quickly requires a team of contributors. Switch to the Contributors section by clicking the icon in the project’s icon bar and start adding teammates. Any user can be granted admin privileges, i.e., the same rights on the project as you. If a user is not an admin, you can set per-language access to the project, specifying some languages as reference (read-only) or contributable (read and update). Only admins have access to key modification, importing, exporting, settings, etc.
Step 4: Edit!
Lokalise editor is feature-packed. We’ve worked hard to deliver a light and responsive interface while still offering all the features you would need while working with app or web project copy. Feel free to explore the Sample Project or just take a peek at our Documentation to read about the basic concepts and options.
Part III: Integrating with your project
Finally, the translation part is done. Now, how do you get the texts out of Lokalise and make them usable in your app? There are three main options, so choose the one you prefer:
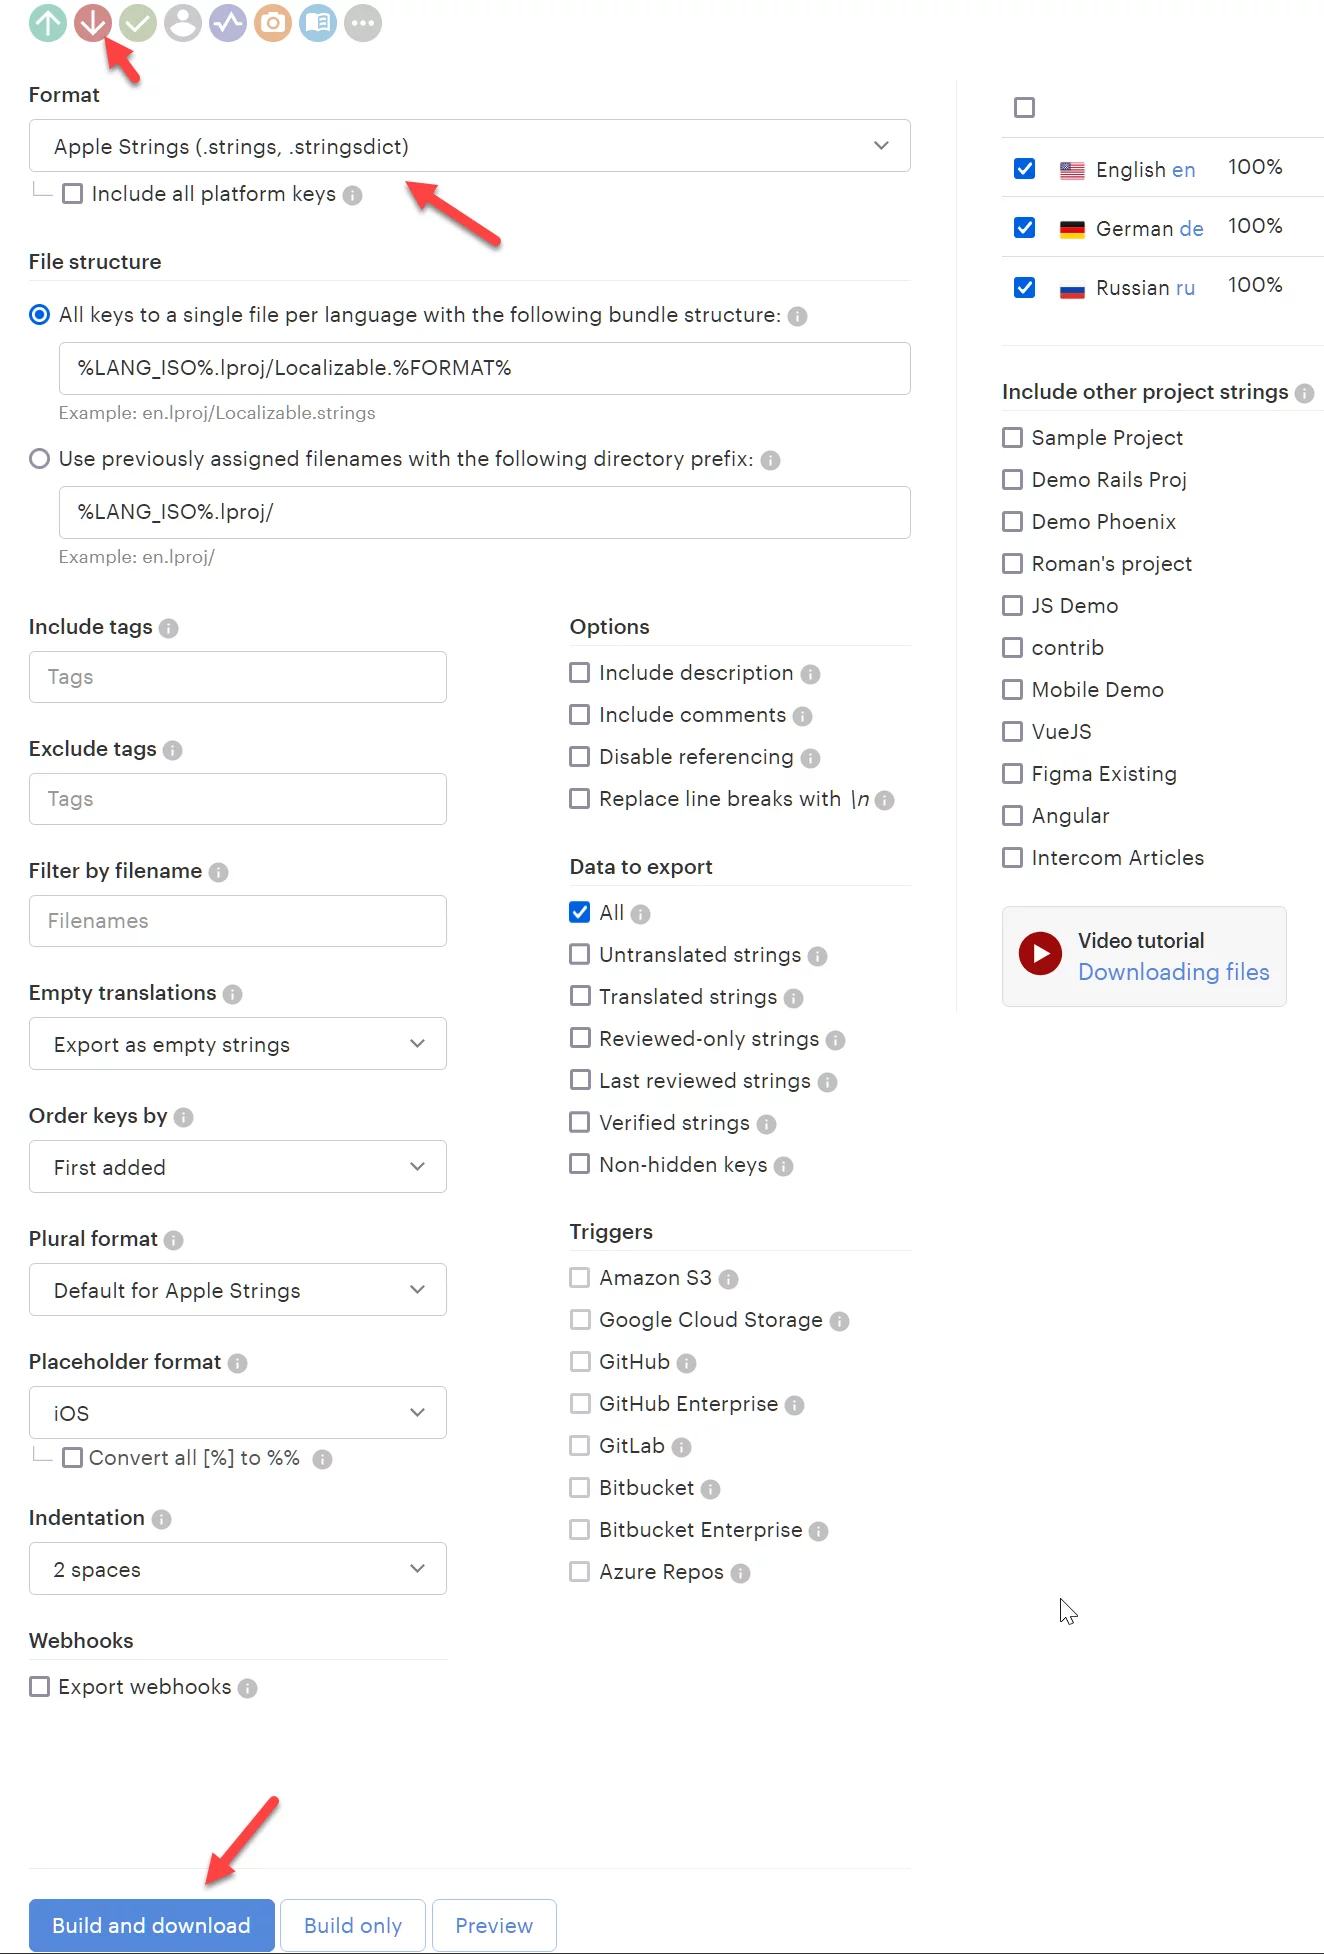
Option 1: Download the files via GUI
Click the Download icon in your project icon bar and select Apple Strings as the exporting format. Click Build and download to get the translation bundle. Then move .lproj folders from the downloaded archive into your project, replacing the existing localization. That’s it!
Option 2: Use API or CLI tool
Depending on your project deployment setup, you may want to use either Lokalise API or the CLI tool – both approaches give you a simple way to automatically generate and download localization files.
Option 3: Integrate using Lokalise iOS SDK
Using our framework gives an opportunity to update your app texts over-the-air (OTA) without the need to resubmit for AppStore review. Please refer to Lokalise iOS SDK instructions.
OTA also means marketing teams don’t have to bug developers every time they spot a typo or mistake or if they want to make a quick update to a translation.
The displayed logo is is a trademark of Apple Inc. Lokalise is an independent product and has not been authorized, sponsored, or otherwise approved by Apple Inc.
Lokalise also comes equipped with a Flutter SDK for both iOS and Android. If you’re localizing for more than one platform, there’s a feature in Lokalise that lets you link the same strings across different mobile projects so that you don’t have to translate the same string more than once.
iOS localization best practices
Before you start localizing your iOS app, don’t forget to follow these best practices:

Figure out where localization is necessary
One common misconception developers make when first localizing their apps is thinking that they need to make it available in every country and language. The reality is that you don’t necessarily need to reach everyone.
Conduct market research to ensure you’re putting your time and resources in the right places and don’t try to do too much at once.
Plan ahead
The app development process is long. It’s no secret that localizing your app can add to an already long, complex process.
One mistake developers make is leaving localization to the end. Instead, you should plan your localization process from the beginning, or it will create a world of problems and delays later on.
Remember to get all teams involved: development, sales, marketing, customer service. Lokalise makes this easy since it’s set up for every department.
Double down on testing
One of the most important parts of integrating localization into your app development is testing.
You should design several tests around the localization of your app. Then, every time you fix a bug, you’ll know it’ll work in all localized versions of your app.
Don’t forget about design and layout
One key aspect to keep in mind when creating your next app is design. For example, some languages take up way more screen space than others, like German.
Remember to leave extra space for languages that require more pixels, whether that’s in a purchase UI or, for example, on background signs in a game. Adapt your content to align with different international markets. For example, adapt units of measurement (currencies, length, calories, etc.)
Lokalise is natively integrated with Figma, which lets you automatically pull strings into design. This not only allows translators to see translations in content but also lets designers ensure the layout can adapt to all languages. The end result is fewer bugs down the road.
Ready to localize your iOS app?
Thousands of new iOS apps are released every day.
If you want to get a leg up on the competition and give your app the best chance of success, you need to ensure you stand out in the crowd and adapt it to different markets through localization.
With Lokalise, mobile app localization has never been faster and easier.
Rather than trying to manually piece together the different parts of the localization process, Lokalise fits seamlessly into your iOS app development process, providing you with the visibility and control you need to launch a high-quality app on time and in multiple languages.
To set up your iOS app for success, get a free trial of Lokalise today.
Conclusion
So, in this article we have seen how to get started with iOS localization and how to manage translations with Lokalise. Please don’t hesitate to reach us out if you have any further questions!
Easily manage thousands of keys across tens of languages
Grab a FREE Lokalise trial and set up your iOS app for localizationStart now
Further reading
- Translation keys: Naming and organizing
- Lokalise APIv2 in practice
- 25 things to remember when localizing mobile apps
- How to choose the best translation management system for your team and company