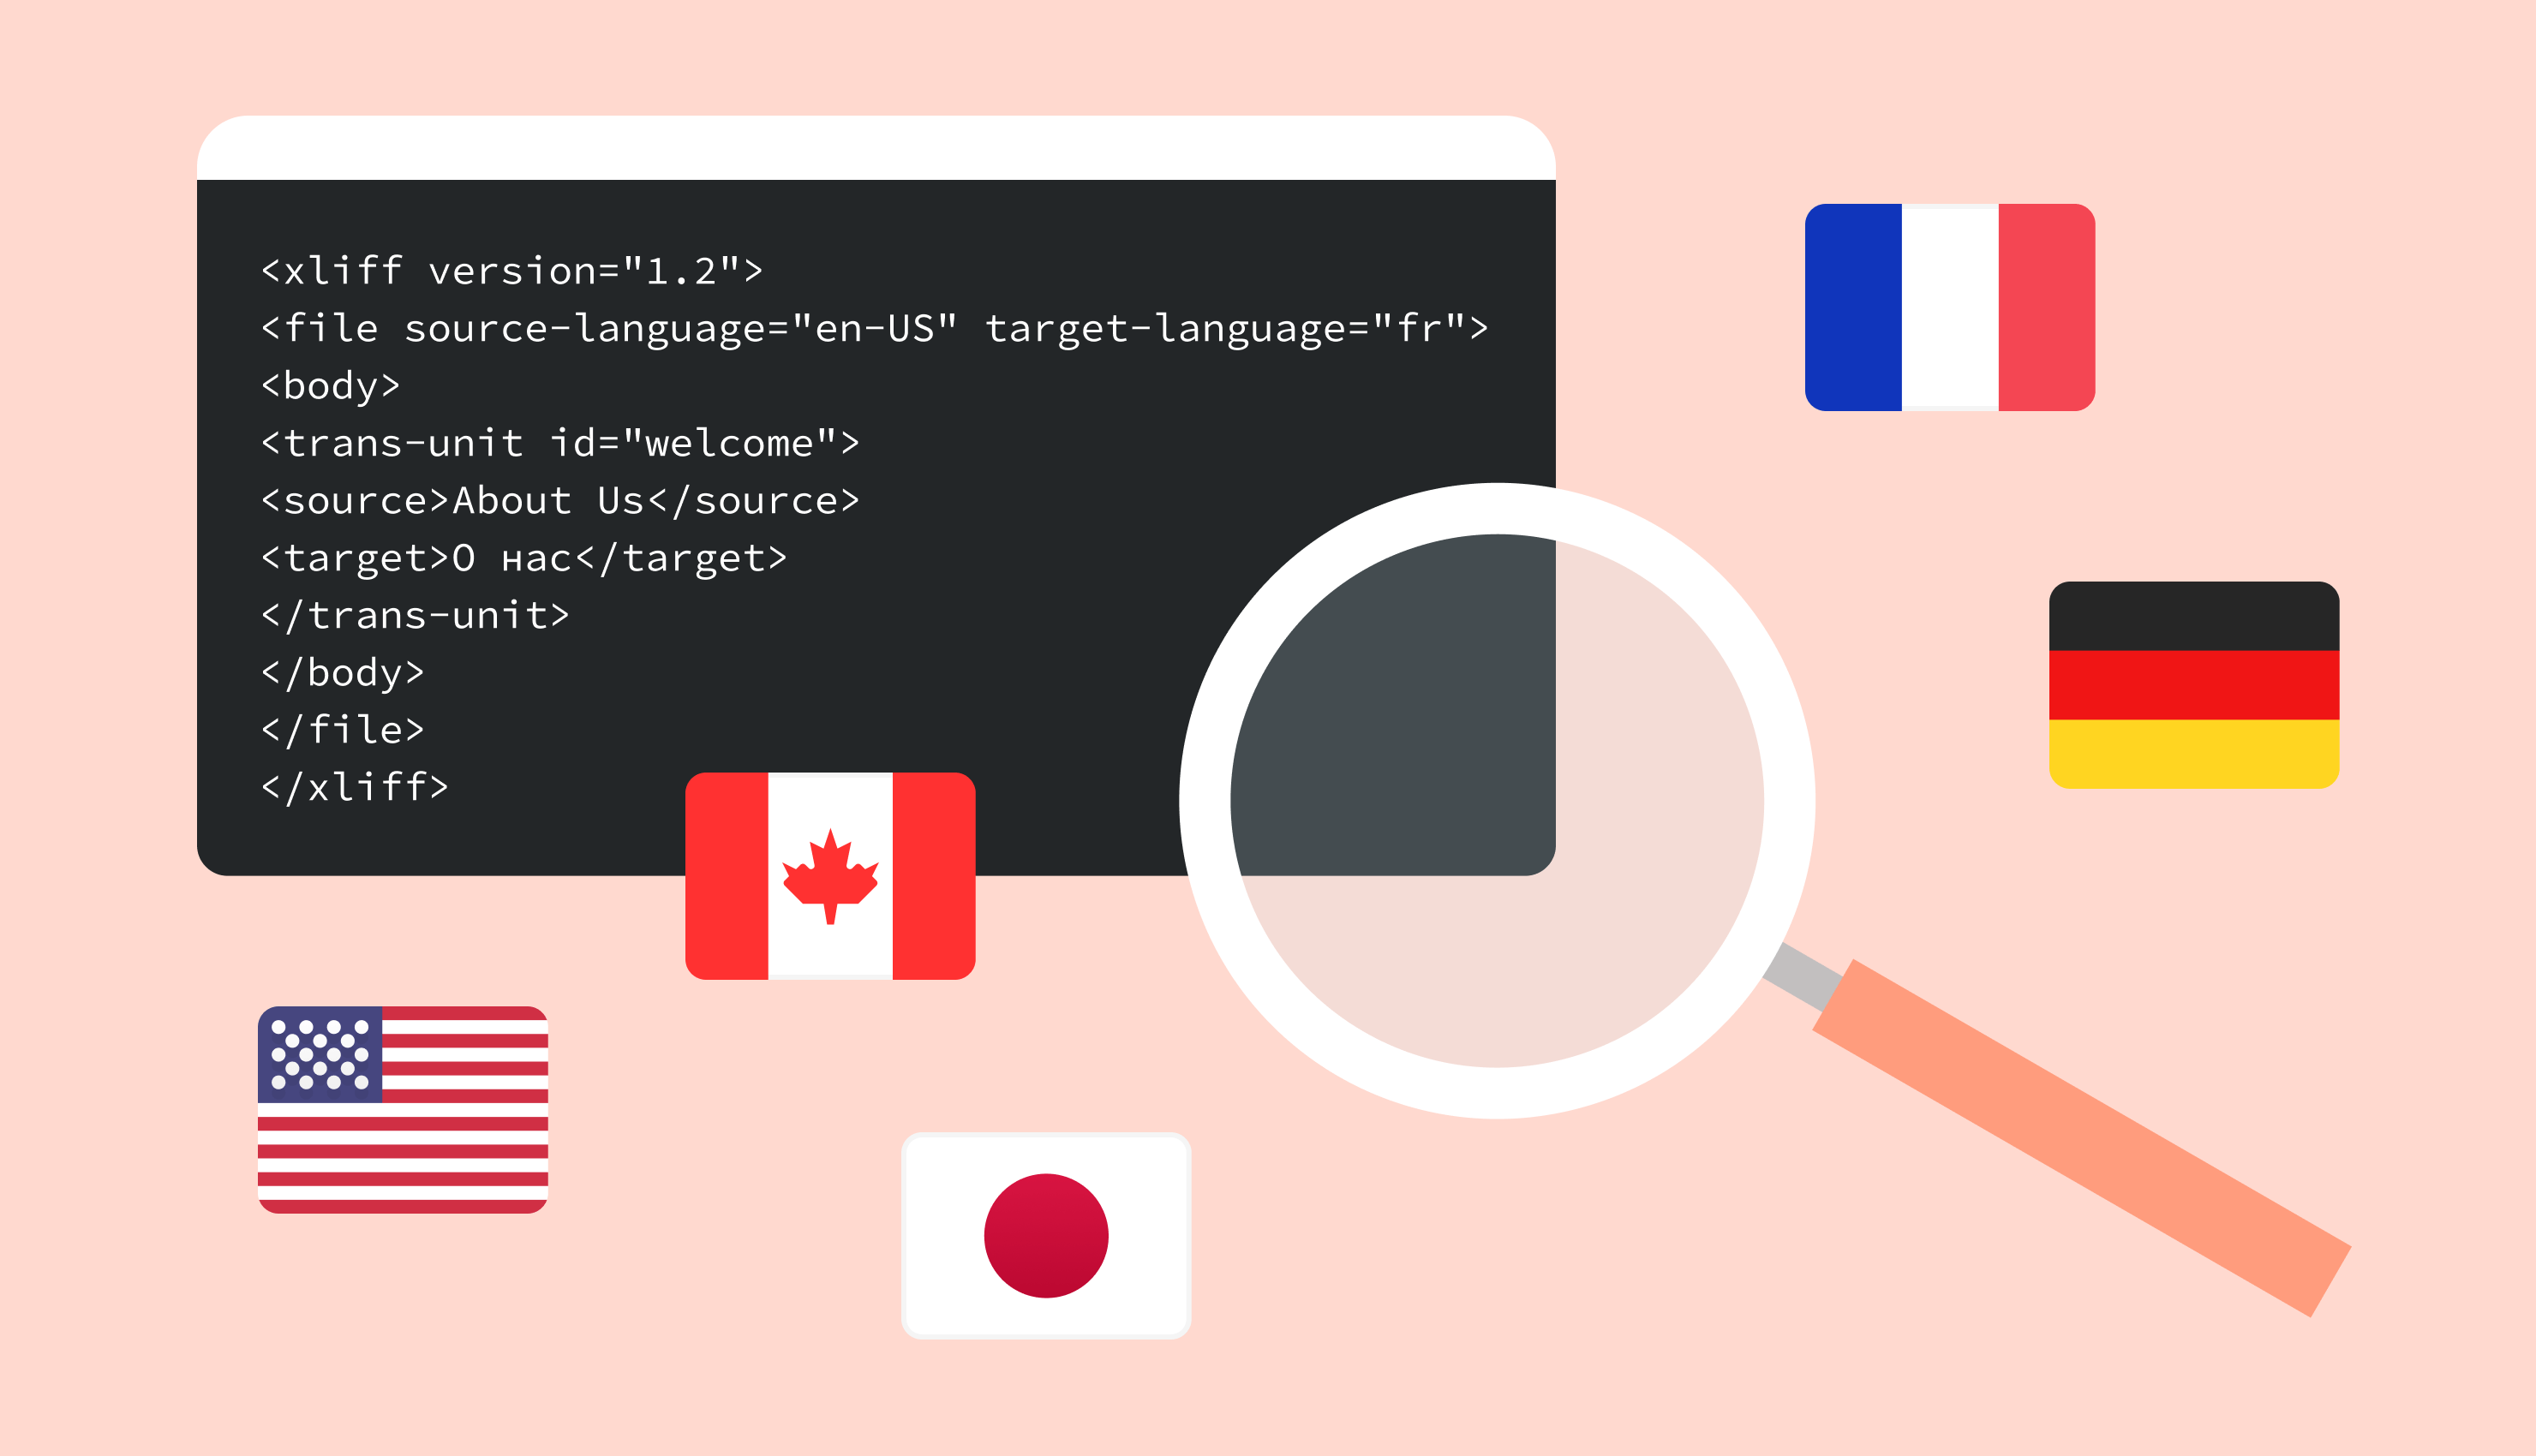
In this tutorial, we are going to cover the XLIFF file format that is utilized to store translations for various systems and technologies, an essential aspect of translation management system.
We will learn how XLIFF files are structured, which is vital for software internationalization, along with important tags and attributes are, and how to perform pluralization. Then we'll see how to easily open and translate XLIFF files with a convenient graphical interface, and how to export translated strings back to your project.
So, first of all let's discuss what this format is all about. If you are eager to start translating your files right away, please proceed to the next section.
XLIFF is an acronym for XML Localization Interchange File Format. As you might guess, it is based on the XML format, which itself means Extensible Markup Language — it has been used quite heavily in software development since it appeared in 1996. XLIFF was designed by a technical committee that included software providers and localization service providers.
The main intent was to create a single interchange file format that can be understood by any localization provider, ensuring that the localization process is efficient and consistent across various systems and tools.
XLIFF version 1.2 emerged in 2008 and is still used in many technologies, including Angular, iOS, macOS, and Symfony PHP. Internationalization efforts benefit from XLIFF's compatibility, Translation management systems also support this format and, of course, Lokalise is no exception.
Now let's see how the XLIFF files are structured.
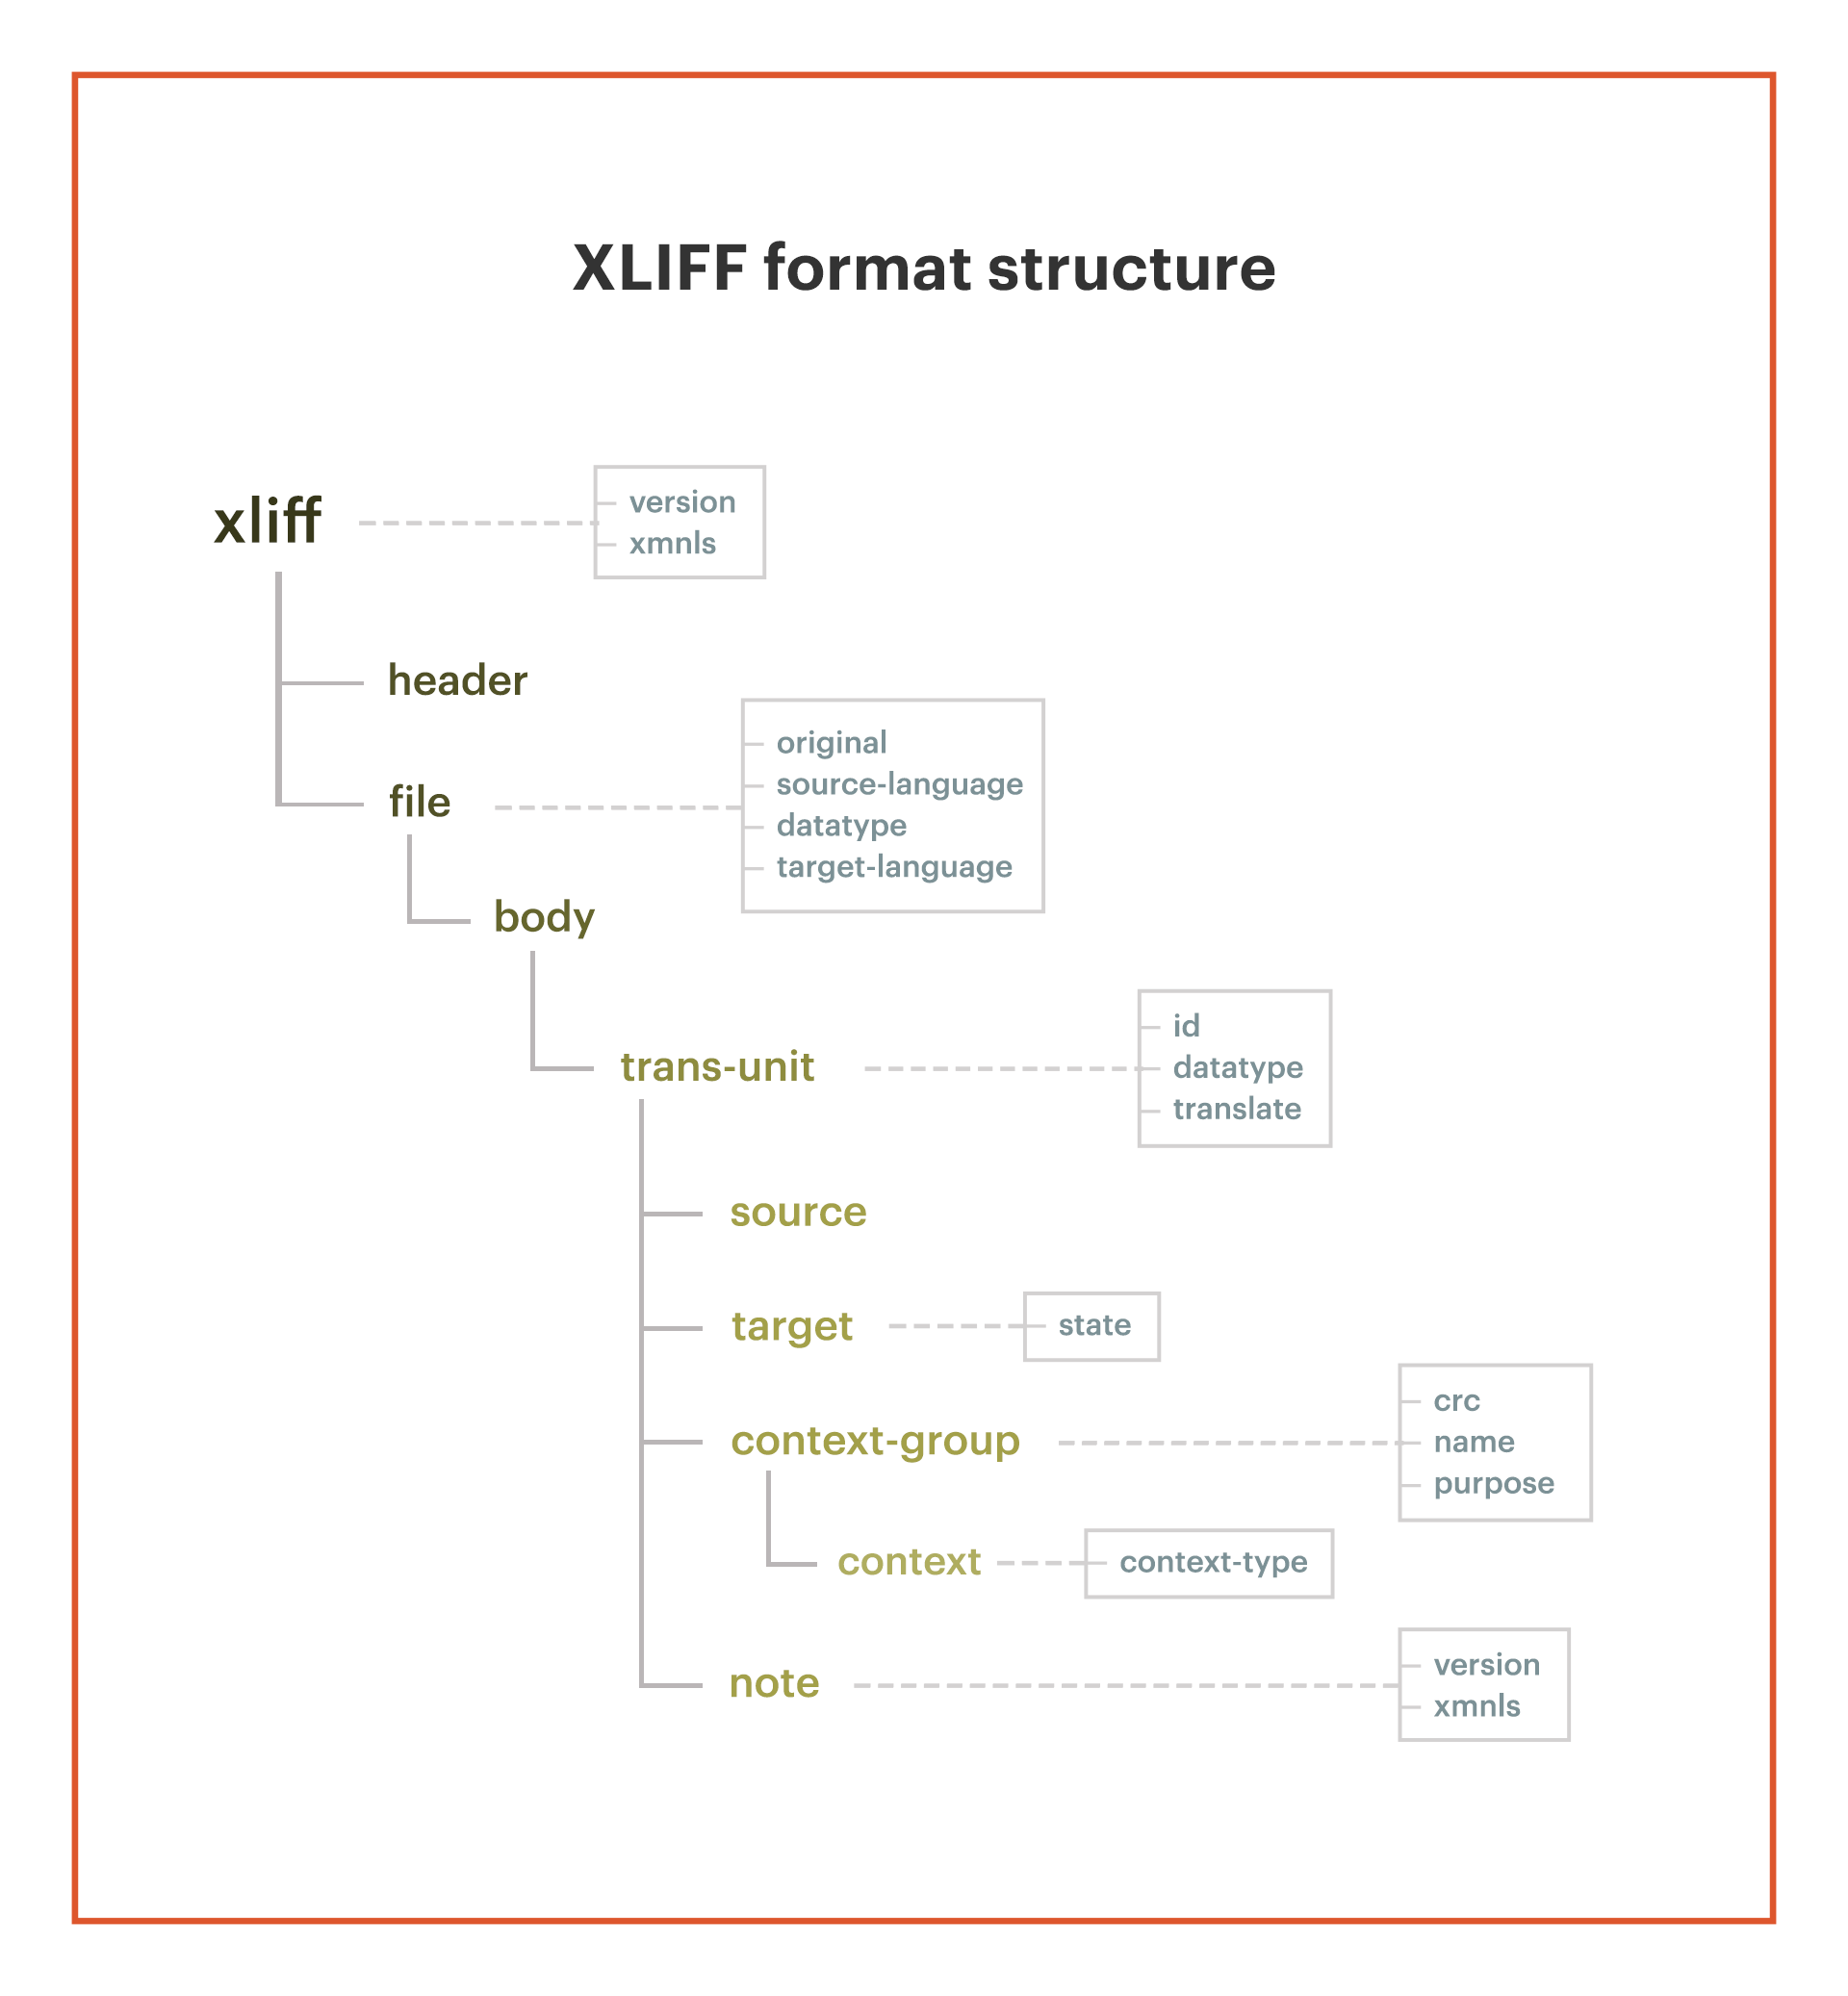
XLIFF file structure
We'll dive in and take a look at the following example taken from our Angular i18n tutorial:
If you feel overwhelmed, don't, because you'll find yourself navigating this file like a pro in no time. To make things simpler, let's deconstruct this file and move on step by step. We will cover the most popular and widespread tags and attributes, but you can find the full tree structure in the official specification.
Preamble
All XLIFF files start with a few tags that together we can call a preamble. These include:
<?xml ?> — this is an XML declaration; in other words, we're stating that this is an XML file, duh! Typically the version and the encoding attributes are provided as shown in the code example above.
xliff — this is the root tag that nests all other data. Usually it contains two attributes:
version — we are going to discuss version 1.2, but there are other versions available (namely, 2.0 and 2.1).
xmnls — once again, contains the format name and the version; for example, urn:oasis:names:tc:xliff:document:1.2.
header — this is an optional tag, and you might find it in some XLIFF documents. It should be nested directly in the xliff tag and it usually contains metadata. For instance, header might contain links to reference materials or glossaries, mention a tool used to create this file, and so on.
file — this is a mandatory tag that corresponds to a single extracted original document. Your XLIFF file must contain at least one file nested directly into the xliff tag. Here are some attributes that this tag supports:
original — this is a mandatory attribute that contains the original filename from which the contents of the file element were extracted. For example, in Angular we would say something like original="ng2.template", meaning that the contents have been extracted from an HTML template.
source-language — another mandatory attribute that specifies the source language of your text elements. This attribute is case sensitive and should contain a language code formatted as specified in the RFC 4646.
datatype — this is the last mandatory attribute, and it specifies the kind of text contained in the element. For example, plaintext, cpp, or html.
target-language — an optional attribute that contains a language code for your target translations.
That's it, we have discussed the preamble — now we'll cover the main part of the XLIFF document!
Main part
All your translation data should be nested inside the file tag discussed in the previous section. Here are the most important tags and attributes:
body — this is a mandatory tag that should be nested directly into the file element. It contains the content from the file and does not have any attributes.
trans-unit — this tag is nested inside the body and contains your source and target texts as well as other associated elements. Here are some important attributes:
id — this is the only mandatory attribute. It serves as a reference to the original corresponding code data or format for the given element, and its value is determined by the tool creating the XLIFF document (usually, you won’t enter IDs manually).
datatype — specifies the kind of text contained in the element. We’ve already discussed this attribute in the previous section.
translate — a boolean attribute (possible values are yes and no) that says whether the text in the trans-unit should be translated.
source — this is the actual source text that you likely want to translate. In many cases it contains a word, a sentence, a paragraph, a menu item, and so on. The source-language attribute of the file tag specifies the language of your source text. Typically, this tag does not have any attributes.
target — this tag contains the translation for the source text; however, it is not mandatory (in other words, you can have a source without the corresponding target). The target-language attribute of the file tag specifies the language of your translations. There's one important attribute worth mentioning:
state — the status of a particular translation. All supported values are covered in the specification; for instance, final, signed-off, new, and others. As we will see next, Lokalise recognizes these attributes and changes the translation statuses accordingly.
Context and note
context-group — an optional tag nested inside the trans-unit. It contains additional context related to the source and target values. There are no required attributes, but you can specify the following:
crc — cyclic redundancy checking that can be used for data verification.
name — the user-defined name used for identification purposes.
purpose — specifies the purpose of the context-group. Allowed values are location, information, and match. In the code example above, we are providing the location purpose to specify where exactly the source text can be found in our app. If the purpose is information, usually it contains notes for linguists explaining how the text should be translated.
context — this tag is nested directly inside the context-group and provides the actual context data. As shown in the code above, it is possible to have multiple context elements, for example, to provide the full path to the file that contains the source text as well as the line number. There's one important attribute:
context-type — mandatory, explains the type of the provided context. There are a few predefined values, including linenumber, record, and element.
note — an optional tag that should be nested inside the trans-unit. It adds localization-related comments to the XLIFF document, and you can have multiple note tags as shown in the source code above. Here you can provide comments for developers, notes for translators, and other relevant information.
priority — optional attribute specifying note priority from 1 to 10, with 1 being the highest priority.
from — indicates the note author.
And this is it—we have covered all the main tags and attributes of the XLIFF format!
Pluralization and interpolation in XLIFF files with ICU
ICU message format
In some cases, you might need to represent pluralized strings in your XLIFF files; for instance, "0 apples", "1 apple", "10 apples". But the problem is, the original specification does not cover how exactly to perform pluralization, and the developers are left on their own.
Don't worry—there are a few solutions available to overcome this problem, and the ICU (Internationalization Components for Unicode) is probably the most common. You can learn more about ICU message format in our tutorial. Let's not get too theoretical and instead discuss a simple example. Suppose you have an HTML page where you would like to display the following text: "Currently assigned: X tasks" where X is a number. As you can guess, the "X tasks" text should be pluralized because there can be zero or more tasks assigned to the current user, right?
Pluralization
And so this is where the ICU message format steps in. Let's create an XLIFF file with the source text for now:
<?xml version="1.0" encoding="UTF-8" ?><xliff version="1.2" xmlns="urn:oasis:names:tc:xliff:document:1.2"> <file source-language="en" datatype="plaintext" original="ng2.template" target-language="ru"> <body> <trans-unit id="2380939390102386148" datatype="html"> <source>Currently assigned: <x id="ICU" equiv-text="{tasksCount, plural, zero {no tasks} one {one task} other {{{tasksCount}} tasks}}" xid="1905583134648350404"/></source> </trans-unit> <trans-unit id="1905583134648350404" datatype="html"> <source>{VAR_PLURAL, plural, zero {no tasks} one {one task} other {<x id="INTERPOLATION"/> tasks}}</source> </trans-unit> </body> </file></xliff>
Yeah, I know what you're thinking: it looks pretty ugly. Indeed it does, but stick with me for a moment and it'll become clear.
So, first of all, why the heck do we need to provide two trans-unit tags to translate a short phrase? Well, because this phrase can actually be separated in two:
"Currently assigned:" — this is a regular text without any pluralization.
"X tasks" — this part requires pluralization.
Therefore, the first trans-unit stores the translation for the "Currently assigned:" part, and also contains a so-called interpolation wrapped into the x tag. In fact, we are saying "insert another translation here". The tasksCount is just a variable name that was extracted from my source code — it can have any name.
ICU expressions
The actual interpolated value is represented by another trans-unit that contains the following:
<source>{VAR_PLURAL, plural, zero {no tasks} one {one task} other {<x id="INTERPOLATION"/> tasks}}</source>
This is the ICU expression with pluralization.
VAR_PLURAL is a numeric variable passed to the expression from your app source code. Depending on this variable, we will display one of the text variants.
plural must be specified as is because that's the ICU expression name.
Then we provide three plural forms covering all potential cases: there are no tasks, there's only one task, and there are many tasks. In the latter case, we use interpolation again because we want to display exactly how many tasks are there. Please note that the plural forms have predefined values:
zero
one
two
few
many
other
Of course, you should not specify all these plural forms every time as different languages have different pluralization rules. For instance, in English there are only two main forms, namely, one and other. However, you still can provide additional variants, for example, zero. In other languages things might be more complex; please refer to the official Unicode docs to learn more about pluralization rules.
Pluralization for other languages
Now that we know what's going on here, let's translate our English texts into Russian:
<?xml version="1.0" encoding="UTF-8" ?><xliff version="1.2" xmlns="urn:oasis:names:tc:xliff:document:1.2"> <file source-language="en" datatype="plaintext" original="ng2.template" target-language="ru"> <body> <trans-unit id="2380939390102386148" datatype="html"> <source>Currently assigned: <x id="ICU" equiv-text="{tasksCount, plural, zero {no tasks} one {one task} other {{{tasksCount}} tasks}}" xid="1905583134648350404"/></source> <source>Вам назначено: <x id="ICU" equiv-text="{tasksCount, plural, zero {no tasks} one {one task} other {{{tasksCount}} tasks}}" xid="1905583134648350404"/></source> </trans-unit> <trans-unit id="1905583134648350404" datatype="html"> <source>{VAR_PLURAL, plural, zero {no tasks} one {one task} other {<x id="INTERPOLATION"/> tasks}}</source> <target>{VAR_PLURAL, plural, zero {0 заданий} one {<x id="INTERPOLATION" equiv-text="{{tasksCount}}"/> задание} few {<x id="INTERPOLATION" equiv-text="{{tasksCount}}"/> задания} many {<x id="INTERPOLATION" equiv-text="{{tasksCount}}"/> заданий} other {<x id="INTERPOLATION" equiv-text="{{tasksCount}}"/> задания} }</target> </trans-unit> </body> </file></xliff>
The first trans-unit contains the translation for the "Currently assigned:" text only. The second trans-unit stores pluralized content. As you can see, pluralization rules in Russian are quite complex. We have to provide five forms: zero, one, few, many, and other, though I must mention that zero is not mandatory, just like in English.
So, that's it: we've just pluralized our content for two languages, great job!
How to open XLIFF files in the Lokalise online editor
So, now we know how XLIFF files work and what data they can contain. But let's face it: the format is quite complex even for developers, let alone translators who are not expected to understand all these specifics. You probably don't want to modify these files directly because even a small mistake might break your app!
That's where we can take advantage of Lokalise, a translation management system that can help you greatly. It enables us to easily upload, download, and modify translations with a convenient interface, invite multiple contributors for collaboration, assign tasks, leverage glossaries and translation memories, hire professional linguists, connect with numerous third-party services, and much more. Not bad, eh?
So, let me explain how to get started with Lokalise and translate your XLIFF files with ease.
Registration and creating a new project
First, grab your 14-day trial, entering your name and email (no credit card needed). Once the trial ends, you can choose the plan that best fits your localization needs.
Next, you'll be asked to create a new team. A team is basically a collection of all your projects, users, and global settings. Then you can follow the wizard's instructions to create a new project. Give it a name, then choose the base (the main) language of your app, and one or more target languages (those you'll be translating into).
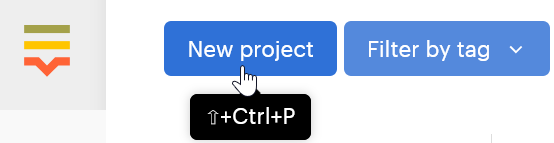
Alternatively, you can proceed to the projects dashboard and create a new project by pressing the corresponding button:
You'll see the following dialog:
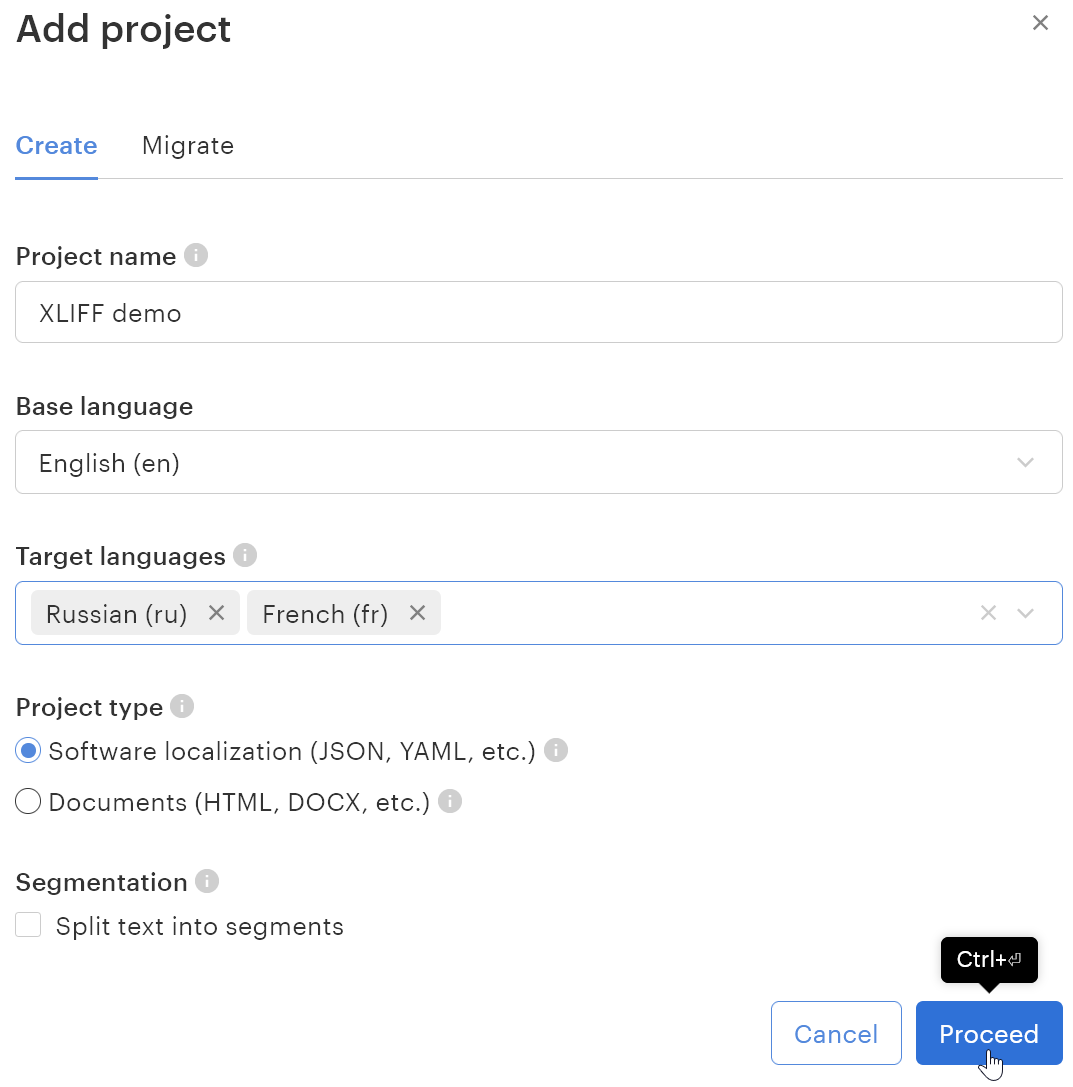
Enter the following:
Project name — enter any name you like
Base language — the language you are going to translate from. Usually it's the original language of your application. Please be sure to choose a language with a proper locale code. For example, if your XLIFF file has the source-language set to en (as shown in the example below), choose English (en). If, however, the value is en-US, you have to pick English (United States) (en_US). Nonetheless, even if you choose the wrong locale, you'll still be able to adjust it later in the language settings.
Target languages — choose one or more languages to translate into. Once again, make sure that the chosen locale is the same as the target-language in your XLIFF file.
Project type — be sure to choose Software localization to be able to upload XLIFF files.
Once you are ready, press Proceed. Your project is now ready!
Uploading XLIFF files
Now that we've created a translation project, let's upload an XLIFF file. For demonstration purposes, I'm going to create a new ru.xliff file on my PC with the following content:
<?xml version="1.0" encoding="UTF-8" ?><xliff version="1.2" xmlns="urn:oasis:names:tc:xliff:document:1.2"> <file source-language="en" datatype="plaintext" original="ng2.template" target-language="ru"> <body> <trans-unit id="2380939390102386148" datatype="html"> <source>Currently assigned: <x id="ICU" equiv-text="{tasksCount, plural, zero {no tasks} one {one task} other {{{tasksCount}} tasks}}" xid="1905583134648350404"/></source> <target>Вам назначено: <x id="ICU" equiv-text="{tasksCount, plural, zero {no tasks} one {one task} other {{{tasksCount}} tasks}}" xid="1905583134648350404"/></target> </trans-unit> <trans-unit id="1905583134648350404" datatype="html"> <source>{VAR_PLURAL, plural, zero {no tasks} one {one task} other {<x id="INTERPOLATION"/> tasks}}</source> <target>{VAR_PLURAL, plural, zero {0 заданий} one {<x id="INTERPOLATION" equiv-text="{{tasksCount}}"/> задание} few {<x id="INTERPOLATION" equiv-text="{{tasksCount}}"/> задания} many {<x id="INTERPOLATION" equiv-text="{{tasksCount}}"/> заданий} other {<x id="INTERPOLATION" equiv-text="{{tasksCount}}"/> задания} }</target> </trans-unit> <trans-unit id="welcome" datatype="html"> <source>Welcome!</source> <target>Добро пожаловать!</target> <context-group purpose="location"> <context context-type="sourcefile">src/app/about/about.component.html</context> <context context-type="linenumber">1</context> </context-group> <note priority="1" from="description">Friendly welcoming message</note> <note priority="1" from="meaning">main header</note> </trans-unit> <trans-unit id="2821179408673282599" datatype="html"> <source>Home</source> <target>Домашняя</target> <context-group purpose="location"> <context context-type="sourcefile">src/app/app.component.html</context> <context context-type="linenumber">10</context> </context-group> </trans-unit> </body> </file></xliff>
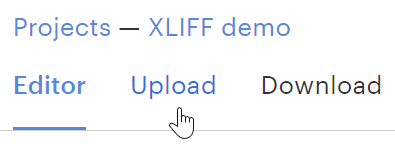
Now open your newly created translation project on Lokalise, and proceed to the Upload page:
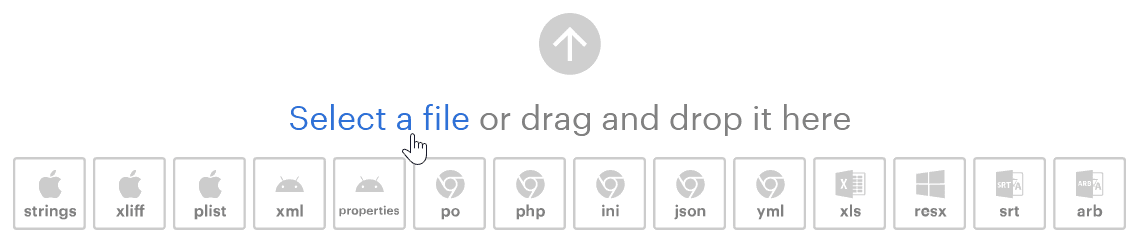
Click Select a file or drag and drop your files directly into the webpage:
Lokalise supports lots of file formats, including XLIFF, JSON, YAML, XLSX, SRT, and others. You can also translate DOCX, HTML, PPTX, and IDML files, but in that case you should create a separate project with Documents as the type.
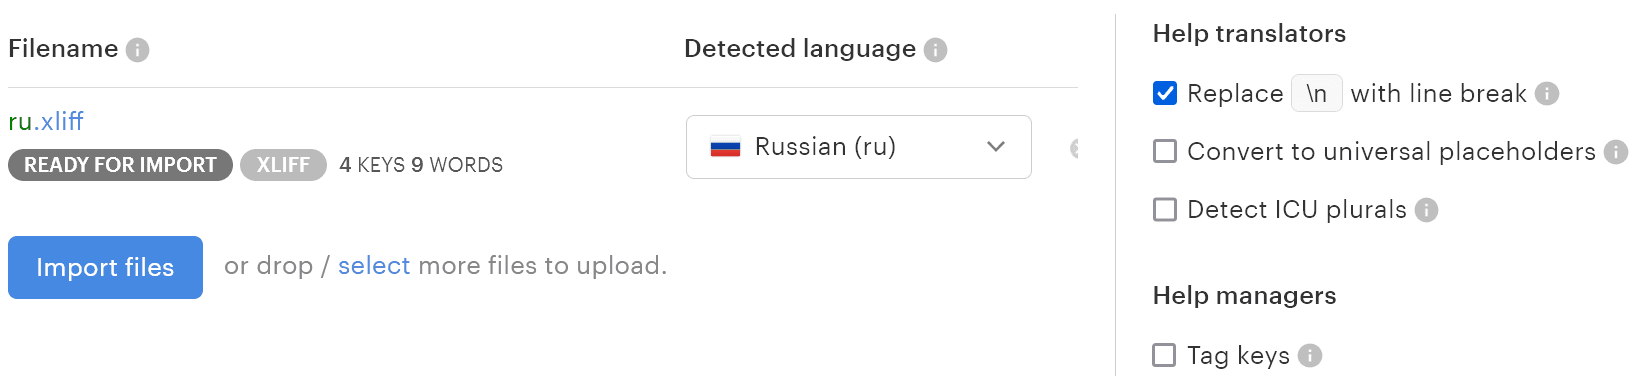
After choosing your XLIFF files, you'll be able to adjust the upload options:
Click on the filename (ru.xliff) to adjust it.
Click on the language dropdown to choose a different locale. The locale is detected by either checking the target-language attribute in the XLIFF file, or by using a machine translation engine.
To the right, you'll see the upload options. If your XLIFF file contains plural expressions in the ICU format, make sure to check Detect ICU plurals. The other options can be left intact — please refer to our documentation to learn more about them.
Once you are ready, click Import files. Lokalise will parse the chosen files and save translation keys and values along with some additional attributes. As stated in the documentation, we support all the main XLIFF tags and attributes.
Great!
A note on custom plural forms
The XLIFF file that I'm uploading contains two ICU expressions with the custom plural form zero. As I've already mentioned above, this plural form is mandatory neither for English, nor for Russian, that's why Lokalise will ignore it by default. If, however, you want to provide separate translations for this non-standard form, follow these steps after initially uploading your files:
Switch to the Editor tab on Lokalise
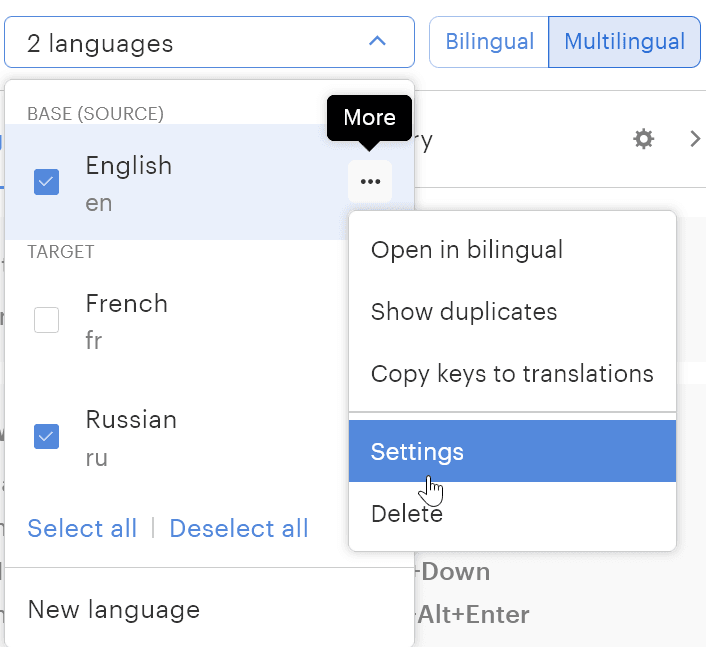
Click on the languages dropdown, click on the More icon next to the English locale, and choose Settings:
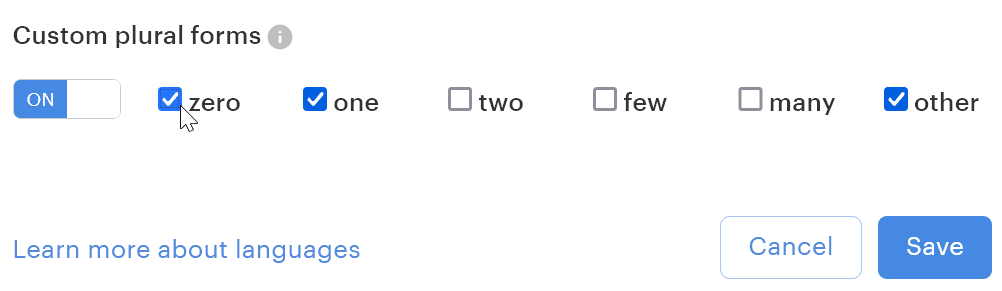
Check the Custom plural forms option and choose zero:
Hit Save. Repeat this process for all other languages that should have a zero plural form.
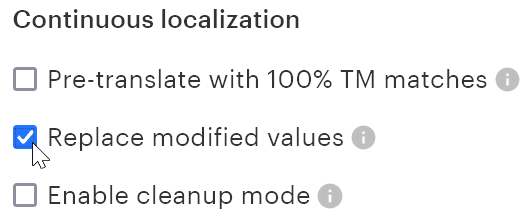
Reupload your XLIFF translation files, checking the Replace modified values option:
That's it—now your translations will contain custom plural forms!
How to translate XLIFF files in the Lokalise online editor
Editor overview
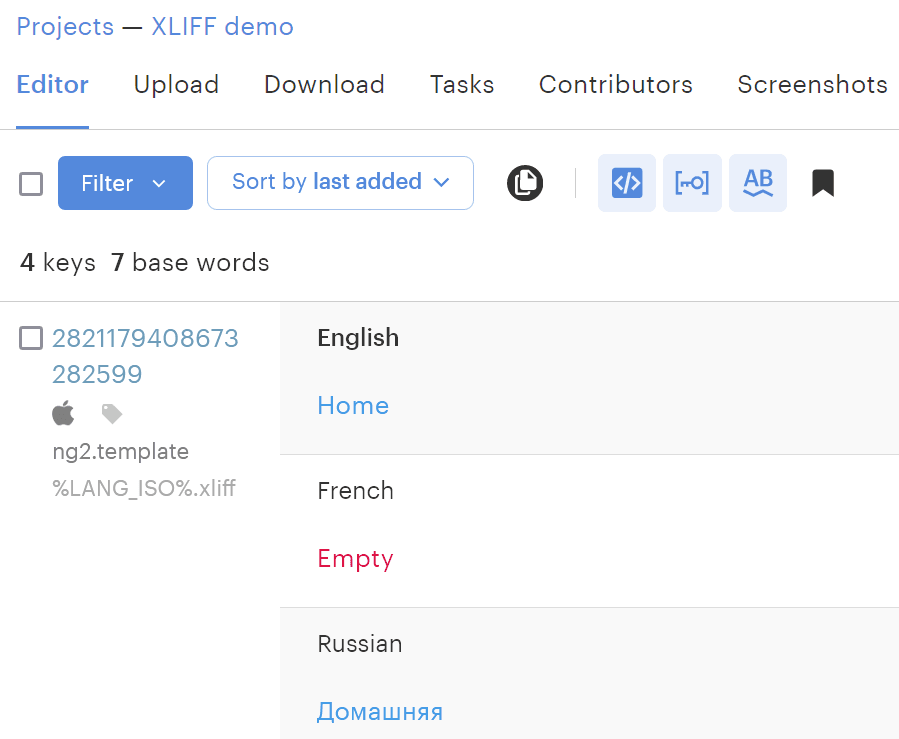
After your translation files are uploaded you can switch back to the Editor tab:
Let me quickly explain what's going on here:
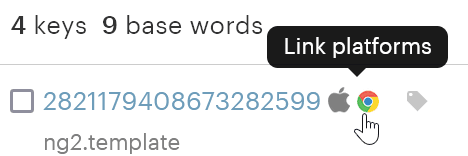
To the left, you can see the translation key name (in the example above it's numeric). Click on the key name to adjust advanced settings.
Then, there’s an “Apple” icon, which means that this key has been assigned with the iOS platform (because XLIFF files are typically used to translate iOS apps). To some extent, platforms control which file formats this key will be included for when downloading translations back. However, I’ve already mentioned that XLIFF is also used in PHP localization and Angular apps, so if you are building one of these apps, simply click on the “Apple” icon and choose the web platform, represented as the “Chrome” icon:
To speed up this process, you can select the checkboxes next to your translation keys, choose the Platform: link/unlink action from the menu, and then pick a platform to assign to multiple keys.
The "ng2.template" text has been taken from the original attribute of the file tag.
Then you can also see the filename that this key has been extracted from. The %LANG_ISO% is a placeholder that will be replaced with the actual locale code once you export your translations.
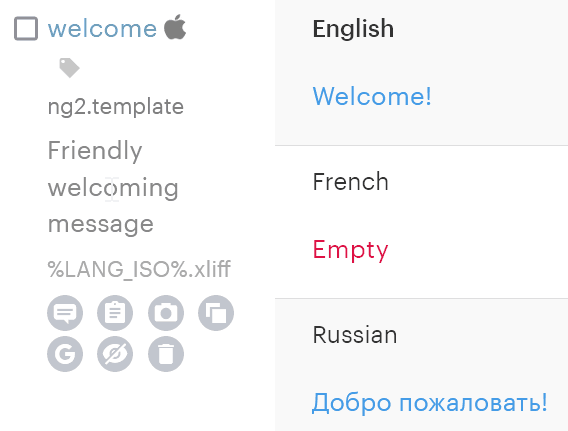
Some translation keys might have an additional description taken from the note tag:
To the right, you can see languages and the corresponding translation values. Simply click on one of these values to start translating:
You can type the text manually or choose one of the suggestions presented by the machine translation engines. Once you are ready, just hit Save. That's it! You can learn more about the project editor and the translation editor in our docs.
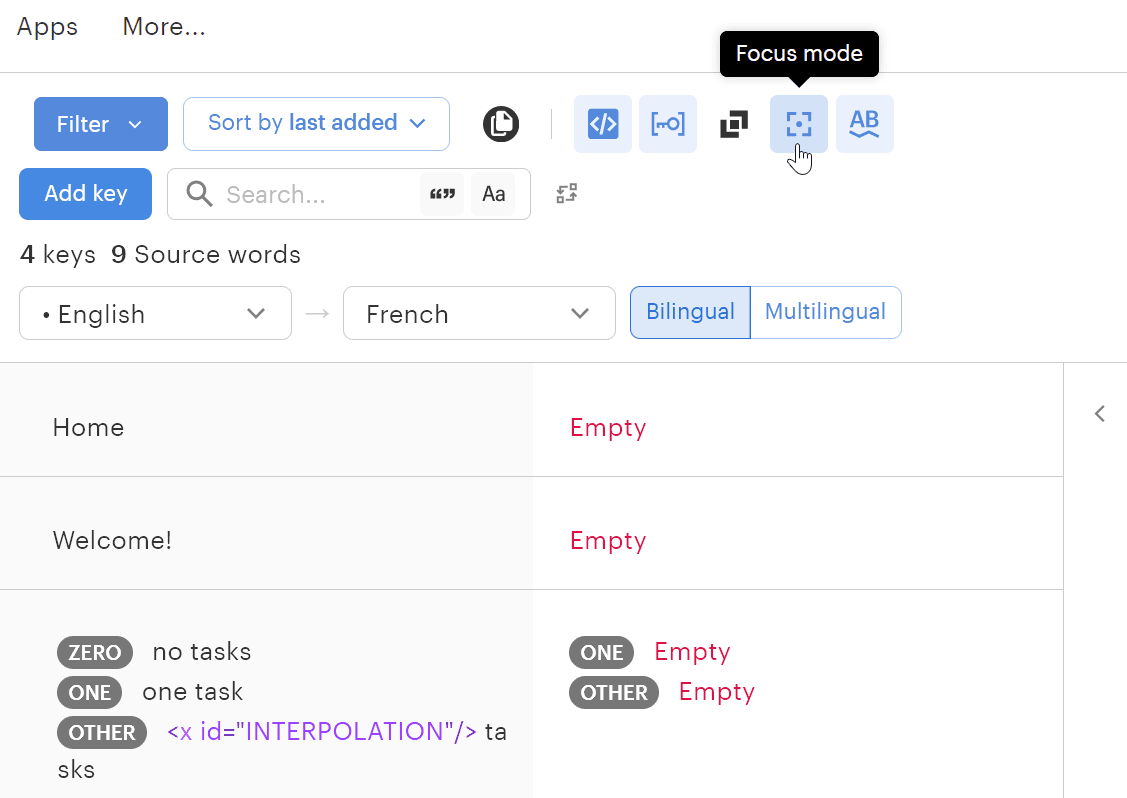
Bilingual view
If you would like to concentrate on translating into a single language, switch to the bilingual view and choose the source and the target languages from the dropdowns (the language on the left is the source):
In the bilingual view, you can also enable Focus mode to hide all extra elements:
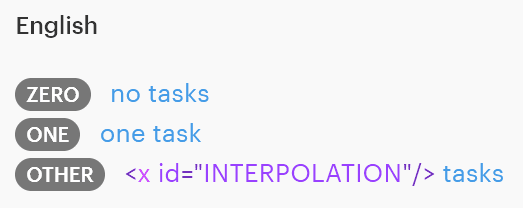
Plural keys and placeholders
Plural keys are displayed in the following way on Lokalise:
You can provide translations for each plural form by simply clicking on the corresponding text.
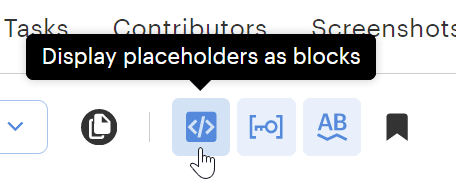
Interpolated values are displayed like this:
The 1 is your placeholder, represented by the x tag. By default, Lokalise hides it for your convenience because these placeholders shouldn't be translated anyway. However, if you'd like to see the raw text, disable the Display placeholders as blocks option in the top menu:
Now your placeholders will be displayed as is:
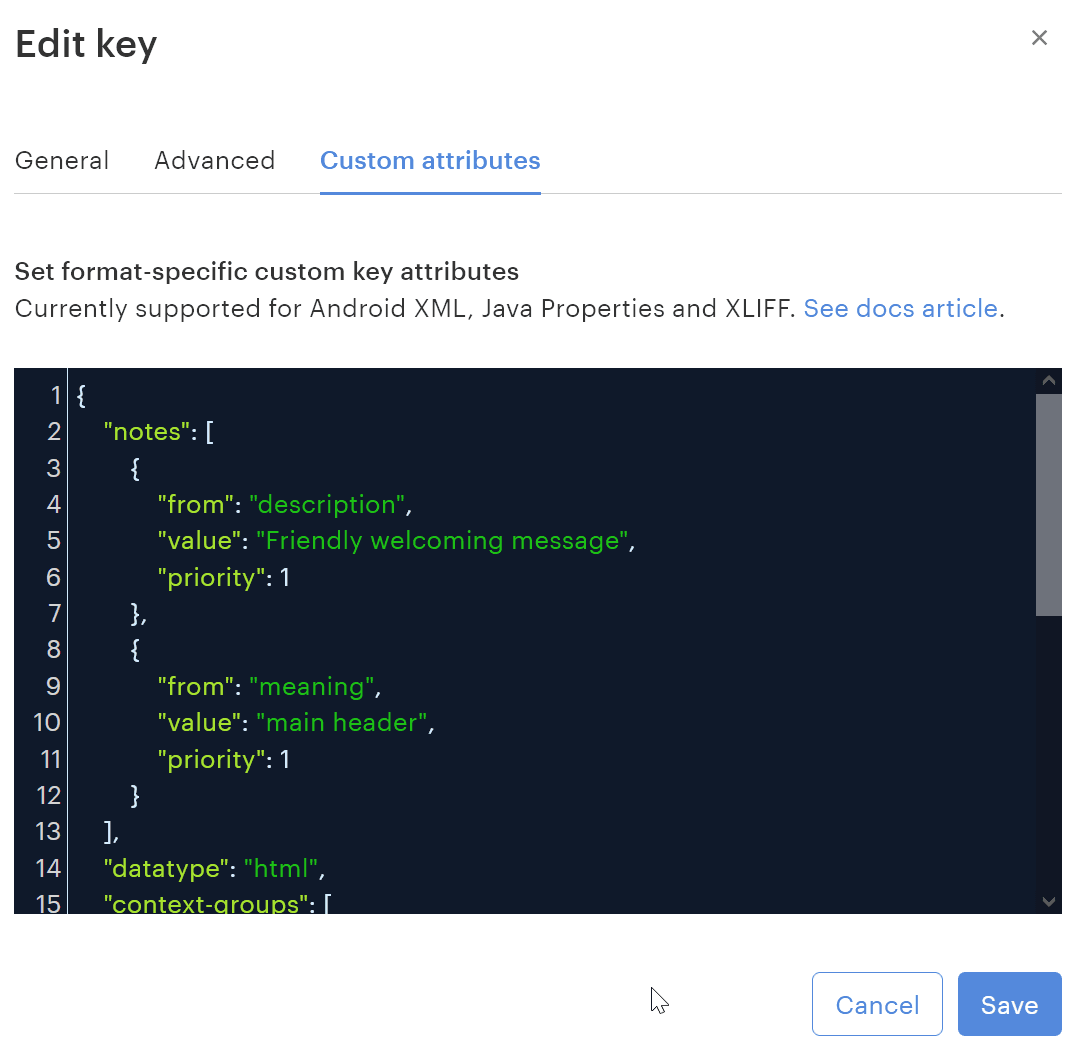
A note on additional attributes
Lokalise supports a handful of additional XLIFF attributes, namely datatype, context-type, priority, and some others. If you're wondering where these attributes can be found, click on the key name itself on Lokalise, and switch to the Custom attributes tab:
All the extra attributes will be displayed here. When you download the translations back, these attributes will be properly reassigned to the corresponding tags.
A note on translation states
We already know that XLIFF enables us to assign various states to target translations, for instance:
Lokalise will also parse these states and adjust translation statuses accordingly. To make a long story short, each translation might contain two statuses on Lokalise: verified and reviewed (unless the reviewing feature is disabled for the project). Based on the translation states in your XLIFF file, Lokalise will toggle the verified and reviewed statuses accordingly. For example, if the state is needs-translation, the translation on Lokalise will be marked as unreviewed and unverified.
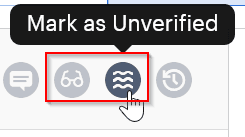
Where can you see these statuses? Actually, they're right next to the translation text:
The icon with the glasses is for reviewing (in the image above it's switched off), whereas the icon with the lines is for verification (currently, this translation is verified).
How to export translated XLIFF files
Once you've finished editing your translations it's time to export them!
Choose the format and the languages
First of all, make sure that you've assigned proper platforms to your translation keys as explained above. As I'm building a web app with Angular, I've added a web platform to my keys:
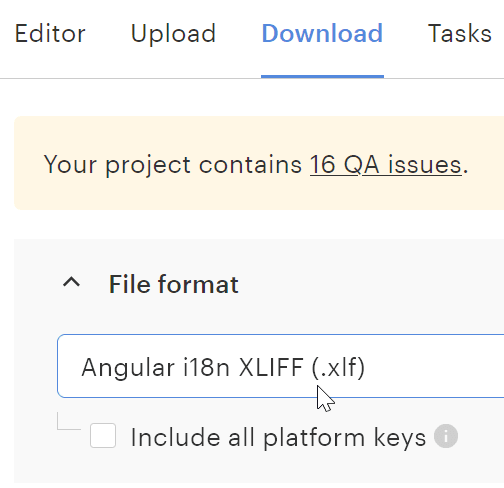
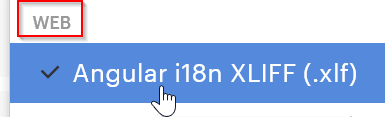
Now we'll switch to the Download page and choose the File format from the dropdown:
You'll notice that this format can be found under the Web section — that's actually the platform name mentioned above.
Next, choose one or more languages to export. Click on the locale codes to adjust their values:
Adjust the bundle structure
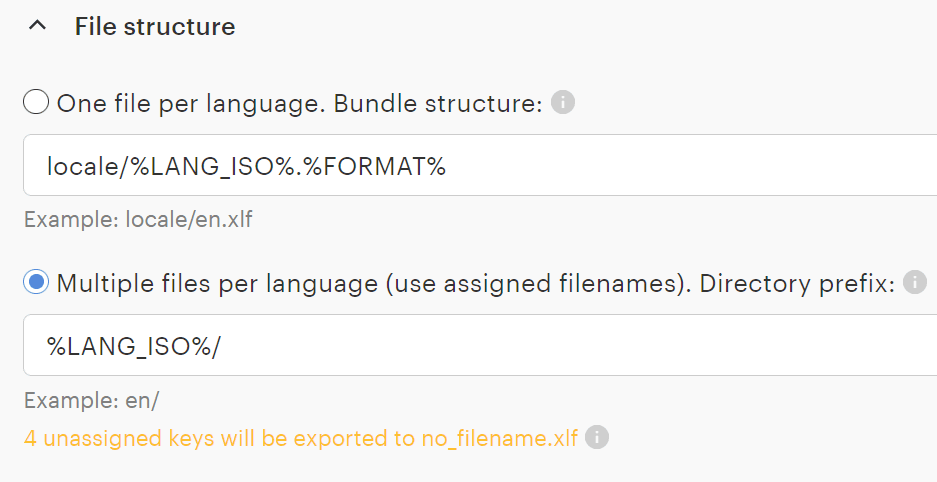
Then you'll be able to choose how your translation files should be structured:
You can either provide a custom naming pattern for the files and folder, or use the previously assigned filenames (the initial filenames that you uploaded). If you've simply uploaded your XLIFF files to Lokalise and wish to export them with the updated translations, then you can choose the second option. However, there's a small problem: it says we have some unassigned keys — Why?
Well, because as you might remember, initially all our keys were assigned to the iOS platform. This means the initial filenames were also associated with this platform, but I've chosen to export for the web platform instead, and Lokalise does not know which filenames to use in this case.
To overcome this problem, you have two options:
Choose the One file per language option. In this case, all English translations will go to the en.xlf file, Russian translations to ru.xlf file, and so on (according to the naming pattern specified in the text input). This is probably the simplest solution.
Provide a filename for the web platform manually. Use this solution if you want more fine-grained control.
Adding filenames in bulk
Let me explain how to add a custom filename for any platform. If you are not interested in this approach, just skip to the next section.
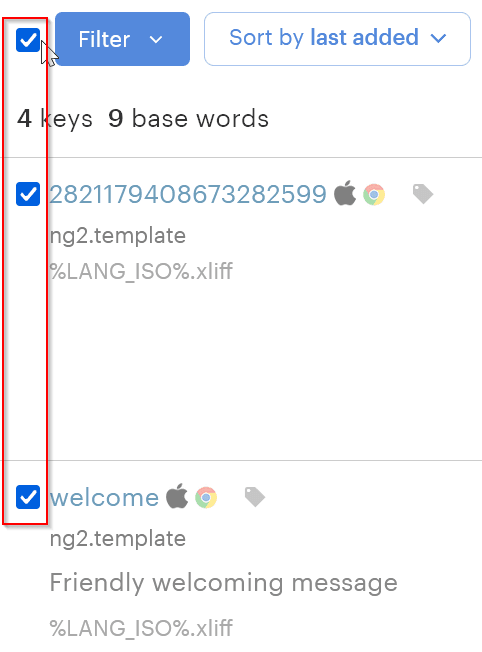
So, to achieve this, return to the Editor and check your translation keys:
Choose File: assign from the bulk actions menu, then choose New filename, and the Web platform:
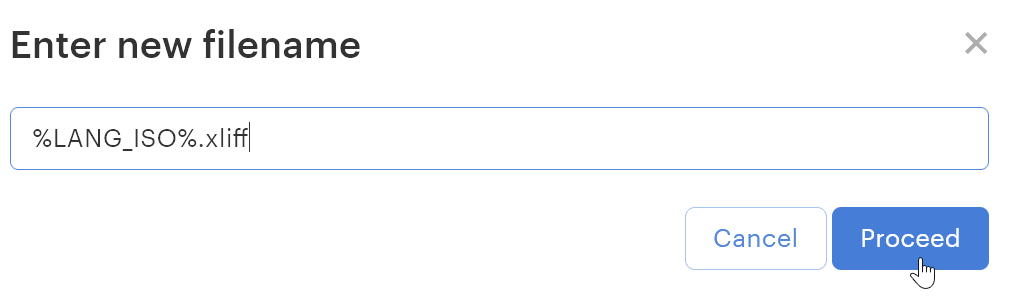
Click Proceed, and then enter the new filename:
I would highly recommend providing the %LANG_ISO% placeholder because in this case Lokalise will replace it with the proper language code upon exporting. Click Proceed, return to the Download page, be sure to choose the proper format, and check the Bundle structure:
Now we don't see any warning messages. You can keep the directory prefix (here, your translation files will be separated into folders named after the corresponding locales), or you can remove it.
Downloading translation files
You can leave all other options set to their default values, scroll to the bottom, and press Build and download:
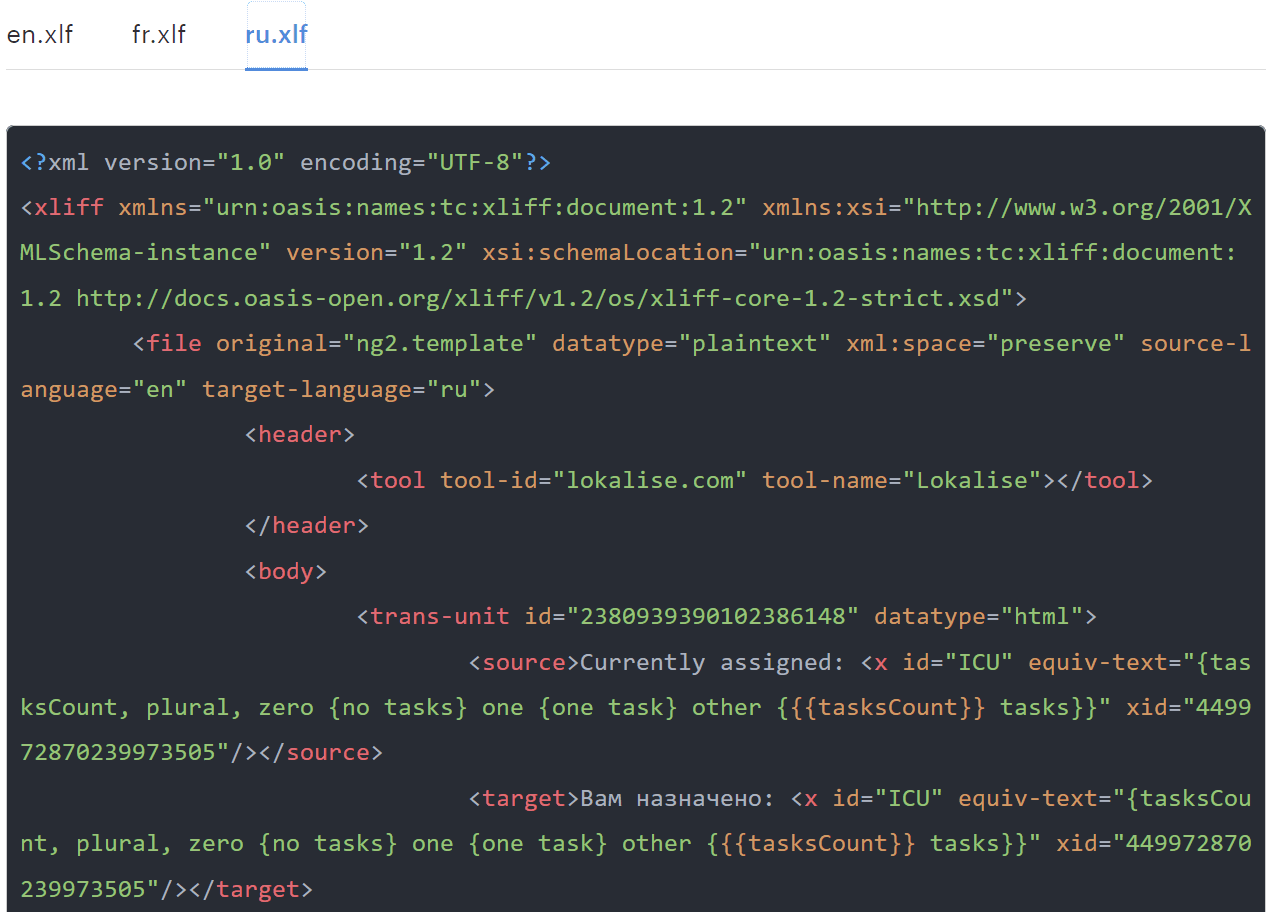
You'll get a ZIP archive with all your translation files. Alternatively, click Preview to see how exactly your keys and files will be structured:
Note, by the way, that there's a header tag added that mentions the tool that was used to create a file (because, technically speaking, Lokalise recreates XLIFF files with the chosen keys and values). All other elements are structured in the exactly the same way.
And this is it! You can repeat this process as many times as you like.
How can I validate the structure and integrity of an XLIFF file?
If you'd like to make sure that your XLIFF file does not contain any issues and it's properly structured, you can take advantage of the OpenXLIFF solution, which is free, open source, and supports both versions 1.2 and 2.0. Just navigate to the Binary Downloads page, choose the version for your OS, download the archive, and run the xliffchecker file from the terminal:
xliffchecker -file en.xlif
Alternatively, use an online XLIFF validator created by the same team. Just choose a file and observe the output.
Conclusion
It was a long journey, wasn't it? We have covered the main technical details of the XLIFF format, discussed some important tags and attributes, and the specifics of pluralization and interpolation. Also, we have seen how to easily translate and manage XLIFF files on Lokalise. Not bad for a single article!
And that's it for today, folks. If you'd like to learn more about Lokalise, you can take a product tour, browse the onboarding guides listed in our documentation, or even enroll in a free "Jump-start Lokalise" course in our academy. If you have further questions on the platform, please reach out to our support team. Thank you for staying with me today, and happy coding!
Ilya is the lead for content, documentation, and onboarding at Lokalise, where he focuses on helping engineering teams build reliable internationalization workflows. With a background at Microsoft and Cisco, he combines practical development experience with a deep understanding of global product delivery, localization systems, and developer education.
He specializes in i18n architectures across modern frameworks — including Vue, Angular, Rails, and custom localization pipelines — and has hands-on experience with Ruby, JavaScript, Python, Elixir, Go, Rust, and Solidity. His work often centers on improving translation workflows, automation, and cross-team collaboration between engineering, product, and localization teams.
Beyond his role at Lokalise, Ilya is an IT educator and author who publishes technical guides, best-practice breakdowns, and hands-on tutorials. He regularly contributes to open-source projects and maintains a long-standing passion for teaching, making complex internationalization topics accessible to developers of all backgrounds.
Outside of work, he keeps learning new technologies, writes educational content, stays active through sports, and plays music. His goal is simple: help developers ship globally-ready software without unnecessary complexity.
Libraries and frameworks to translate JavaScript apps
In our previous discussions, we explored localization strategies for backend frameworks like Rails and Phoenix. Today, we shift our focus to the front-end and talk about JavaScript translation and localization. The landscape here is packed with options, which makes many developers a
Character encoding: Types, UTF-8, Unicode, and more explained
In this article, we’ll explore various types of character encoding used in the world of information technology. We’ll break down why encoding matters, explain how they function, and highlight the key differences between ASCII, UTF-8, UTF-16, and the Unicode Standard. Understanding these differences is essential for correctly handling text in any software application, especially when working with localized time and date formats that rely on proper ch
Syncing Lokalise translations with GitLab pipelines
In this guide, we’ll walk through building a fully automated translation pipeline using GitLab CI/CD and Lokalise. From upload to download, with tagging, version control, and merge requests. Here’s the high-level flow: Upload your source language files (e.g. English JSON files) to Lokalise from GitLab using a CI pipeline.Tag each uploaded key with your Git branch name. This helps keep translations isolated per feature or pull request