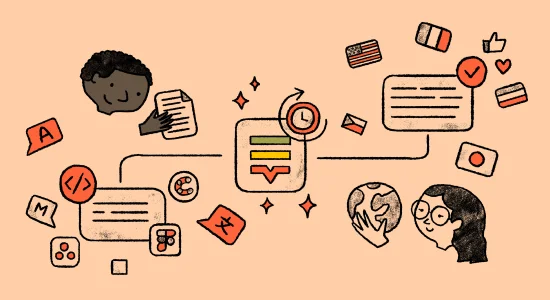
We often ask content design teams working on localization what their biggest challenges are. There’s one pain point that pops up frequently:
Integrating UX design and localization to ease collaboration.
The gap between UX design and localization is a decades-long problem with a new solution. Withings cracked it using design-stage localization. DBS gave their process a lick of paint too. You can apply it to your localization process using Lokalise + Sketch.
What is design-stage localization?
We’ve been thinking, writing, talking, and publishing a lot lately about design-stage localization – the main challenges and how to implement it.
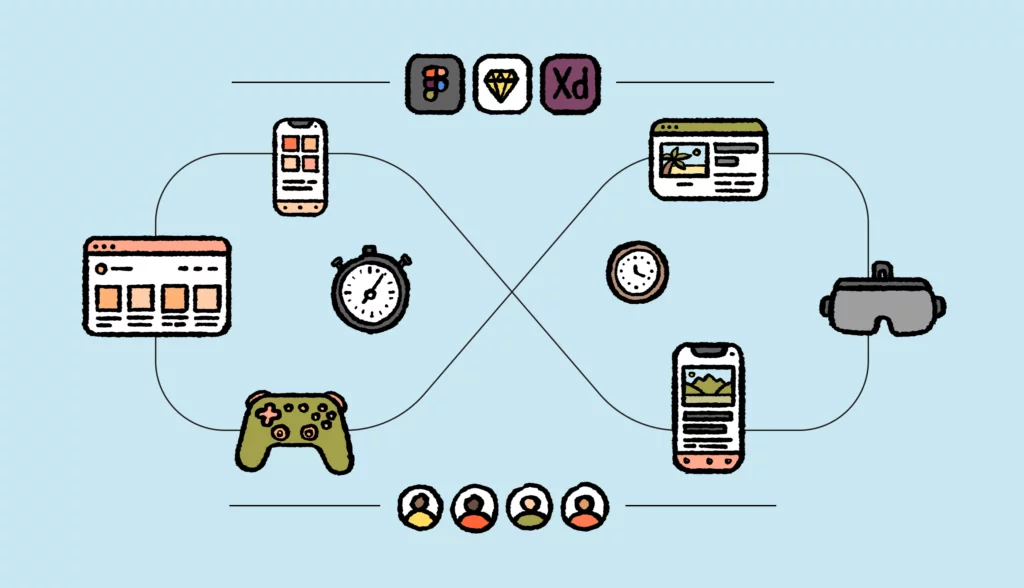
Design-stage localization is a powerful way to continuously release fully localized products like mobile apps, web apps, and games. Because just like localization, design shouldn’t be an afterthought but an integral part of the product development process.
The complete guide to design-stage localization
We’ll show you how to build and implement a unified localization workflow that starts at the design stage.
Beyond “education” – bringing localization into day one of onboarding content designers
Localization professionals still talk a lot about “evangelization” and “education.” During a Nimdzi Insights Lesson in Localization with Martiño Prada Díaz, currently the Global Head of Localization at Spotify, it became clear he is beyond that phase. His focus is on how to bring localization education into day one of onboarding a new person at Spotify.
He says: “let’s make sure that designers, UX writers, etc., understand localization from the get-go by attacking the problem at its roots. Instead of investing time in correcting bad habits, make sure that people can learn early on. It’s not necessarily just about education, but about WHEN education needs to happen.”
If you have a user-centric philosophy and understand that great multilingual experience equals great localization, it becomes clear that UX/content design teams are your best localization allies.
Melanie Heighway, Product Localization Senior Team Lead at Atlassian, shares that: “we have a large UX Content Design team at Atlassian and they’re one of our best l10n allies. There is so much potential to improve our collaboration though.”
So, how do we do that?
Step 1: Plug localization into the overall content ecosystem
The traditional translation stack includes many tools with a “t” in them, like CAT and translation memories.
But the modern tech stack is richer and includes tools such as:
- Slack – for communication, feedback, and workflows
- Asana or Trello – for project and task management
- WordPress (or headless CMS’ like Contentful) – for multilingual content management
- Sketch (or Figma) – for design-stage localization
Teams working on localization require an open ecosystem allowing them to connect a translation management system with their existing tools.
In an ideal world, these tools would feed into a company’s TMS with existing APIs or connectors. Managing a growing group of people with integrated tools and data that flows into a single workspace makes your localization workflow function like a well-oiled machine.
Plus, teams are increasingly looking for products that meet them where they work.
Showing your team how localization plugs into the overall content ecosystem elevates the importance of building great multilingual customer experiences and breaks down the silos that cross-functional teams often face.
Step 2: Align as a team to build a unified workflow that starts at the design stage
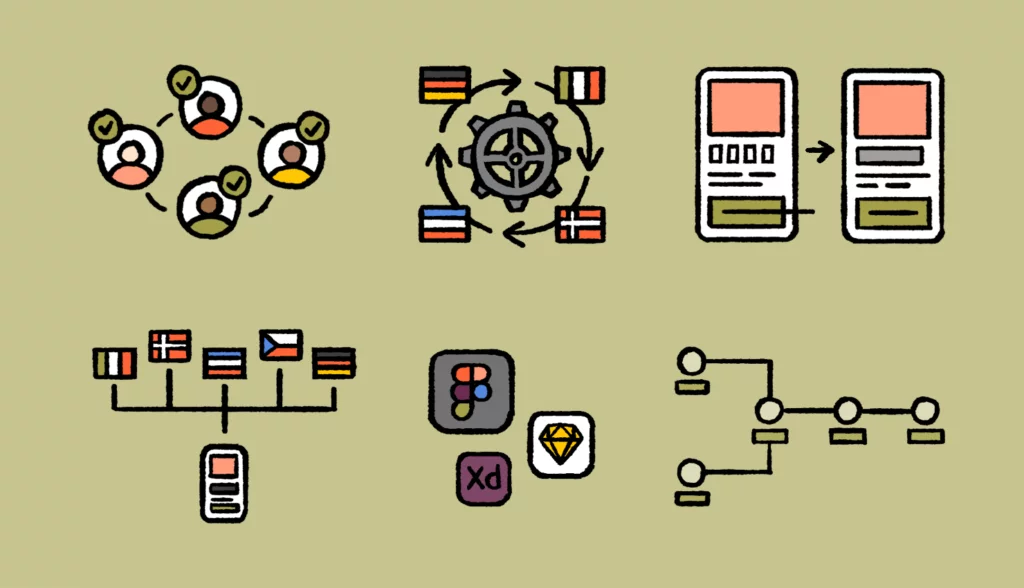
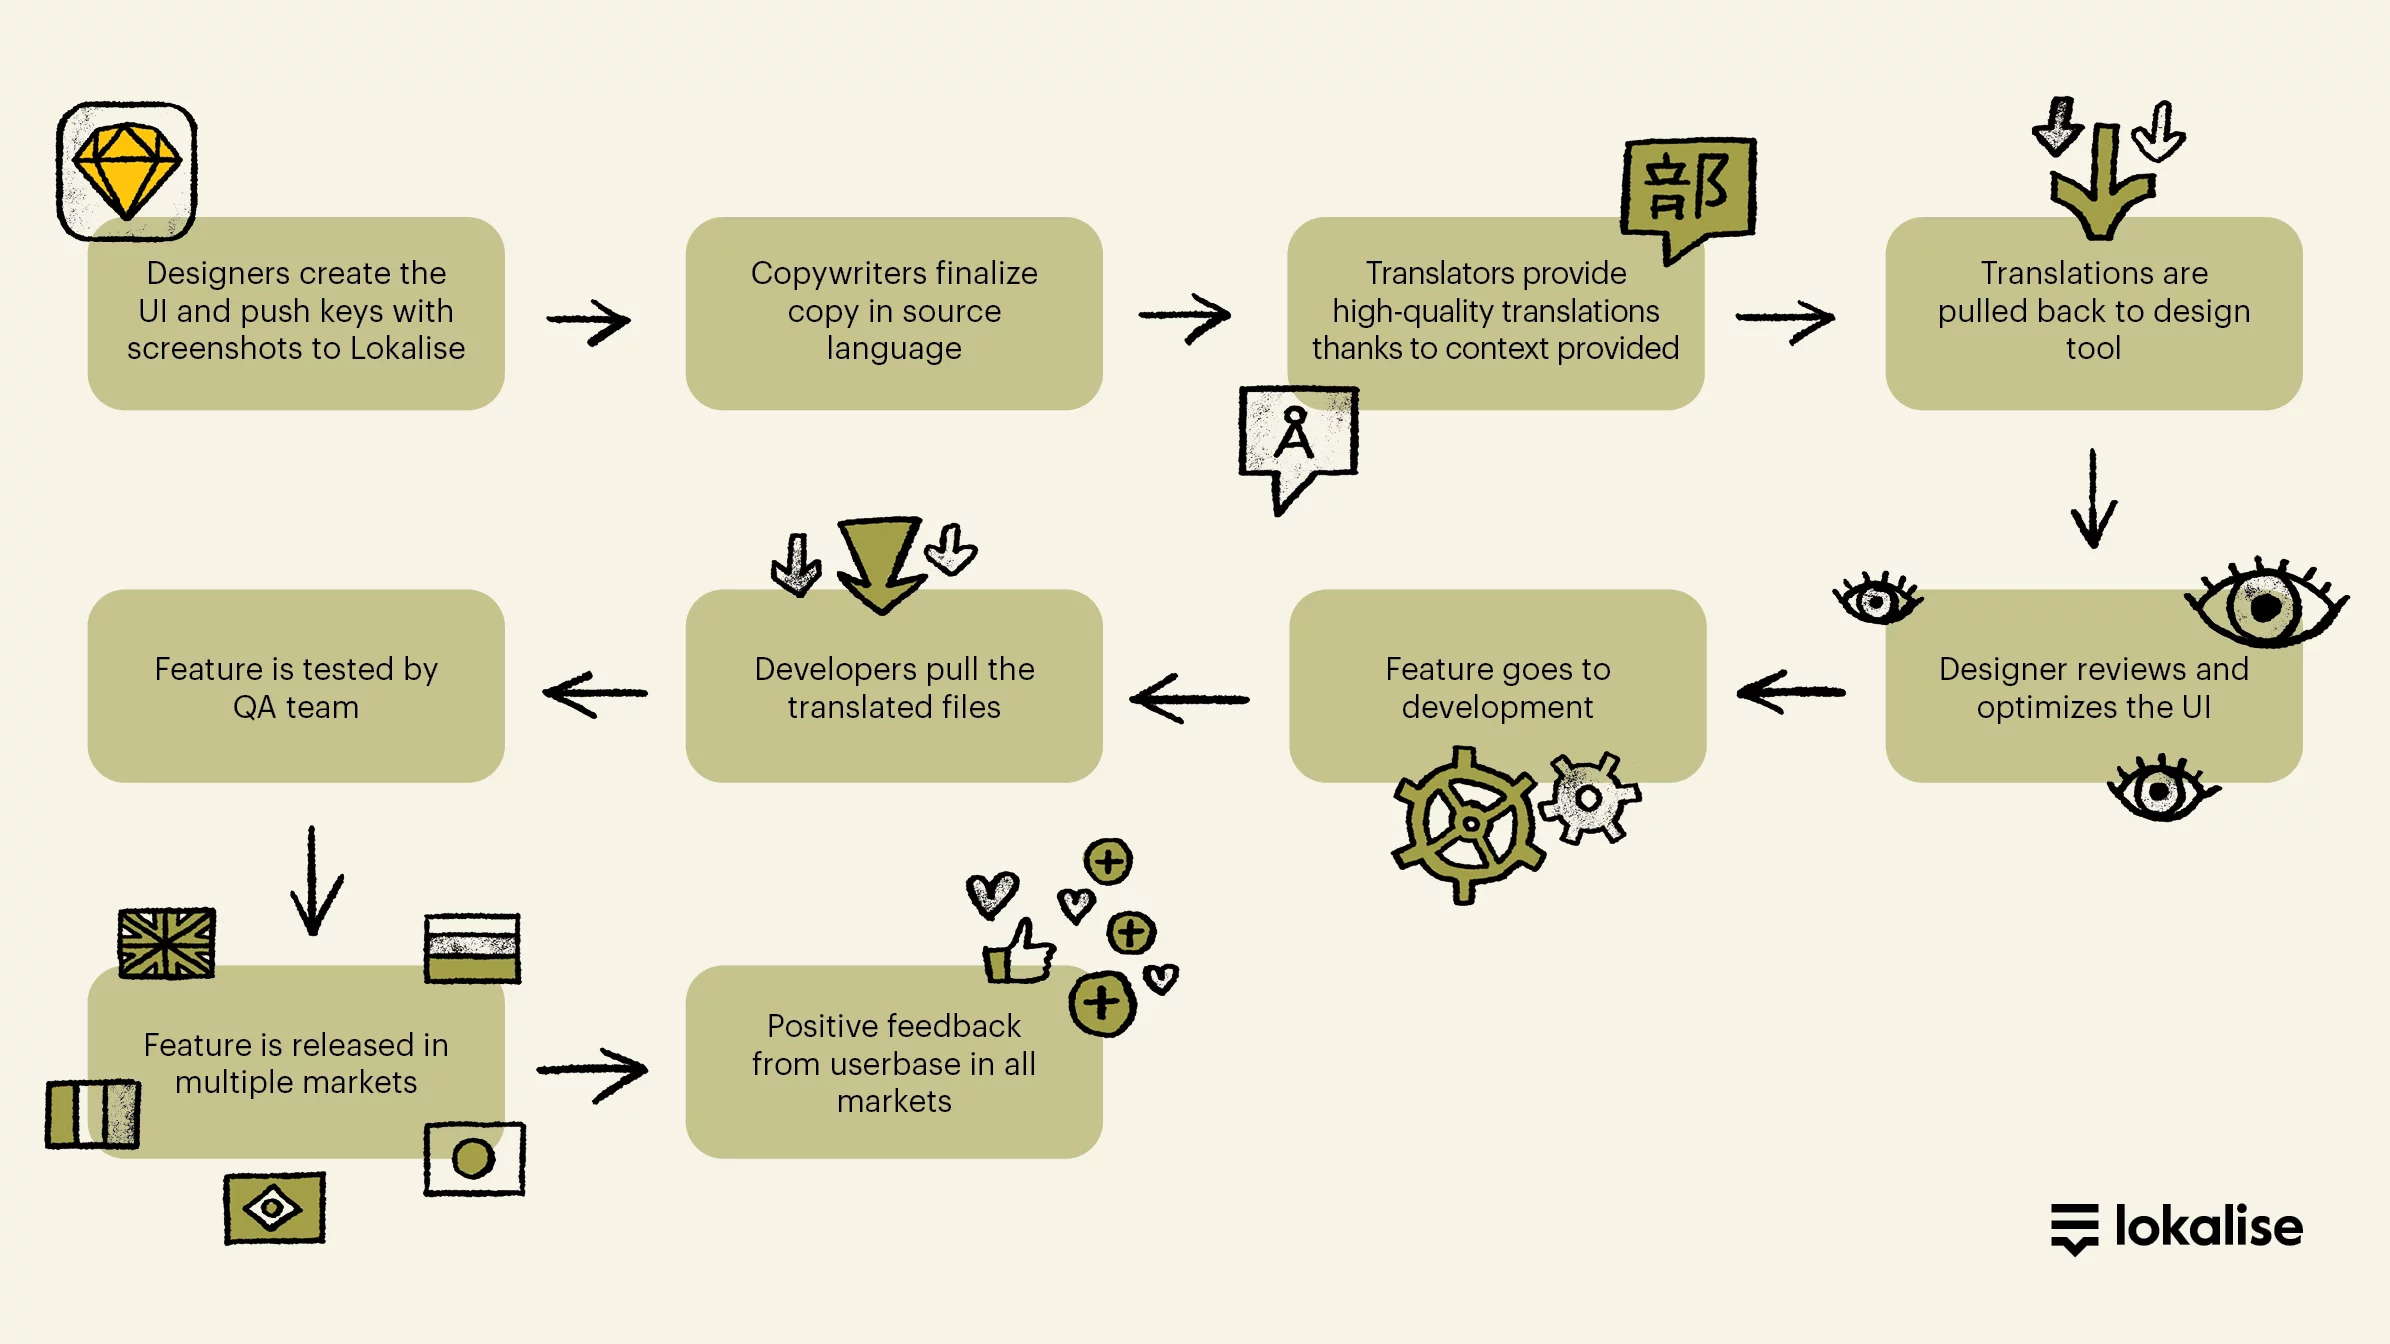
Imagine your localization workflow as a continuous cycle with five steps:

1. Developers create the translation keys and store the code in a repository like GitHub, GitLab, or Bitbucket (which connect with Lokalise).
2. The keys are supplied to project managers.
3. Managers define the project scope, pre-translate, and assign tasks for linguists to perform translations.
4. The translations are reviewed and verified by a QA team.
5. The translated keys are pulled back into the repository by developers, and a semi-automated flow for continuous deployment of localized assets is achieved.
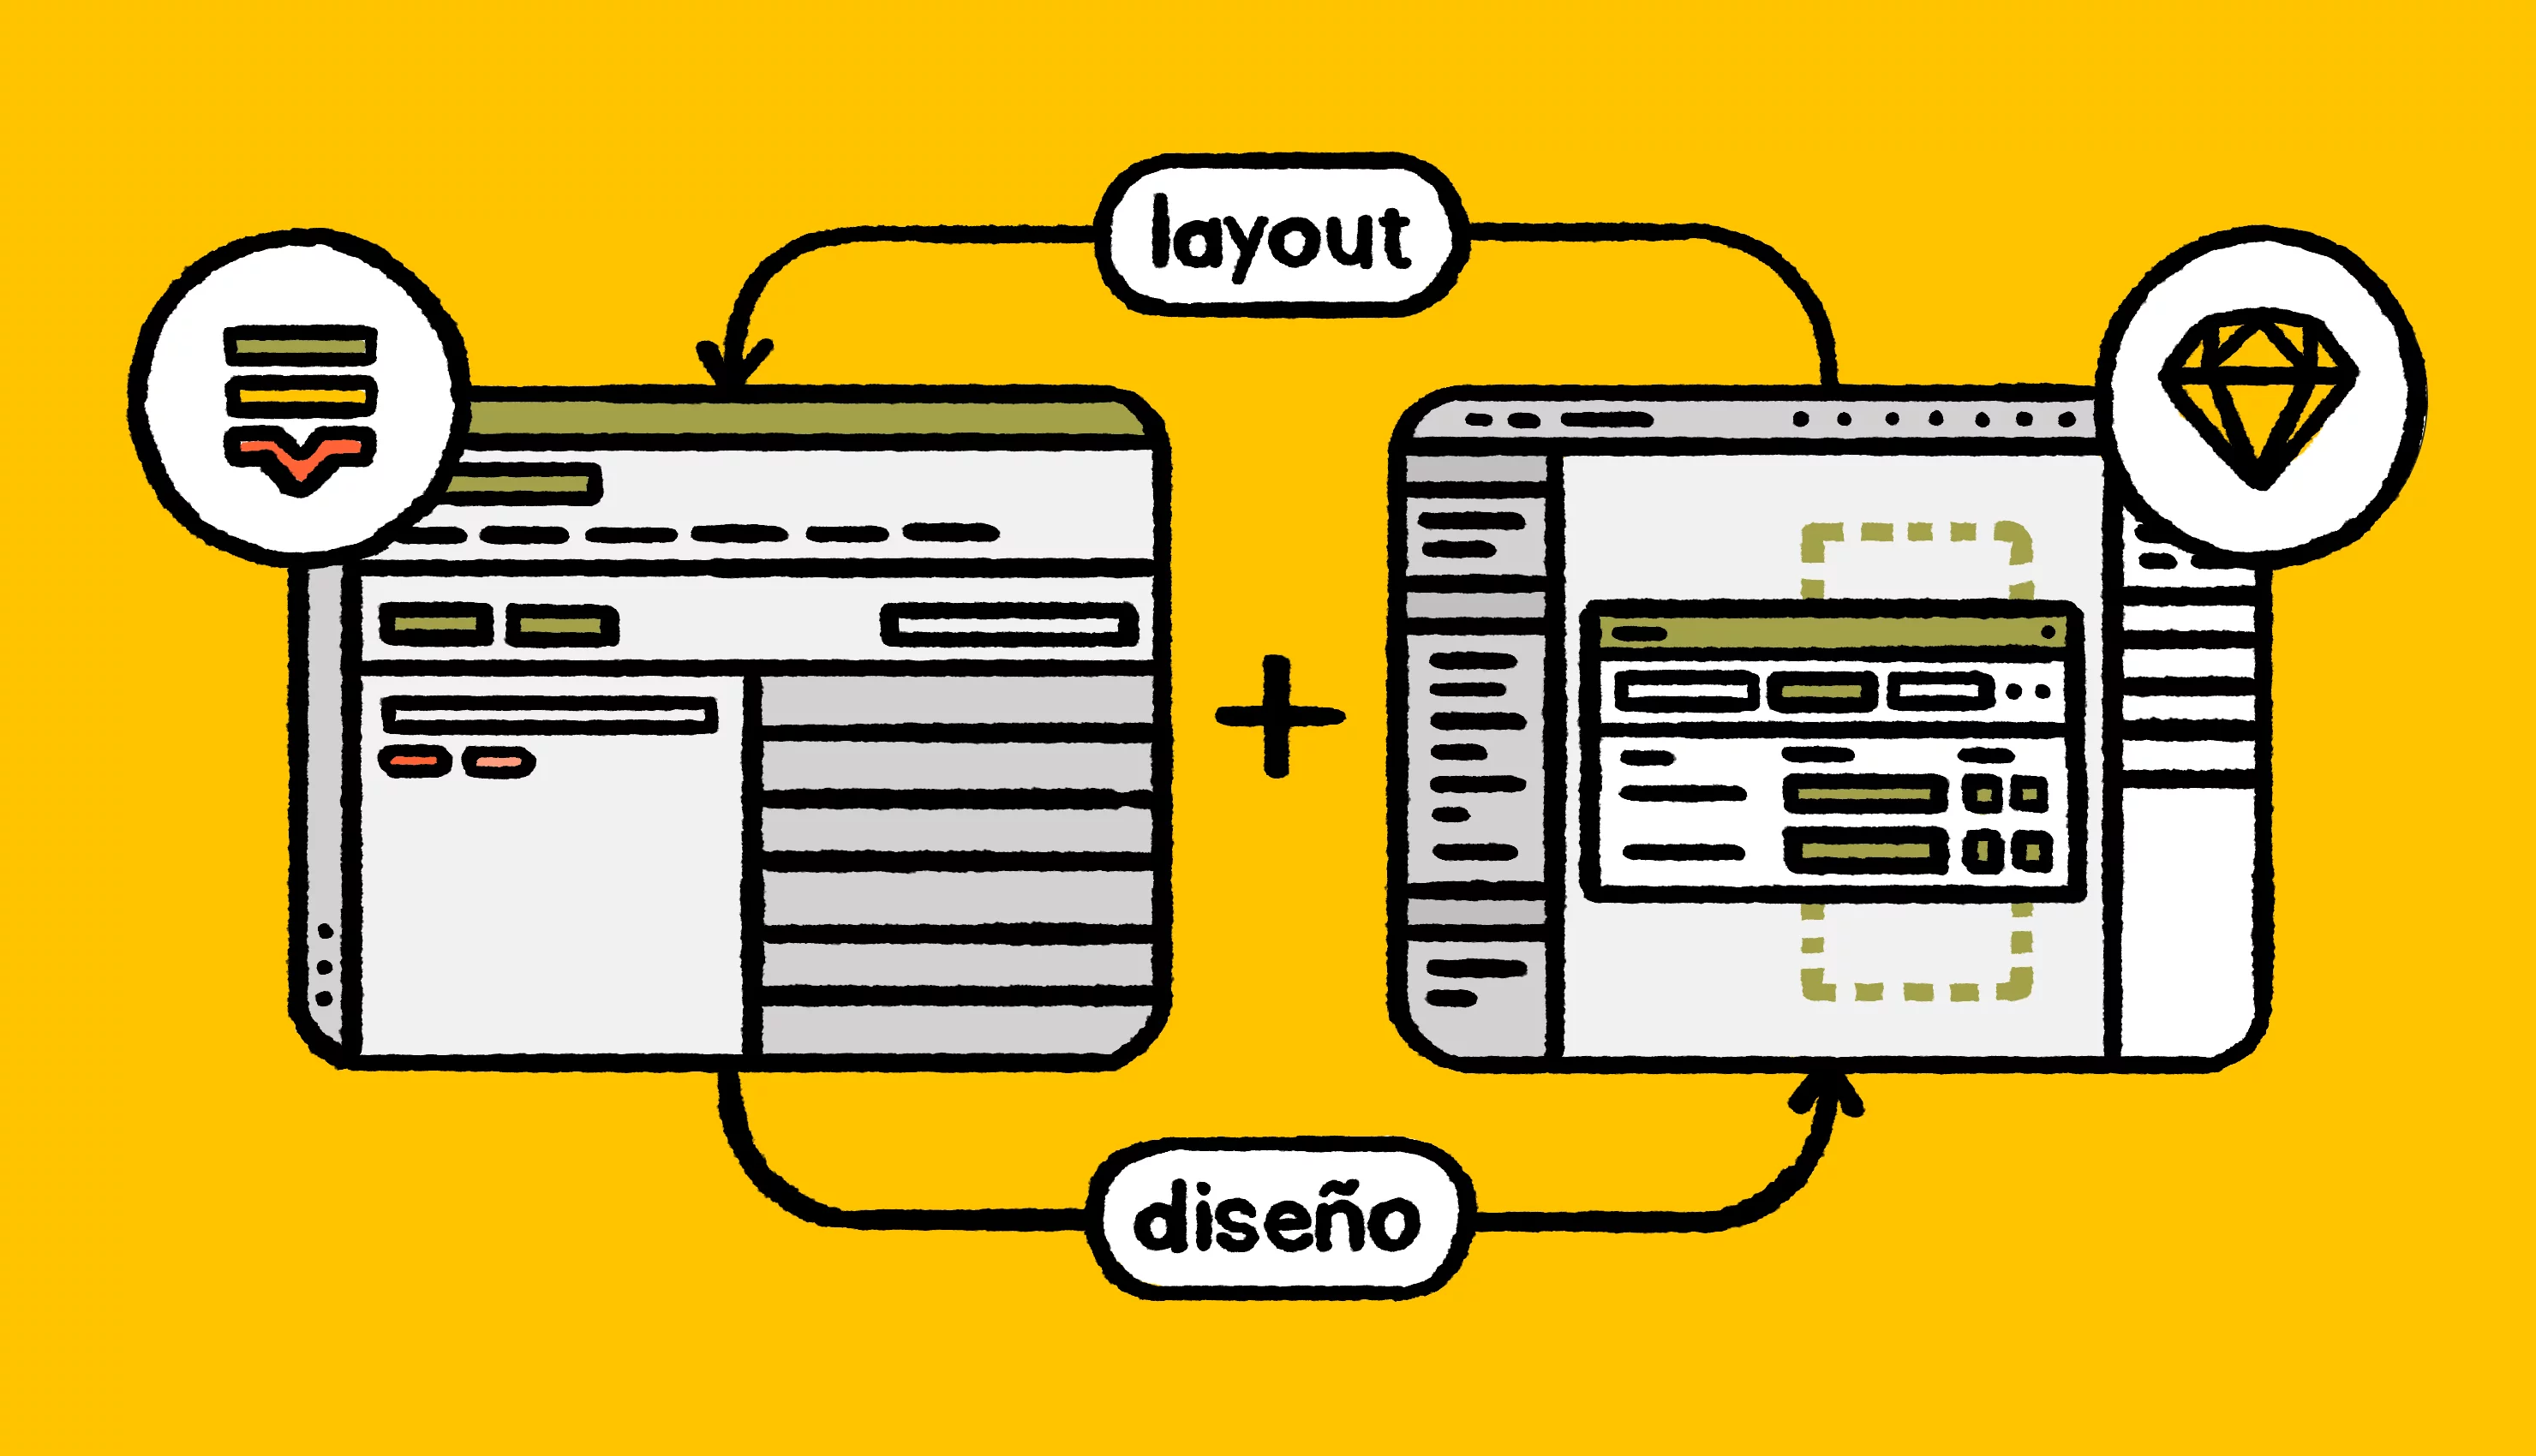
Here’s the same workflow with designers included from the beginning:

Adopting this new localization process doesn’t require a steep learning curve – connecting Sketch with Lokalise creates a bridge between designers and developers so that they can work on the localization process in tandem, like so:
Streamlining collaboration between the contributors in the localization flow ensures everyone is working from the same set of information and stays focused on the same priorities. Aside from ending the perpetual back and forth between designers, developers, managers, and translators, it allows product teams to collect valuable feedback from linguists before releasing the feature in multiple markets.
So how do you build out supporting localization workflows or naturally integrate new flows into your existing processes and management?
Step 3: Sync your TMS with Sketch
With Lokalise’s two-way integration that syncs content with code repositories, CMS, and design tools like Sketch, you can embed localization into the product development phase.https://www.youtube.com/watch?v=udoDZPAVgpw
By pushing and pulling keys from GitHub and Sketch, designers and developers can dovetail their efforts into a localization cycle that follows the continuous deployment of digital assets
How the Sketch plugin works
Here are the steps you need to take to get your first fully localized prototypes created ahead of time (once you sync Lokalise with Sketch, you are five minutes away from your first localized mockup):
The main steps of the workflow are:

Step 1: Select the text to be translated in the Sketch design.

Step 2: Choose keys to link so that all text blocks in the design will be uploaded to Lokalise and linked to translation keys (there is an option to enable this function automatically).

Step 3: Push selected text into Lokalise (you can automatically match text to existing translations, create missing keys, identify duplicate texts, or update screenshots).

Step 4: If the “Update screenshots” option is enabled, each translation key will automatically have a linked screenshot to give translators context in Lokalise.

Step 5: Once the translations are completed, simply pull all the keys from the Lokalise project, or specific text elements, back into your Sketch design.
And that’s it!
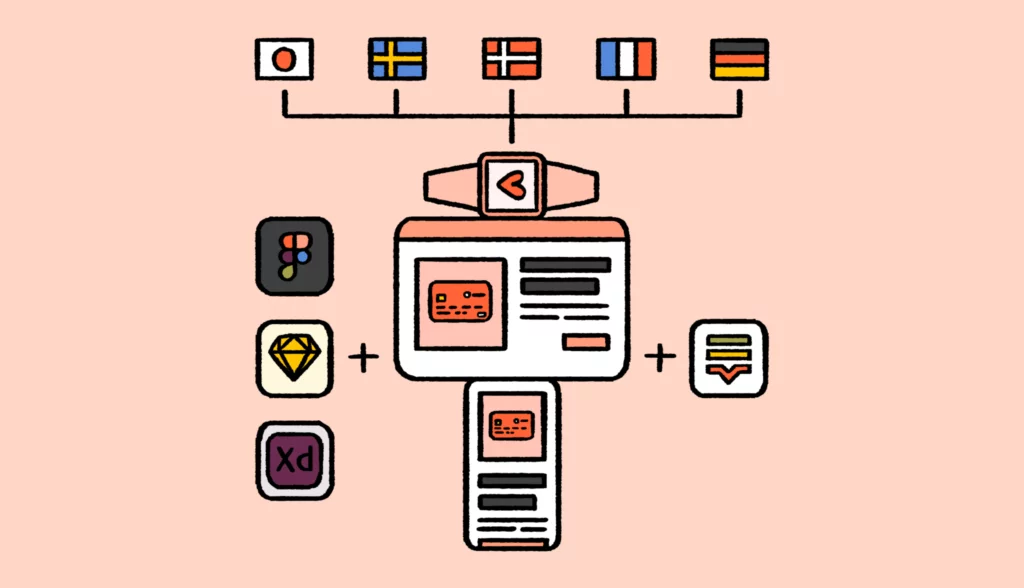
What your localized prototype will look like
Here’s what your screens will look like in Sketch when you pull French strings into your core (english) UI:
→
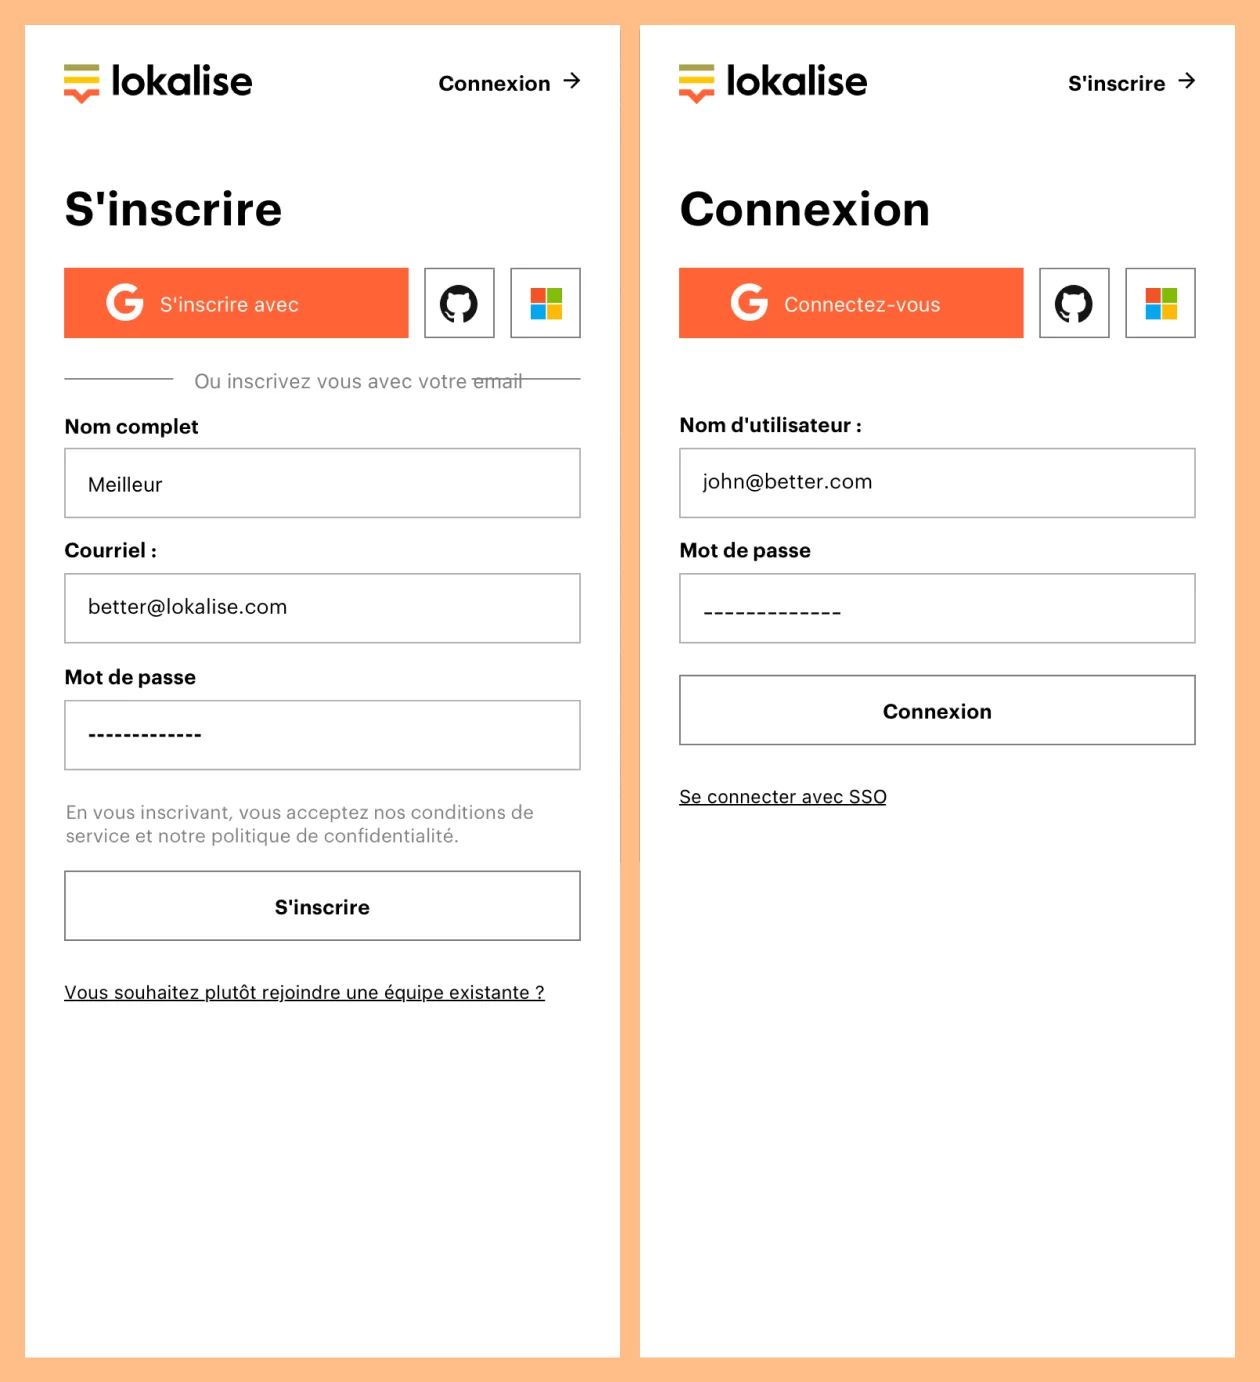
Notice how there are minor distortions in the design once the English strings are translated to French. By catching these design breaks early on you can make the necessary changes before the feature goes to development.
FAQs about setting up Sketch + Lokalise
1. Our stakeholders are resistant to change. How do I prepare for change management?
It’s important to scale things down. Start by putting together a proof of concept and focus on doing a pilot project. Improve what you already have; the small things help you build the foundations on which you’ll pull off the big ones.
2. Our designers are busy. Why should I add this to their workload?
Ask them if they’ve ever had to redesign the UI because of translations that didn’t fit in the design. If the answer is “yes,” you can imagine how this slows down the entire localization process. Then, ask them how they inserted those new translations into the designs. If the answer is “by copy-pasting,” you will quickly learn that they are wasting valuable time.
Now, ask your developers if they’ve ever had to rework the code to reflect the new design. If the answer is “yes,” it’s likely you’ve been forced to choose between delivering localized products that don’t look great or shipping late.
3. Our developers want to remain in control of key naming conventions. How do we make it easy for anyone to create keys correctly?
We often come across customers who would love to start using our design plugin but face problems with legacy key naming conventions.
With Lokalise, you have three options:
Automatically link text from your designs to legacy key names in Lokalise if the wording matches (or do it manually if the wording doesn’t match).
Do not automatically generate key names, meaning you or whoever owns the process can manually input the legacy key names in the plugin.
Use the merge functionality. By allowing for per-platform key names, you can add your locale files with legacy key naming conventions, merge them, and push them back into your design.
4. Should I use machine translation or human translation at the design stage?
If you want to get an idea of what a localized design will look like, use machine translation. It’s instant, virtually free, and gives you a clear idea of what the user experience will look like in other languages.
The complete guide to design-stage localization
We’ll show you how to build and implement a unified localization workflow that starts at the design stage.