Simplifying software localization for beginners can seem like Pandora’s box. A slew of issues could arise if localization is not setup properly. Certain colors, like red, might not be optimal in one country, while the number 4 could signify death in another. Some phrases could be offensive and a few may have geopolitical implications. These instances are merely a subset of overall software localization challenges. An unintentional oversight typically results in an unflattering flow that either makes or breaks a product’s launch in a global market.
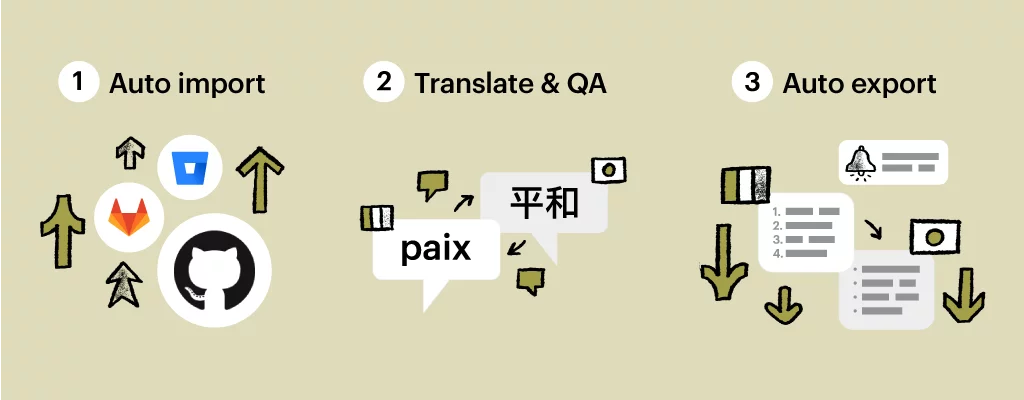
The path to achieving successful software localization can be summed in 3 critical steps.
Step 1: Source setup
90% of traditional software product teams build and launch with English as a base language. Source text is usually stored in version control repositories like Azure Repos, GitHub, GitLab or Bitbucket. Normally, product teams would then think about expanding to another market only after deployment. It seems like the right thing to do, albeit that a reactive workflow will bear l10n defects and l10n bug-related issues in the long run. The culprit: lack of an internationalization-based mindset.
Definition: Internationalization
The design and development of a product, app, or document content that allows easy localization for target audiences that vary in culture, region, or language. Also referred to as i18n.
The purpose of designing and developing a product with internationalization in mind is to free developers, and sometimes project managers, from future localization processes. It prevents copy-pasting values from code for translators to understand, and vice versa in copy-pasting translated content back into code. The worst task a project manager could ask of a developer is to flatten out software files into .xlsx, .csv, or even .docx file formats only to come back to request that .xlsx, .csv, and docx. files be converted back into software file formats.
Setting up source files with a translation management platform is key to a healthy software localization project. Below are three out-of-the-box options available for you to supply the source from a developer’s perspective.
How to connect GitHub
- Click on the … icon
- Select Integrations
- Choose GitHub > Connect
- Add access token from GitHub
- Click Connect
- Select files from source
- Press link
How to connect GitLab
- Click the … icon
- Select Integrations
- Choose GitLab > Connect
- Add access token from GitLab
- Click Connect
- Select files from source
- Press link
How to connect Bitbucket
- Click on the … icon
- Select Integrations
- Choose Bitbucket > Connect
- Add access token from Bitbucket
- Click Connect
- Select files from source
- Press link
“What if we are not using GitHub, GitLab, or Bitbucket?”
Another common development method is CLI v2, which is used by engineers who prefer using the tool. CLI tool is a wrapper for the API. Simply upload files with a single command line.
For example:
lokalise2 file download --token <token> --project-id <project_id> --format xml --dest PATH/TO/PROJECT/locale
Once the source repository is connected to a TMS (translation management system), the system should be able to automate the extraction of keys & values, while mapping out relevant language translations for each key. If your current TMS does not allow this, perhaps it is time to consider a more modern and developer-friendly TMS.
In lieu of pushing the file changes to and from systems, it is possible to set up an integration within Lokalise. This would automatically fetch the files as soon as a developer pushes the changes to the repository. If automating localization tasks is a priority, you should consider a multiplatform translation system. This means that you can store iOS, Android, Web, or any other strings regardless of whether each string originally exists in the different files and formats.
Consequently, uploading all files from different systems and formats will enforce one system of truth that is easy to manage, translate, and QA.
Step 2: Perform translation
Software localization depends on the quality of translations and step 2 can be broken down by answering two simple questions:
- Do you have in-house translators?
- If not, are you looking for language service providers?
If the answer to question 2 is yes, I’ve prepared a short video on how to choose the right language service provider.
Every project is unique. Understanding the actual translation and reviewing processes depends on the complexities of each project. A robust TMS should offer the following options in order to complete a project within time, budget, and quality expectations.
If a company already has in-house translators, they can simply invite a third-party translation agency or freelance translators to the project. For full documentation, check out Nick’s article and instructional video here.
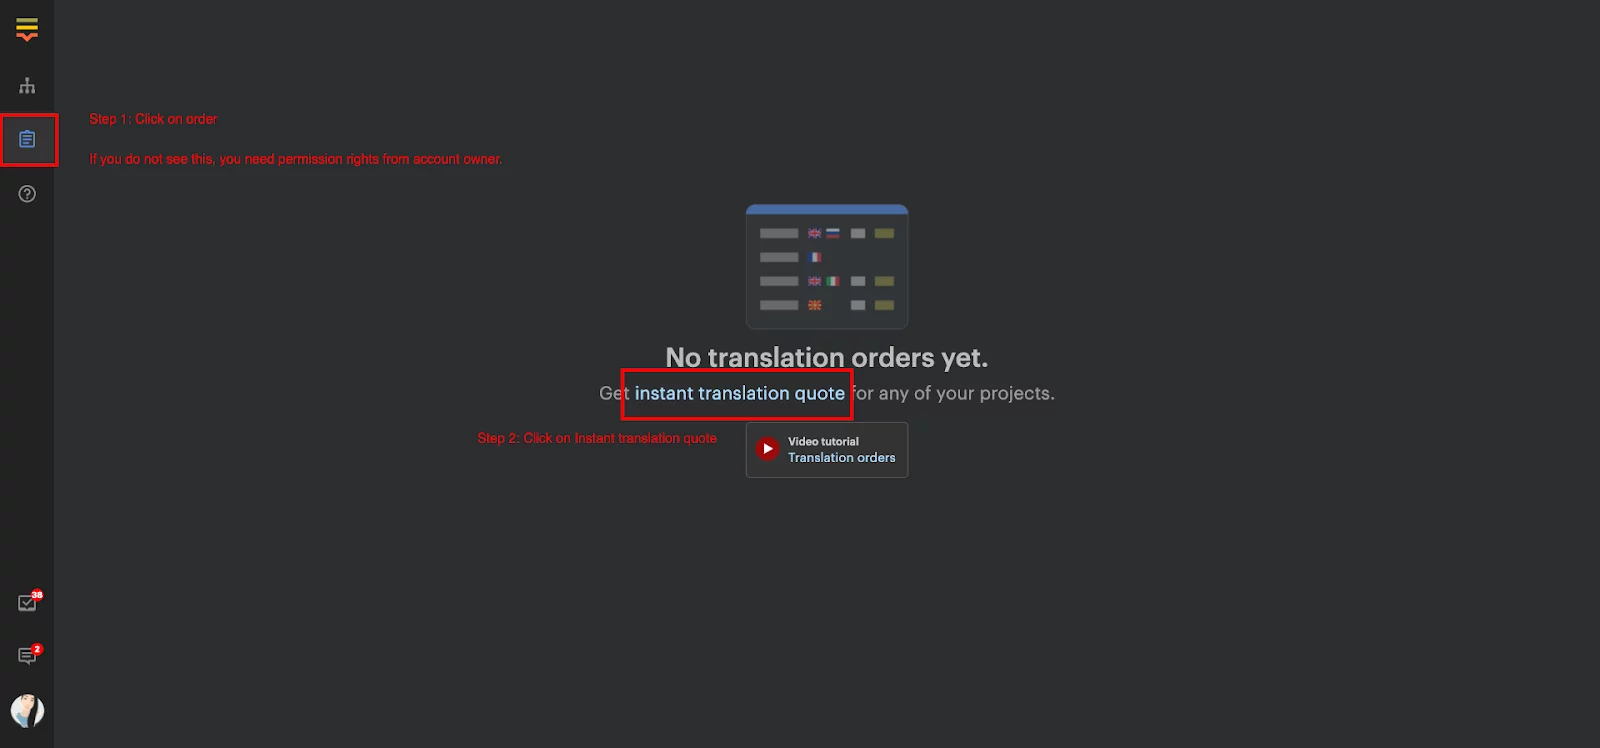
In the case that a company opts for simple translations, then Lokalise comes with integrated machine translation options such as, Google Translate, Microsoft Translate, and DeepL. In addition to machine translations, we also offer professional translation services. Translation rates start at 0.07 USD/word. If you’d like to compare different translation services, simply click on order and complete the following fields to receive a dynamic real-time quote that comes with an estimated completion time.
Some companies may have complex projects that require translation certifications for a specific industry or language subject-matter expertise. In this case, Lokalise will provide an introduction to one of our partners like Acclaro or RWS.
Bottom line, in addition to performing translations within a powerful TMS, your company should also qualify and evaluate add-on translation services through Lokalise’s Orders page. Otherwise, they can request an introduction to a reputable language service partner.
Step 3: Deliver localized content
Translated content is the result of the transformation of text from one language to another. A layer above that is localized content where an entire software product, along with its content, is transformed from one language to another. With the complete localization of a project, a software project is transformed both on a linguistic and cultural level. Cultural adaptation tackles technical obstacles, such as the ability to remove the number 4 (which connotes death in Japan) from text and replace it with a bullet point representation.
Roll call… What have we discussed so far?
- Step 1: Setup source with CLI v2/API or GitHub/GitLab/Bitbucket integration – CHECK
- Step 2: Perform translation w/ QA through machine translation, service providers, or hiring a language service provider – CHECK
- Step 3: Delivery of translated content via webhooks/API/notifications…
Once the translation and QA tasks are complete, we can use Webhooks or API to automatically deliver translations to the source code.
Automating typical software localization tasks
These include the following types of notifications:
Linguists will be notified whenever new/modified strings require translation if a key is:
- added, then the system will notify the translator via email notification (or Slack Integration)
- modified, then the system will notify the translator via email or slack notification
- translated, then the system will notify the reviewer to verify at linguistic level
- reviewed at linguistic level, then the system will notify the designer to QA at design level
- verified at design level, then the system will notify the developer to QA at code level
Once translation & QA are completed, automate the pushing of completed key strings back to the developer’s repo
If all levels of QA are finished, then auto pull the completed key strings back to Git with webhooks/API .
As mentioned above, Slack is another popular way to align all of the software localization project’s stakeholders. To integrate notifications via Slack, follow these steps:
- Navigate to More > Integrations
- Find Slack and click Connect
- Press the Connect button
- Grant the application permissions to access your workspace. Please note that you can choose a different workspace using the dropdown in the upper-right corner of the page
- Next, choose a channel where messages will be posted
- Click Allow to grant the necessary permissions
- Select one or more events that require notifications
- Press Save changes. The Slack integration is up and running! You should also see this message: “<Username> added an integration to this channel: Lokalise webhooks” in the selected Slack channel
- To add another Slack integration with different options, click Add another handler
Software localization does not have to be Pandora’s box.
As a matter of fact, if the 3 steps are deployed correctly, your company can enjoy the following advantages:
- Eliminate errors and reduce l10n defects/bugs at staging level
- Remove the energy it takes to inform linguists of which keys were recently added/modified
- Accelerate code to delivery when entering new markets
- Tailor & automate as many routine tasks as possible
If you are interested in creating a free sandbox, I’m happy to walk you through our platform, simply book a call with me here. Cheers to global growth!


