Localization is essential when building user-friendly ASP.NET Core applications for different languages and regions. It allows your app to display text, dates, numbers, and other content based on the user’s culture.
As part of software localization, this process ensures that your application feels natural to users in different locales, not just translated.
In this guide, you’ll learn how ASP.NET Core localization works in practice and how to implement it step by step.
We’ll cover:
ASP.NET Core i18n/l10n (internationalization and localization)
Adding language resources and following localization conventions
Localizing text with IStringLocalizer
Translating views with IViewLocalizer
Detecting user culture using IRequestCultureProvider
Open Visual Studio and create a new project with the following configuration:
Template: ASP.NET Core Empty (minimal hosting model)
Name: ASPLokaliseDemo
Target Framework: .NET 8.0 (LTS)
Note: Tick the "Place solution and project in the same directory" option.
Setting up services and building the application
Next, open the Program.cs file and add the following code::
var builder = WebApplication.CreateBuilder(args);// Add services to the container.builder.Services.AddControllersWithViews();builder.Services.AddRazorPages();var app = builder.Build();
Key points:
WebApplication.CreateBuilder(args) creates the builder used to configure services and the app.
AddControllersWithViews() registers MVC services.
AddRazorPages() registers Razor Pages services.
builder.Build() creates the application instance.
Configuring the HTTP request pipeline
Now configure the HTTP request pipeline in the same file:
// Configure the HTTP request pipeline.if (app.Environment.IsDevelopment()){ app.UseDeveloperExceptionPage();}app.UseHttpsRedirection();app.UseStaticFiles();
Key points:
UseDeveloperExceptionPage() shows detailed error information during development.
UseHttpsRedirection() redirects HTTP requests to HTTPS.
UseStaticFiles() enables static files such as CSS, JavaScript, and images.
Adding routing and endpoint mapping
Finally, add routing and endpoint mapping in the same file:
UseRouting() matches incoming requests to endpoints.
UseAuthorization() applies authorization rules.
MapControllerRoute() sets the default MVC route.
MapRazorPages() maps Razor Pages endpoints.
app.Run() starts the application.
Creating the Home Controller
To set up a basic controller:
Create a Controllers directory in the project root (if it doesn’t exist).
Add the HomeController:
In Visual Studio, right-click the Controllers directory.
Select Add > New Item...
Choose MVC Controller - Empty and name it HomeController.cs.
Update HomeController.cs:
Visual Studio will generate a basic HomeController class with an Index method. This method will be the default action when users navigate to the root URL.
Here’s what the HomeController.cs should look like:
using Microsoft.AspNetCore.Mvc;namespace ASPLokaliseDemo.Controllers{ public class HomeController : Controller { public IActionResult Index() { return View(); } }}
The HomeController matches the default route configured earlier in Program.cs. When a user opens the root URL (for example, https://localhost:5001/), the request is routed to the Index action.
Creating the Razor view for the Index action
With your HomeController set up, it’s time to create the view for the Index action:
Create a Views directory in the project root (if it doesn’t exist).
Add a Home folder inside the Views directory.
Add the Index.cshtml file:
Right-click the Home folder.
Select Add > New Item...
Choose Razor View and name it Index.cshtml.
Fill in Index.cshtml with the following code:
<!DOCTYPE html><html lang="en"><head> <meta charset="utf-8" /> <title>ASP.NET localization demo | Lokalise</title></head><body> <p>Ready to get localized!</p></body></html>
Razor views generate HTML on the server. The Index.cshtml file corresponds to the Index action in HomeController. By convention, ASP.NET Core looks for this view in the Views/Home/ folder when the action is executed.
At this point, the project is ready for adding ASP.NET Core localization services and middleware.
Resource (RESX) files for ASP.NET localization
Before adding localization logic, you need to define language resources in your ASP.NET Core project. Localized strings are stored in .resx files and are resolved at runtime based on the current culture.
How ASP.NET Core organizes resource files
ASP.NET Core uses .resx files to store localized strings for controllers, services, and views. Each file contains key-value pairs for a specific language.
These files are mapped to classes or views using naming conventions.
Resource file naming conventions
Resource file names depend on the class namespace:
Matching namespace: If the namespace matches the project assembly, name the file after the class.
Example: For ASPNETCoreL10n.HomeController, name the resource file HomeController.resx.
Non-matching namespace: If the namespace differs, use the full type name.
Example: For ASPNETCoreUtils.StringFormatter, name the resource file ASPNETCoreUtils.StringFormatter.resx.
Resource files can be placed:
next to the class/view they localize
or inside a shared Resources folder
Supporting multiple locales
To support multiple languages, create separate .resx files per culture:
To add English and French localization for HomeController:
Create the Resources directory:
In the root of your project, create a new folder named Resources.
Add resource files:
Inside the Resources folder, add two resource files named Controllers.HomeController.en-US.resx and Controllers.HomeController.fr-FR.resx
Adding keys to resource files:
Open one of the resource files, like Controllers.HomeController.en-US.resx, in Visual Studio.
Click on the “plus” icon (or “Add Resource” if you see that option).
A dialog will appear, prompting you to enter the details of the new resource.
Name: Enter welcome . This is the key that you’ll use in your code to reference this resource.
Value: Enter Welcome!. This is the English text that will be displayed to users when the welcome key is accessed.
Click “Add” or “OK” to save the resource.
Handling multiple locales:
After adding the key to one resource file, repeat the process for the other file (Controllers.HomeController.fr-FR.resx).
In the French resource file, set the Value for the welcome key to Bienvenue!.
Fallback resource file:
Once you add resources, you might notice that a default Controllers.HomeController.resx file is created in the same directory. This file acts as a fallback for when a specific localization isn’t available. Open it, and you should see the welcome key listed. However, this file typically remains empty or contains neutral/default values.
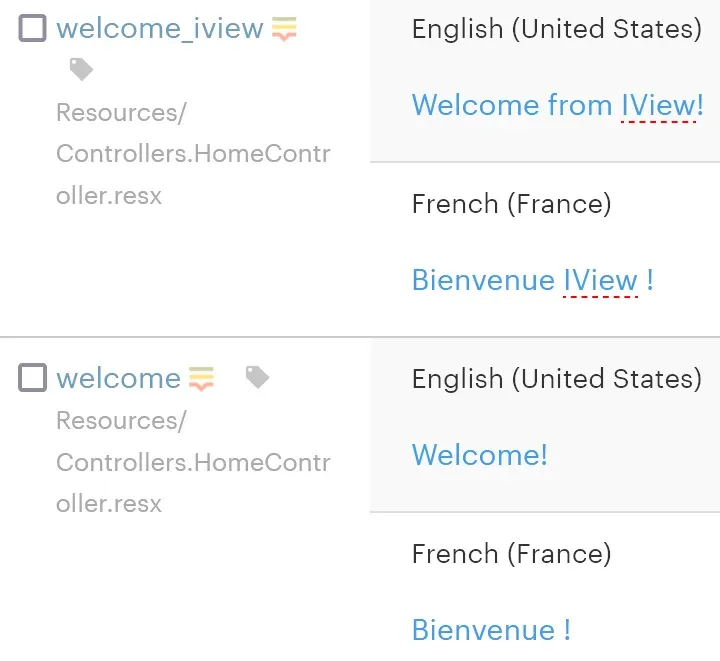
Review the resource table:
In each resource file, you’ll see a table where your welcome key is listed along with its corresponding values. For the en-US file, you’ll have Welcome!, and for the fr-FR file, you’ll have Bienvenue!. These values will be used based on the user’s locale.
By following these steps, you've successfully set up localized resources for your HomeController in English and French!
Implementing ASP.NET core localization with IStringLocalizer
In ASP.NET Core, IStringLocalizer is the recommended way to access localized strings. It integrates with the framework and lets you retrieve translations without hardcoding them.
Setting up localization in the application
First, configure localization in your Program.cs file:
SupportedUICultures Controls UI translations (text from .resx files)
If these are not configured, the app won’t know which cultures it can handle.
Configuring request localization middleware
Now update Program.cs to enable culture switching:
using System.Globalization;var builder = WebApplication.CreateBuilder(args);builder.Services.AddControllersWithViews();builder.Services.AddRazorPages();builder.Services.AddLocalization(options =>{ options.ResourcesPath = "Resources";});var app = builder.Build();// Define supported culturesvar supportedCultures = new[]{ new CultureInfo("en-US"), new CultureInfo("fr-FR")};// Configure localization optionsvar localizationOptions = new RequestLocalizationOptions{ DefaultRequestCulture = new RequestCulture("en-US"), SupportedCultures = supportedCultures, SupportedUICultures = supportedCultures};// Enable localization middlewareapp.UseRequestLocalization(localizationOptions);app.UseHttpsRedirection();app.UseStaticFiles();app.UseRouting();app.UseAuthorization();app.MapControllerRoute( name: "default", pattern: "{controller=Home}/{action=Index}/{id?}");app.MapRazorPages();app.Run();
How it works
SupportedCultures defines which cultures affect formatting.
SupportedUICultures defines which cultures are used for UI translations.
DefaultRequestCulture sets the fallback culture (en-US in this example).
UseRequestLocalization() applies the correct culture to each request.
By default, ASP.NET Core will detect the user’s culture from the browser’s Accept-Language header, unless you override it with other providers (such as query string or cookies).
Enhancing locale switching with RequestCultureProviders
To improve how your app detects and switches cultures, you can configure multiple RequestCultureProviders. Each provider checks a different source (query string, cookies, or browser settings).
Update your localization setup:
var supportedCultures = new[]{ new CultureInfo("en-US"), new CultureInfo("fr-FR")};var localizationOptions = new RequestLocalizationOptions{ DefaultRequestCulture = new RequestCulture("en-US"), SupportedCultures = supportedCultures, SupportedUICultures = supportedCultures, RequestCultureProviders = [ new QueryStringRequestCultureProvider(), new CookieRequestCultureProvider(), new AcceptLanguageHeaderRequestCultureProvider() ]};app.UseRequestLocalization(localizationOptions);
You can now test culture switching directly in the URL: https://localhost:5001/?culture=fr-FR.
How RequestCultureProviders work
Each provider tries to determine the culture for the current request:
QueryStringRequestCultureProvider Reads culture from the query string. Example: ?culture=fr-FR&ui-culture=fr-FR
CookieRequestCultureProvider Reads culture from a cookie. Useful for persisting user preferences across sessions.
AcceptLanguageHeaderRequestCultureProvider Uses the browser’s Accept-Language header. This reflects the user’s browser language settings.
Provider order matters
Providers are evaluated in order. ASP.NET Core uses the first one that returns a valid culture.
A typical order:
Query string — explicit user choice
Cookie — stored preference
Browser header — fallback
Date and time localization
After setting up text localization, you also need to format dates and times based on the user’s culture. Different regions use different formats, and ASP.NET Core automatically handles this using the current culture.
Displaying a localized date on the home page
To demonstrate, let's add the current date to the home page and ensure it's localized based on the selected culture.
In your HomeController, pass the current date and time to the view. ASP.NET Core will automatically format this date according to the current culture.
If your application serves users in different time zones, you may want to convert the date and time to the user's local time zone before displaying it:
var userTimeZone = TimeZoneInfo.FindSystemTimeZoneById("Central European Standard Time");var localTime = TimeZoneInfo.ConvertTime(DateTime.Now, userTimeZone);ViewData["currentDate"] = localTime.ToString("F", CultureInfo.CurrentCulture);
"F" produces a full date and time string, including both date and time.
Pluralization
When localizing content, you need to handle plural forms — words that change depending on quantity. Different languages have different pluralization rules, so this is important for natural-looking UI text.
To handle pluralization, we’ll add entries for both singular and plural forms in our resource files. First, open the HomeController.en-US.resx file using the XML editor, and add the following entries:
These entries define the messages for singular (AppleCount) and plural (AppleCountPlural) forms. The {0} placeholder will be replaced by the actual number at runtime.
Do the same for the French resource file (HomeController.fr-FR.resx):
While IStringLocalizer is used in controllers and services, IViewLocalizer is designed specifically for Razor views. It lets you localize UI text directly inside views without moving everything into controllers.
IViewLocalizer automatically maps to resource files based on the view’s path, which keeps view-specific translations organized.
Next, you need to ensure that your ASP.NET Core application is configured to support view localization. Open the Program.cs file and add the necessary services:
var builder = WebApplication.CreateBuilder(args);builder.Services .AddControllersWithViews() .AddViewLocalization();builder.Services.AddRazorPages();builder.Services.AddLocalization(options =>{ options.ResourcesPath = "Resources";});
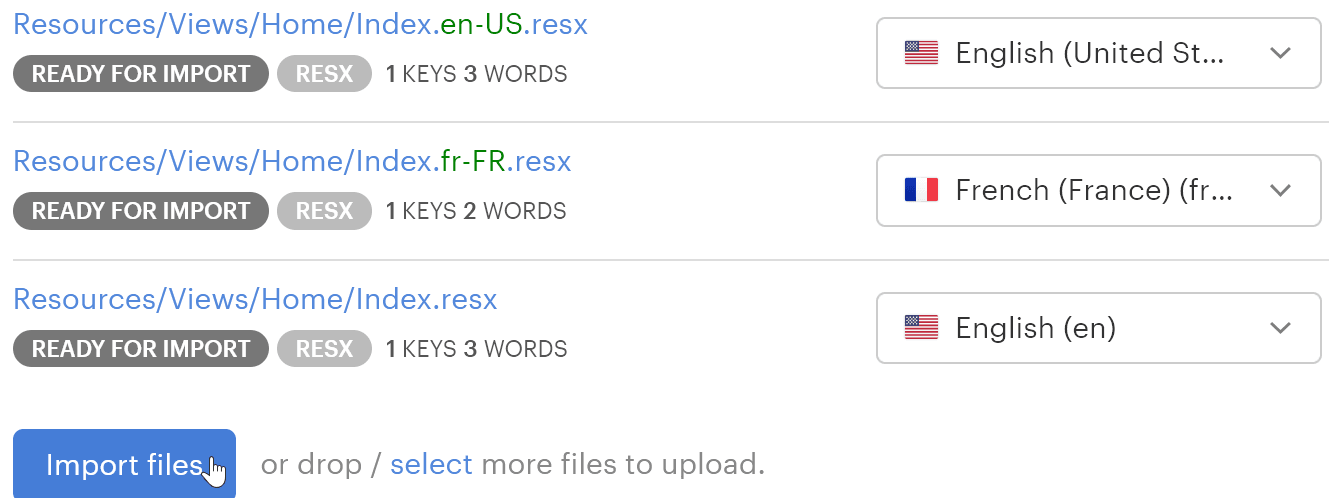
For a view like Views/Home/Index.cshtml, create matching resource files:
Resources/Views/Home/Index.en-US.resx
Resources/Views/Home/Index.fr-FR.resx
Add keys (for example, welcome_iview) just like you did for controllers.
ASP.NET Core will automatically resolve these based on:
view path (Views/Home/Index)
current culture
When to Use IViewLocalizer vs. IStringLocalizer
Choose the localizer based on where the text is used:
IViewLocalizer Use for content that exists only in a specific view (e.g., page titles, unique UI text)
IStringLocalizer Use for shared or reusable content (e.g., buttons, validation messages, common UI text)
Example:
"Submit" used across multiple pages → use IStringLocalizer
A unique header on the homepage → use IViewLocalizer
Localizing HTML content with IHtmlLocalizer
When your localized strings contain HTML (for example, <strong> or <a> tags), you should use IHtmlLocalizer.
IHtmlLocalizer<T> works similarly to IStringLocalizer, but with one key difference:
it does not encode the HTML in the resource string
it does encode any arguments passed into the string
This allows you to safely include HTML markup in your translations without breaking rendering or introducing security issues.
Using IHtmlLocalizer in a controller
You can inject IHtmlLocalizer just like IStringLocalizer:
using Microsoft.AspNetCore.Mvc;using Microsoft.AspNetCore.Mvc.Localization;public class HomeController(IHtmlLocalizer<HomeController> htmlLocalizer) : Controller{ public IActionResult Index() { ViewData["htmlMessage"] = htmlLocalizer["welcome_html", "<b>User</b>"]; return View(); }}
The HTML from the resource file will be rendered correctly in the browser.
Avoid putting user-generated HTML into resource files. IHtmlLocalizer is safe for static markup, but user input should always be sanitized separately.
IHtmlLocalizer vs IStringLocalizer vs IViewLocalizer
IHtmlLocalizer Use when your resource strings contain HTML markup
IStringLocalizer Use for plain text (no HTML)
IViewLocalizer Use inside Razor views for view-specific content
Localizing validation error messages with DataAnnotations
ASP.NET Core localization also supports validation messages from DataAnnotations. This is useful when you want form errors like “The Name field is required” to appear in the user’s language.
To enable this, register DataAnnotations localization in Program.cs:
This allows ASP.NET Core to localize validation messages using .resx resource files.
Example ViewModel
Create a simple view model:
using System.ComponentModel.DataAnnotations;namespace ASPLokaliseDemo.Models{ public class ContactViewModel { [Required( ErrorMessageResourceName = "NameRequired", ErrorMessageResourceType = typeof(ContactViewModelResource) )] public string Name { get; set; } = string.Empty; }}
In this example, the validation message is taken from a resource instead of being hardcoded in the attribute.
Resource files for validation messages
Create resource files for the view model, for example:
Resources/Models.ContactViewModelResource.en-US.resx Name is required.
Resources/Models.ContactViewModelResource.fr-FR.resx Le nom est obligatoire.
You also need a marker class so DataAnnotations can resolve the resource type:
namespace ASPLokaliseDemo.Models{ public class ContactViewModelResource { }}
How it works
When validation fails, ASP.NET Core reads the message from the matching resource file based on the current culture.
For example:
en-US → Name is required.
fr-FR → Le nom est obligatoire.
This keeps validation messages consistent with the rest of your ASP.NET Core localization setup.
DataAnnotations localization vs shared strings
Use DataAnnotations localization when the message belongs to a model property or form validation rule.
Use IStringLocalizer when you need localized strings in controllers, services, or shared UI text.
Using a SharedResource for common localization strings
In larger applications, you often have strings that are reused across multiple controllers, views, or services (for example, “Submit”, “Cancel”, or common messages).
Instead of duplicating these in multiple resource files, you can use a shared resource.
Creating a SharedResource class
Create an empty marker class:
namespace ASPLokaliseDemo.Localization{ public class SharedResource { }}
public class HomeController(IStringLocalizer<SharedResource> localizer) : Controller{ public IActionResult Index() { ViewData["submit"] = localizer["Submit"]; return View(); }}
When to use SharedResource
Use a shared resource when:
the same string appears in multiple places
the string is not tied to a specific controller or view
you want to centralize common UI text
Shared resources are optional. For small projects, per-controller or per-view resource files are often enough.
However, in larger applications, this pattern helps avoid duplication and keeps translations consistent.
How Lokalise simplifies ASP.NET Core localization
In this section, let’s take a quick look at Lokalise, a translation management system that helps you handle ASP.NET Core localization more efficiently.
Lokalise provides a range of features that simplify the localization workflow, including integrations with tools like GitHub, Jira, Figma, Trello, and AWS S3. It also supports collaborative translations, offers built-in quality assurance checks, and gives you a central dashboard to manage all your translations.
With these features, it becomes much easier to scale your ASP.NET Core application across multiple languages and regions.
Create a new Web or mobile project using the setup wizard.
Make sure to select the correct base and target languages. For example, if your app uses en-US as the default culture and supports fr-FR, choose the same languages in Lokalise. You can always adjust them later in the UI.
Uploading resource files
Once your project is created:
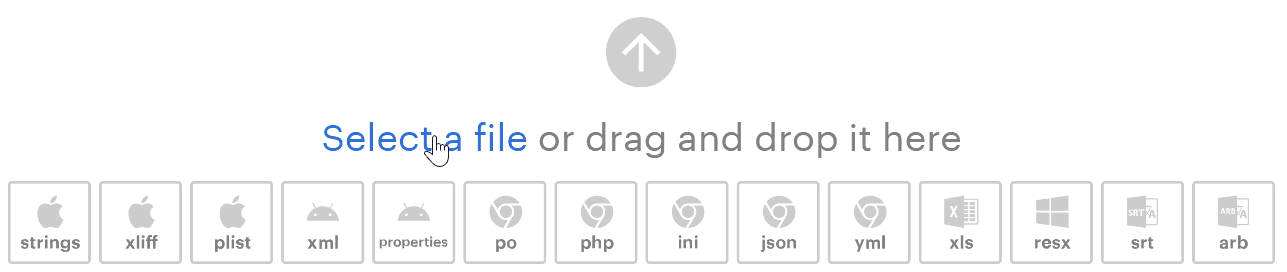
Open your project and go to the Upload page
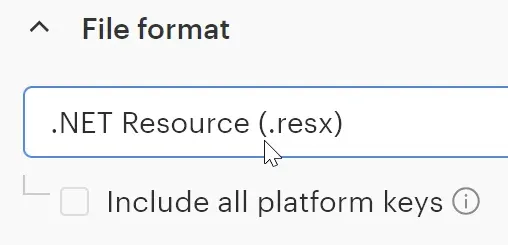
Select your .resx files from the ASP.NET Core project
Alternatively, you can drag and drop the entire Resources folder.
Download the translated files and add them back to your project
That’s it! For more detailed guidance, check the Lokalise Getting started documentation. It includes step-by-step guides and best practices for managing localization workflows.
Conclusion
ASP.NET Core localization makes it straightforward to build applications that support multiple languages and cultures. With built-in tools like IStringLocalizer, IViewLocalizer, and DataAnnotations localization, you can manage translations, formatting, and validation messages in a consistent way.
By adding proper culture handling, resource files, and patterns like shared resources, you can scale your localization setup as your application grows.
Tools like Lokalise can further simplify the workflow by helping you manage translations, collaborate with your team, and keep resource files in sync.
Whether you're working with simple UI text or more advanced scenarios like pluralization and culture-specific formatting, ASP.NET Core provides a flexible foundation for building localized applications.
Frequently asked questions about ASP.NET Core localization
What is ASP.NET Core localization?
ASP.NET Core localization is the process of adapting your app to different languages and regions. It lets you display text, dates, numbers, and other content based on the user’s culture. Typically, this is done using .resx resource files and services like IStringLocalizer, which return the correct translations at runtime.
What is the difference between IStringLocalizer and IViewLocalizer in ASP.NET Core?
IStringLocalizer is used to access localized strings in controllers, services, and shared logic. It’s flexible and works across the whole app.
IViewLocalizer, on the other hand, is designed specifically for Razor views. It automatically maps to resource files based on the view’s location, so translations stay close to the UI they belong to.
How does ASP.NET Core detect the user’s preferred language?
ASP.NET Core uses RequestCultureProviders to figure out the culture for each request. By default, it checks:
Query string (for example, ?culture=fr-FR)
Cookie (.AspNetCore.Culture)
Browser Accept-Language header
It goes in that order, and the first valid match is used.
What is a .resx file in ASP.NET Core?
A .resx file is a resource file used to store localized strings as key-value pairs. Each language has its own file (for example, HomeController.fr-FR.resx).
At runtime, ASP.NET Core loads the correct file based on the current culture and returns the right values.
Can I use Lokalise to manage ASP.NET Core localization?
Yes. Lokalise works well with .resx files out of the box. You can upload your resource files, manage translations with your team or AI, and download updated files back into your project. This helps avoid manual editing and keeps everything in sync.
How do you localize validation messages in ASP.NET Core (DataAnnotations)?
You can localize validation messages by enabling DataAnnotations localization in your setup:
Then, instead of hardcoding error messages in attributes like [Required], you can use resource keys. ASP.NET Core will automatically resolve them using your .resx files based on the current culture.
What is IHtmlLocalizer in ASP.NET Core and when should you use it?
IHtmlLocalizer works like IStringLocalizer, but it’s designed for HTML content. It does not encode HTML in resource strings, which means you can safely include markup (like <strong> or <a>) inside translations.
Use it when:
your localized strings contain HTML
you want to avoid double-encoding issues in Razor views
For plain text, IStringLocalizer is still the better choice.
Ilya is the lead for content, documentation, and onboarding at Lokalise, where he focuses on helping engineering teams build reliable internationalization workflows. With a background at Microsoft and Cisco, he combines practical development experience with a deep understanding of global product delivery, localization systems, and developer education.
He specializes in i18n architectures across modern frameworks — including Vue, Angular, Rails, and custom localization pipelines — and has hands-on experience with Ruby, JavaScript, Python, Elixir, Go, Rust, and Solidity. His work often centers on improving translation workflows, automation, and cross-team collaboration between engineering, product, and localization teams.
Beyond his role at Lokalise, Ilya is an IT educator and author who publishes technical guides, best-practice breakdowns, and hands-on tutorials. He regularly contributes to open-source projects and maintains a long-standing passion for teaching, making complex internationalization topics accessible to developers of all backgrounds.
Outside of work, he keeps learning new technologies, writes educational content, stays active through sports, and plays music. His goal is simple: help developers ship globally-ready software without unnecessary complexity.
Build a smooth translation pipeline with Lokalise and Vercel
Internationalization can sometimes feel like a massive headache. Juggling multiple JSON files, keeping translations in sync, and redeploying every time you tweak a string… What if you could offload most of that grunt work to a modern toolchain and let your CI/CD do the heavy lifting? In this guide, we’ll wire up a Next.js 15 project hosted on Vercel. It will load translation files on demand f
Hands‑on guide to GitHub Actions for Lokalise translation sync: A deep dive
In this tutorial, we’ll set up GitHub Actions to manage translation files using Lokalise: no manual uploads or downloads, no reinventing a bicycle. Instead of relying on the Lokalise GitHub app, we’ll use open-source GitHub Actions. These let you push and pull translation files directly via the API in an automated way. You’ll learn how to: Push translation files from your repo to LokalisePull translated content back and open pull requests automaticallyWork w
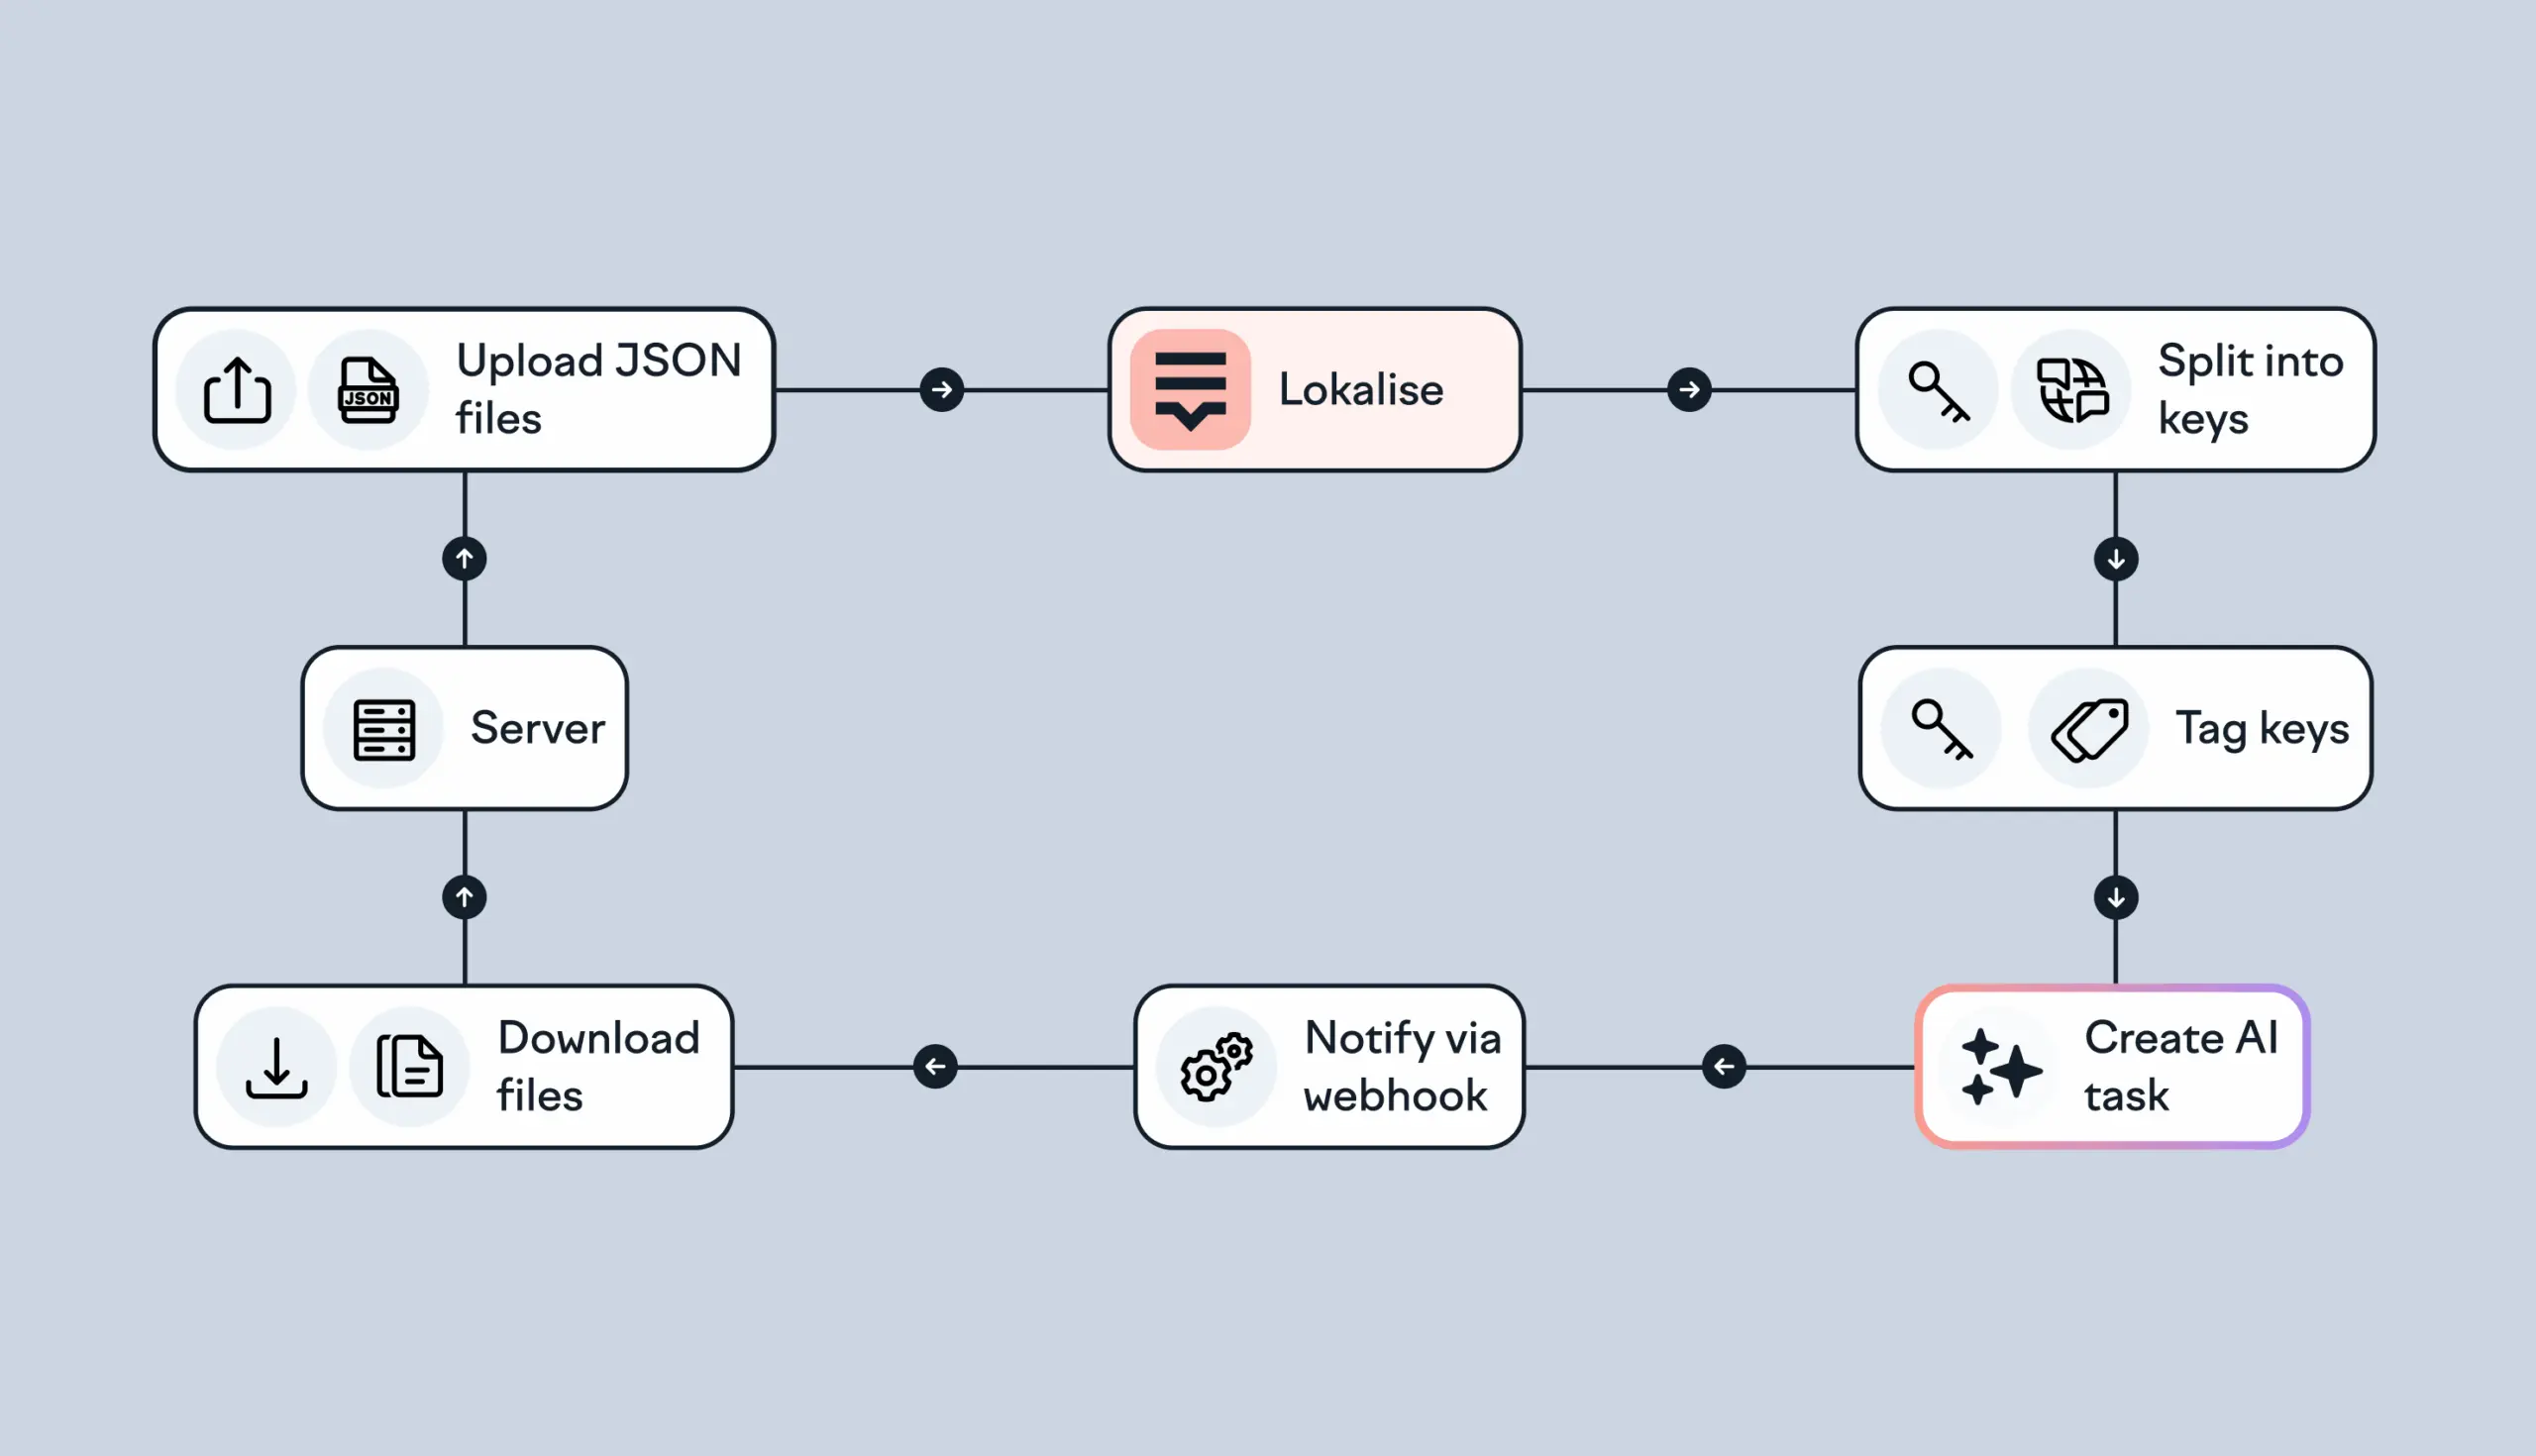
Building an AI-powered translation flow using Lokalise API and webhooks
Managing translations in a growing product can quickly become repetitive and error-prone, especially when dealing with frequent content updates or multiple languages. Lokalise helps automate this process, and with the right setup you can build a full AI-powered translation pipeline that runs with minimal manual input. In this guide, you’ll learn how to: Upload translation files to Lokalise automaticallyCreate AI-based translation tasksUse webhooks to downloa