Managing translations in a growing product can quickly become repetitive and error-prone, especially when dealing with frequent content updates or multiple languages. Lokalise helps automate this process, and with the right setup you can build a full AI-powered translation pipeline that runs with minimal manual input.
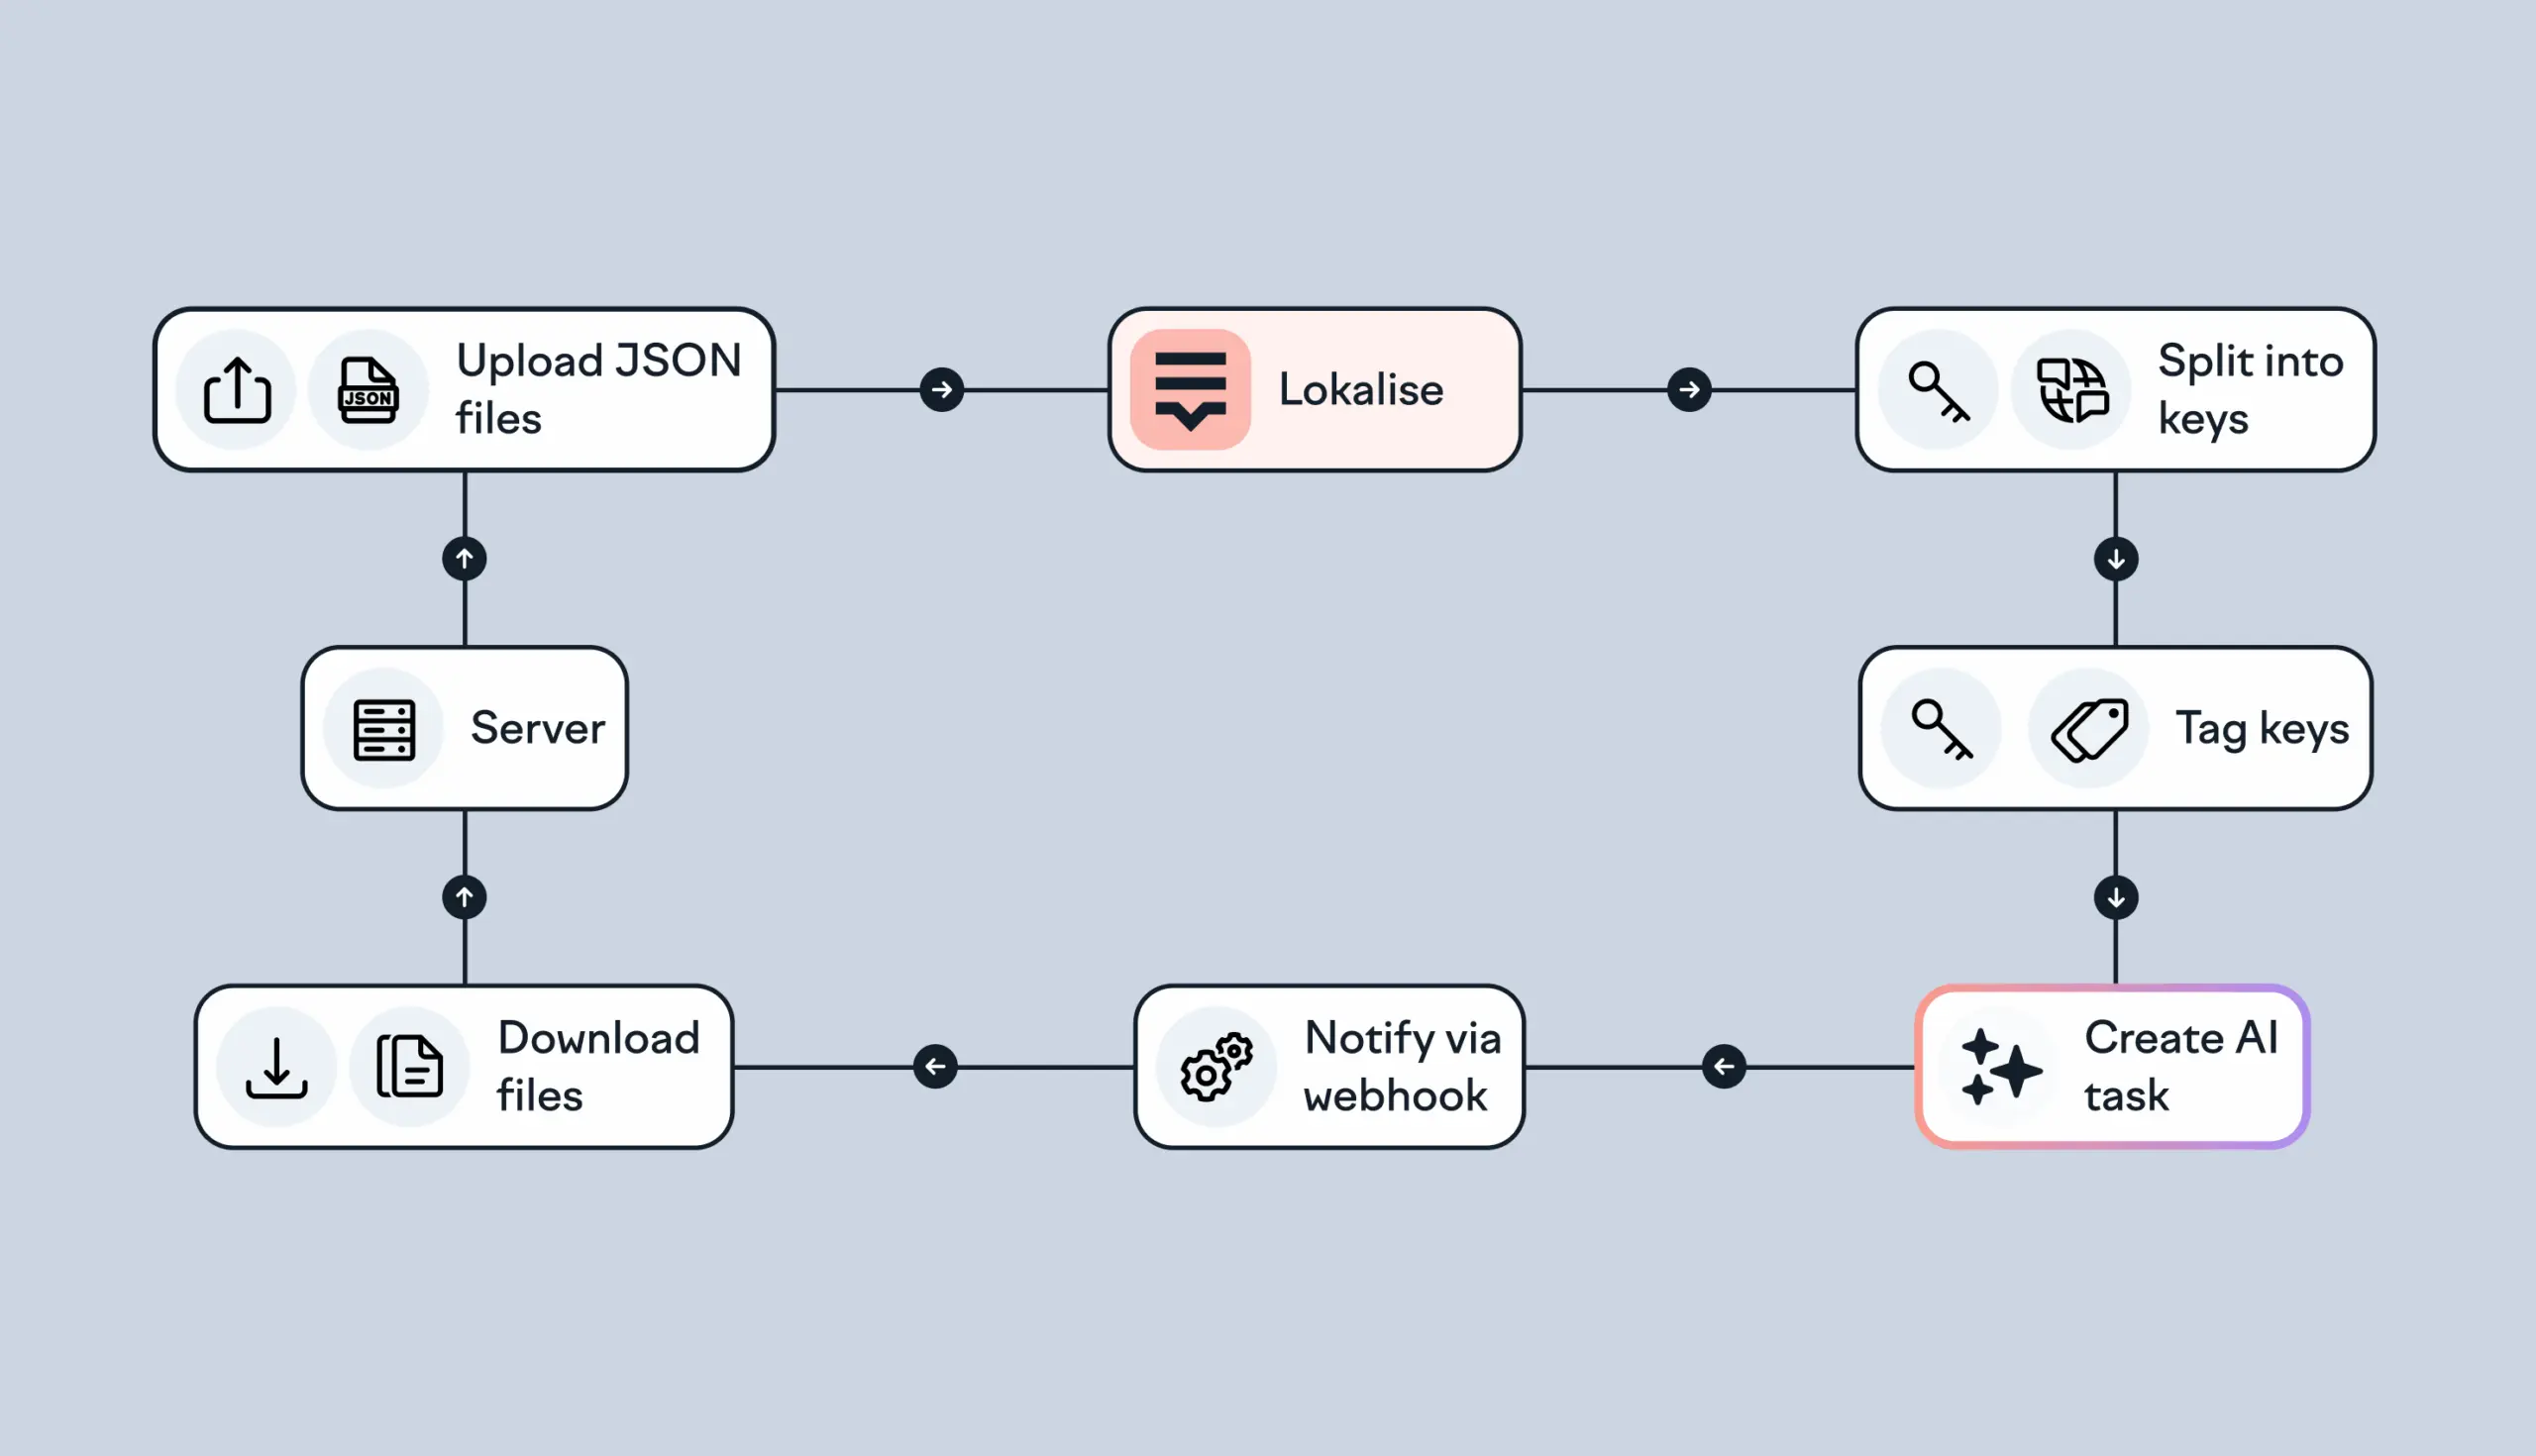
In this guide, you’ll learn how to:
Upload translation files to Lokalise automatically
Create AI-based translation tasks
Use webhooks to download translated files when the job is done
By the end, you’ll have a working system that connects your codebase to Lokalise, handles translations via AI, and reacts to updates in real time. Let’s get started!
To manage and translate your content, you’ll need a Lokalise project. This project will act as a central place to store your translation keys and their values.
In this guide, we’ll work with translation files in JSON format, using a simple key-value structure but Lokalise supports many other formats. The goal is to upload these files to Lokalise and automatically translate them into one or more target languages using AI-powered tasks.
To get started, log in to your Lokalise account and go to the projects dashboard. Click New project to create one:
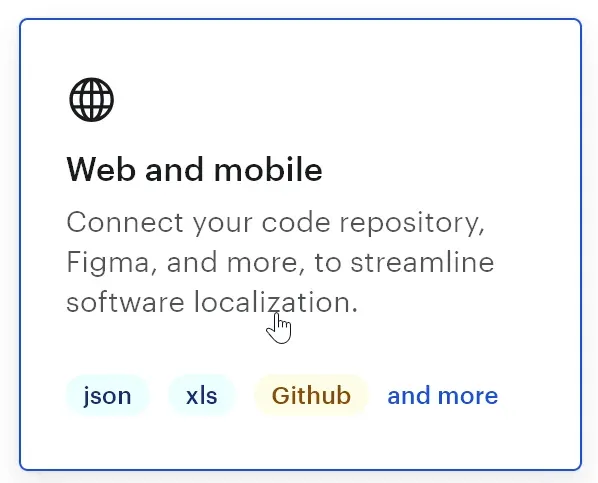
Make sure to choose Web and mobile project type as it supports JSON and other common formats that we developers so adore:
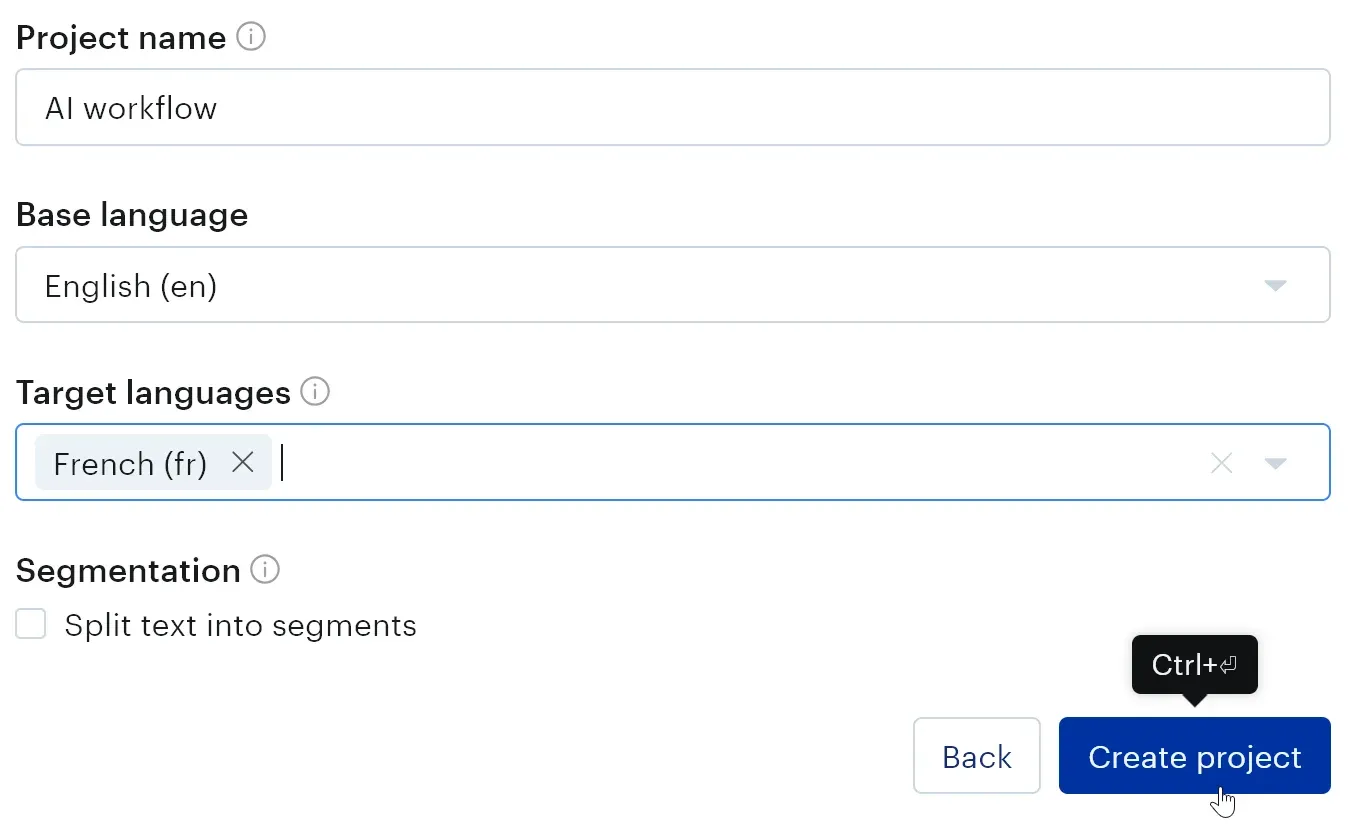
Give your project a name and choose a base language: this is the language to translate from. I’ll pick English. Also, choose one or more target languages to translate into. Let’s suppose we want to translate into French (you’ll be able to add more languages later).
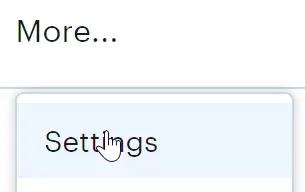
Once you’re ready, click Create project. You’ll be navigated to the project editor. Here, click More > Settings in the top menu:
You’ll proceed to the Settings page. Here locate the project ID and copy it:
Now, in your Node project create an .env file with the following content:
LOKALISE_PROJECT_ID=YOUR_PROJECT_ID_HERE
Don’t forget to add the .env file to .gitignore.
Obtaining Lokalise API token
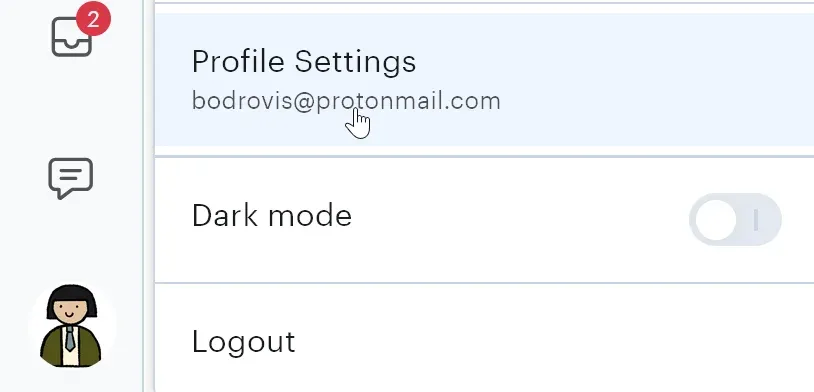
As long as we’re going to heavily utilize Lokalise API, a token is needed. To generate one, click on your avatar in the side menu and proceed to your personal profile:
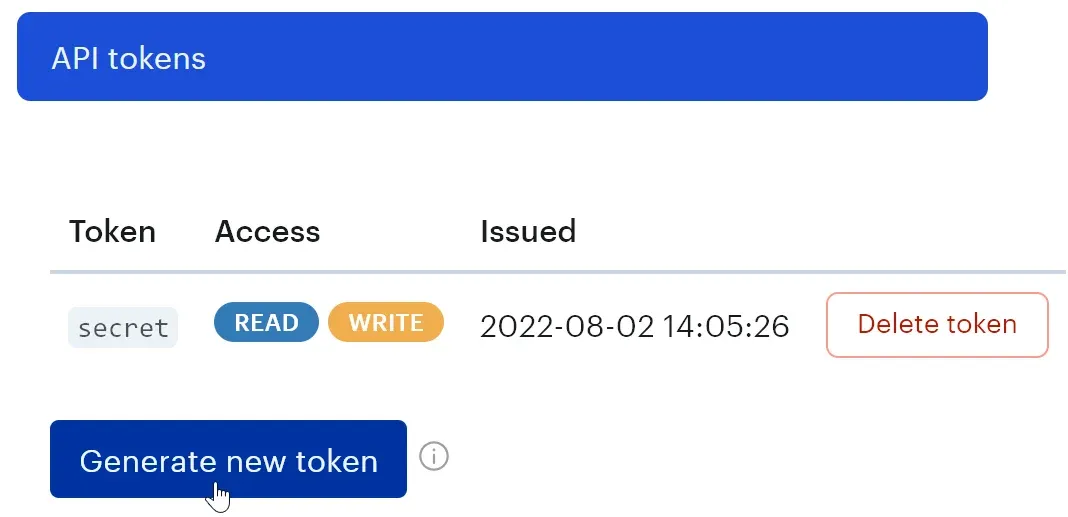
Switch to the API tokens tab and generate a new read/write token:
Now update your .env file like this:
LOKALISE_API_TOKEN=YOUR_API_TOKEN
Make sure to keep this token in secret.
Create translation files
As I’ve already mentioned, Lokalise supports a wide range of file formats including JSON, YAML, XML, and others. Therefore, you can organize your translation files however you prefer. For the purpose of this guide, we’ll use a simple setup with two JSON files stored under /locales/en.
This is purely for demonstration, and you can adjust the structure later to match your actual project layout. Create the following directory and files:
{ "save": "Save Changes", "cancel": "Cancel", "loading": "Loading...", "error_generic": "Something went wrong. Please try again.", "success_saved": "Changes saved successfully!", "no_data": "Nothing to show here yet.", "search": "Search...", "confirm_delete": "Are you sure you want to delete this?", "yes": "Yes", "no": "No"}
General server configuration
Starting the server
Now that we’ve prepared our translation files and Lokalise project, it’s time to set up a simple server to handle uploading, task creation, and incoming webhooks.
In this example, we’ll use a Node.js server written in TypeScript. The main file is located at src/index.ts, and we’ll use tsup to build it. Your actual setup may differ; this is just a minimal working example.
Here’s an example of the relevant scripts in your package.json:
{ "build": "tsup", "start": "npm run build && node dist/index.js"}
Open src/index.ts and add the following code:
import Fastify from "fastify";import { port } from "./config.js";import rootRoutes from "./routes/root.js";import webhookRoutes from "./routes/webhooks.js";const app = Fastify();app.register(rootRoutes, { prefix: "/" });app.register(webhookRoutes, { prefix: "/webhooks" });const start = async () => { try { await app.listen({ port }); console.log(`🚀 Server running at http://localhost:${port}`); } catch (err) { app.log?.error?.(err); process.exit(1); }};start();
This will start a local HTTP server and register two route modules: one for handling translation uploads and another for receiving webhook events from Lokalise. We’ll create these routes later.
Configuration
Next, let’s define some global configuration values. These include API credentials, default settings, and environment-based options. Create a new file at src/config.ts with the following content:
import { existsSync } from "node:fs";import { loadEnvFile } from "node:process";import type { TaskLanguage } from "@lokalise/node-api";if (existsSync(".env")) { loadEnvFile();}export const apiKey = process.env.LOKALISE_API_TOKEN as string;export const lokaliseProjectId = process.env.LOKALISE_PROJECT_ID as string;export const lokaliseWebhooksSecret = process.env.LOKALISE_WEBHOOKS_SECRET as string;export const targetLanguages: TaskLanguage[] = [{ language_iso: "fr" }];export const port = Number(process.env.PORT) || 3000;
Here’s what each variable does:
apiKey: Your Lokalise API token
lokaliseProjectId: The project ID where translations will be uploaded and processed
targetLanguages: The default target languages for AI-powered translation tasks (in this case, French). You can override this value dynamically later when uploading
port: The local port used to start the server
Nice!
Connecting to Lokalise API
We’ll heavily work with Lokalise API to perform various actions. Therefore, let’s create all the necessary objects under src/lokalise/api.ts right away:
import { LokaliseApi } from "@lokalise/node-api";import { LokaliseDownload, LokaliseUpload } from "lokalise-file-exchange";import { apiKey, lokaliseProjectId } from "../config.js";// Upload helper: used when we push source files to Lokaliseexport const lokaliseUploader = new LokaliseUpload( { apiKey, enableCompression: true }, { projectId: lokaliseProjectId });// Download helper: used after a task is finished to pull the translated filesexport const lokaliseDownloader = new LokaliseDownload( { apiKey, enableCompression: true }, { projectId: lokaliseProjectId });// Generic REST client: used for tasks, keys, users, etc.export const lokaliseApi = new LokaliseApi({ apiKey });
We need three separate clients:
LokaliseUpload – wraps the upload endpoint and handles file collection, compression, and status polling.
LokaliseDownload – handles exporting translations and unpacking the returned archive.
LokaliseApi – the low-level REST client for everything else (for example, listing keys or creating tasks).
Uploading files and creating AI-powered tasks
In this section we’ll take the JSON files you created earlier, push them to Lokalise, and spin up an AI translation task in one request-response cycle.
Step 1: Prepare the root routes file
All workflow logic will live in a dedicated route file, so start by creating src/routes/root.ts and adding the required imports:
import path from "node:path";import type { FastifyInstance } from "fastify";import type { TaskLanguage } from "@lokalise/node-api";import type { CollectFileParams, PartialUploadFileParams, ProcessUploadFileParams,} from "lokalise-file-exchange";import { targetLanguages as defaultTargetLanguages, lokaliseProjectId,} from "../config.js";import { lokaliseApi, lokaliseUploader } from "../lokalise/api.js";
Before we send our files to Lokalise, we need a reliable way to single out the keys created (or updated) in this run.
Lokalise TMS is key-based: when you upload a JSON file like
{ "hi": "Hey there!", "welcome": "Welcome to Lokalise demo!"}
the platform creates two separate keys: hi and welcome. If either of those keys already exists in the project, Lokalise will simply update its value (depending on your upload settings). In practice this means:
New keys should be added to the AI task (they still need translation).
Existing keys that were unchanged (and translated earlier) can be skipped.
The simplest way to tell the two groups apart is tagging. We’ll attach a tag to every key affected by the current upload. Later, when we build the task, we’ll fetch only the keys carrying that tag.
Choosing a tag format
To keep things tidy we’ll generate a tag that contains the current date: ai-task-2025-07-10. A date-based tag is:
Unique for each upload (assuming one upload per day).
Human-readable in the Lokalise UI.
Easy to query via the API (filter_tags).
If you plan to upload multiple times per day, feel free to append the time as well (for example, ai-task-2025-07-10-14-30).
Declaring the base tag
Add this constant near the top of src/routes/root.ts:
Update any existing keys with new values (replace_modified: true).
Attach the current tag to all affected keys (tags: [tag]).
There are many more options available: refer to the official documentation for advanced configuration.
Selecting files for upload
Next, we need to define where our base language files live:
const collectFileParams: CollectFileParams = { inputDirs: ["./locales/en"], // Folder containing source language files extensions: [".json"], // File types to include recursive: true, // Include nested folders};
In this demo, we’re uploading only the English source files (en.json, main.json, etc.) in JSON format. But the file structure and format are fully customizable.
Inferring the language code
Each uploaded file must be mapped to a language code in your Lokalise project. But the language isn’t always obvious just from the filename.
For example:
en.json is easy — it clearly matches English (en).
main.json could be anything.
To solve this, we’ll infer the language code from the parent folder name. In our case, files are stored in ./locales/en, so we’ll use "en" as the language code.
The inferer must return a valid language code that already exists in your Lokalise project, otherwise the upload will fail. Feel free to adapt the logic to your own project structure or naming conventions. For instance, some formats like Ruby on Rails YAML provide language code right in the file.
A list of any errors (e.g. malformed files, unknown language codes).
We can log this info for debugging:
for (const process of processes) { console.log("Created At:", process.created_at); console.log("Status:", process.status); console.log("Details:", process.details); console.log("===");}if (errors.length > 0) { console.error("Errors during upload:"); for (const error of errors) { console.error(error); }}
At this point, we’ve successfully uploaded our base translations and tagged all new keys. Next, we’ll collect these tagged keys and create a task to translate them automatically.
Step 4: Finding the keys to translate
After the upload finishes, every new or updated key now carries a unique tag like ai-task-2025-07-10. The goal of this step is to fetch only those keys and pass their IDs to an AI translation task.
Add the call inside the route handler:
app.post("/lokalise-upload", async (req, reply) => { const tag = `${baseTag}-${new Date().toISOString().split("T")[0]}`; await uploadToLokalise(tag); // Collect the keys created or updated in this run const keyIds = await prepareKeyIds(tag);});
Let’s code the prepareKeyIds() function:
async function prepareKeyIds(tag: string): Promise<number[]> { const paginationLimit = 500; // maximum page size const allKeyIds = new Set<number>(); let cursor: string | undefined = ""; // empty string => first page let hasNext = true; while (hasNext) { const keys = await lokaliseApi.keys().list({ project_id: lokaliseProjectId, filter_tags: tag, // only keys with our tag limit: paginationLimit, pagination: "cursor", cursor, }); // Collect key_id from each item for (const { key_id } of keys.items) { allKeyIds.add(key_id); } // If another page exists, continue the loop hasNext = keys.hasNextCursor(); cursor = hasNext ? (keys.nextCursor as string) : undefined; } return Array.from(allKeyIds);}
The lokaliseApi.keys().list() method is paginated, so we need to loop until there are no more items to fetch. Our code:
Requests up to 500 keys per API call (this is the maximum).
Filters by the tag we just generated.
Stores every key_id in a Set to avoid duplicates (defensive measure).
Uses the cursor-based pagination helpers hasNextCursor() and NextCursor.
Returns a plain array of unique IDs.
Step 5: Preparing languages to translate into
Lokalise tasks require two inputs:
A list of key IDs → we already have it (keyIds)
A list of target languages → we’ll assemble it now
But it’s handy to let callers override this list on demand. The snippet below checks the request body and replaces the default if the payload looks valid.
// Inside the /lokalise-upload handler, right after we have keyIdslet languages = defaultTargetLanguages;// Is the body an array where every element has a string `language_iso`?if ( Array.isArray(req.body) && req.body.every((item) => typeof item.language_iso === "string")) { languages = req.body as TaskLanguage[]; console.log("Using languages from request:", languages);} else { console.log( "No valid languages in request. Falling back to default:", defaultTargetLanguages );}
With both keyIds and languages ready, we can create the AI-powered translation task in the next step.
Step 6: Creating a new AI-powered task
Now that we’ve uploaded our base language files and identified all the relevant key IDs and target languages, we’re ready to create a new task using Lokalise AI.
Here’s the full route handler code in context:
app.post("/lokalise-upload", async (req, reply) => { const tag = `${baseTag}-${new Date().toISOString().split("T")[0]}`; await uploadToLokalise(tag); const keyIds = await prepareKeyIds(tag); let languages = defaultTargetLanguages; if ( Array.isArray(req.body) && req.body.every((item) => typeof item.language_iso === "string") ) { languages = req.body; console.log("Using languages from request:", languages); } else { console.log( "No valid languages in request. Falling back to default:", defaultTargetLanguages, ); } await createLokaliseTask(keyIds, languages); return reply.status(201).send({ msg: "Translation files uploaded" });});
Let’s break down the createLokaliseTask() function:
async function createLokaliseTask( keyIds: number[] | string[], targetLanguages: TaskLanguage[],) { if (keyIds.length === 0) { console.warn("No keys found with the specified tag. Skipping task creation."); return; } await lokaliseApi.tasks().create( { title: "English <> French (AI)", // Required task title description: "Use informal, casual tone", // Optional instruction for translators or AI task_type: "automatic_translation", // AI-powered task type keys: keyIds, // List of key IDs to translate languages: targetLanguages, // Target languages (one or many) apply_ai_tm100_matches: true, // Use 100% translation memory matches if available save_ai_translation_to_tm: true, // Save all AI translations into translation memory }, { project_id: lokaliseProjectId }, );}
Key points:
title is required and visible in the Lokalise UI. It helps to keep track of tasks.
description provides extra context to Lokalise AI and is helpful when you want to guide the translation tone or style.
task_type: "automatic_translation" sets this task to be handled by Lokalise AI instead of human contributors.
keys is the list of translation key IDs we collected earlier by filtering tags.
languages specifies which languages to generate translations for.
apply_ai_tm100_matches allows Lokalise to reuse exact matches from your project’s translation memory (TM), saving costs and avoiding redundant AI usage.
save_ai_translation_to_tm ensures all generated translations are saved to TM for future use.
Optional next steps
Below are practical extensions you can layer onto the basic flow to make it production-ready:
Persist the task ID
tasks().create() returns a task.id.
Save it to a database or log it.
You can later poll task status, link directly to the Lokalise UI, or use the ID as the parent task in follow-up jobs.
Add closing tags automatically
Include closing_tags: ["ai-task-done"] when you create the task.
Lokalise will attach this tag to every key as soon as the task is closed.
Makes it trivial to filter out “already processed” keys in future uploads.
Monitoring task completion with webhooks and downloading files
At this point our workflow can:
Upload the source language files.
Tag every new or updated key.
Kick off an AI-powered translation task.
What’s missing is the handover once the task finishes. Lokalise AI might return in seconds or it might take minutes (larger projects translate thousands of keys). Polling the API on a fixed timer is wasteful and brittle, so we’ll let Lokalise contact us instead.
That’s what webhooks are for. A webhook is simply an HTTP callback: when a specified event occurs inside Lokalise, the platform sends a POST request to a URL you provide. For our pipeline we care about a single event: project.task.closed . It’s fired the moment a task is marked “completed” in Lokalise (automatically for AI tasks).
Therefore, in this section we’ll:
Create a webhook in Lokalise that points to POST /webhooks/notifications in your Node server.
Secure the endpoint with a shared secret.
Handle notifications.
Download the newly translated files as soon as the proper notification arrives.
Step 1: Create webhook on Lokalise
To get notified when an AI translation task is completed, we’ll configure a webhook in Lokalise. First of all, open your Lokalise project and proceed to the Apps page:
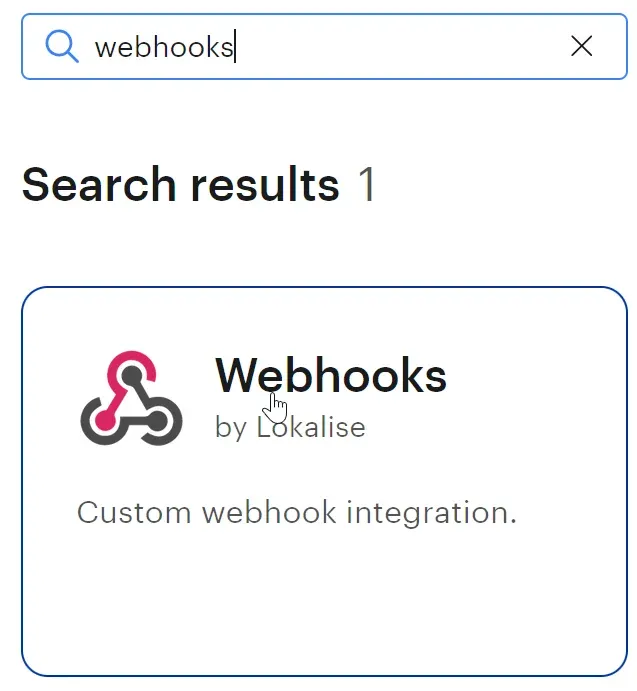
Here’s search for “webhooks” and click on the corresponding app:
Hit Install. You’ll be able to configure your webhook:
Key things to note:
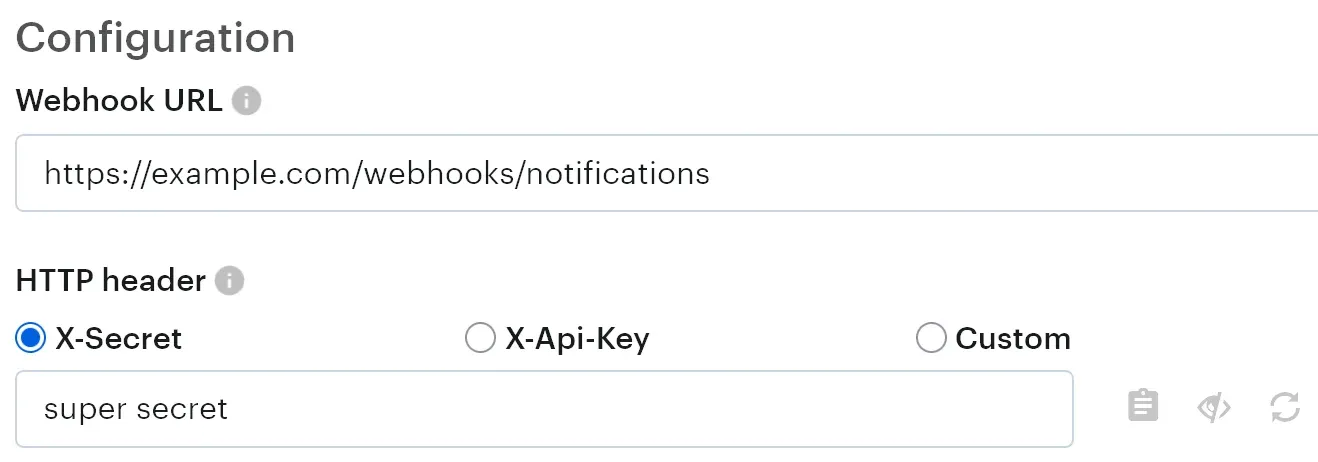
The main thing to specify is the Webhook URL – that’s the endpoint Lokalise will send notifications to. In our case, the route is /webhooks/notifications, but the domain depends on your setup. If you’re running the app locally, you can use a tool like ngrok to expose your service to the internet.
To improve security, Lokalise supports sending a pre-shared secret with each webhook request. By default, this will be passed via the X-Secret header, though other options are available. We’ll verify this secret in our handler to make sure the request is coming from a trusted source.
Add your secret to the .env file like this:
LOKALISE_WEBHOOKS_SECRET=YOUR_WEBHOOK_SECRET
Let’s also read that secret in the src/config.ts:
export const lokaliseWebhooksSecret = process.env
  .LOKALISE_WEBHOOKS_SECRET as string;
Lastly, choose which events you want to receive notifications for. For this project, make sure to select Task – closed.
Don’t save the configuration yet — Lokalise will immediately try to ping your server, and we haven’t added the route handler yet. We’ll do that next.
Step 2: Add webhook handler
Now that we’ve configured the webhook on Lokalise, it’s time to handle incoming notifications. Create a new file at src/routes/webhooks.ts. Here, we’ll define a new POST route to process events like “task closed” and respond to Lokalise’s pings.
Start by adding the necessary imports and creating the route:
import type { DownloadFileParams, WebhookProjectTaskClosed,} from "@lokalise/node-api";import type { FastifyInstance } from "fastify";import type { ExtractParams } from "lokalise-file-exchange";import { lokaliseProjectId, lokaliseWebhooksSecret } from "../config.js";import { lokaliseApi, lokaliseDownloader } from "../lokalise/api.js";export default async function webhooksRoutes(app: FastifyInstance) { app.post("/notifications", async (req, reply) => { const payload = req.body; const headers = req.headers; // Check if the webhook secret matches if (headers["x-secret"] !== lokaliseWebhooksSecret) { return reply.status(403).send({ error: "Forbidden" }); } // Handle Lokalise ping requests if (Array.isArray(payload)) { if (payload[0] === "ping") { return reply.status(200).send({ status: "success" }); } return reply.status(400).send({ error: "Invalid ping payload" }); } // You can continue with event-specific logic here... });}
Key points:
Lokalise sends the pre-shared secret via the x-secret header. We validate it to confirm the request is genuine.
When you configure the webhook in the Lokalise UI, it will first send a "ping" payload to verify the URL. Your server must respond with 200 OK for the webhook to be accepted.
We check whether the incoming payload is a ping and return an appropriate response. If it’s not a ping, we can continue processing the event (for example, task completion).
Now you can save your webhook on Lokalise. If everything is correct, you shouldn’t see any errors related to ping events.
Step 3: Handle the task closed event
Once Lokalise finishes an AI task it sends a project.task.closed notification. We need to verify that:
The event type is indeed project.task.closed.
This notification comes from our project.
The request passed the secret check (already done above).
If everything matches, we can pull the list of languages used in the task and immediately download those translations.
Add the following logic inside the /notifications route, after the ping check:
if (typeof payload === "object" && payload !== null) { const webhookPayload = payload as WebhookProjectTaskClosed; // Verify event type and project if ( webhookPayload.event === "project.task.closed" && webhookPayload.project.id === lokaliseProjectId ) { console.log( `Task "${webhookPayload.task.title}" (ID ${webhookPayload.task.id}) was closed ` + `in project "${webhookPayload.project.name}".` ); // 1) Find which languages were part of this task const downloadLangs = await getTaskTargetLanguages(webhookPayload.task.id); // 2) Download the finished translations await downloadFromLokalise(downloadLangs); // 3) Acknowledge the webhook return reply.send({ status: "task processed" }); }}// Fallback for anything we don't understandreturn reply.status(400).send({ error: "Invalid payload" });
What this block does:
Type-guard – ensures payload is an object before accessing nested fields.
Event validation – accepts only project.task.closed. Anything else (e.g. task created, screenshot uploaded) is ignored.
Project check – compares payload.project.id with our own lokaliseProjectId to avoid processing webhooks that belong to another project.
Post-processing – once validated, it
fetches the list of languages actually included in the task (getTaskTargetLanguages)
downloads the translated files (downloadFromLokalise)
Acknowledgement – responds with 200 OK so Lokalise won’t retry the same webhook.
The project.task.closed webhook tells us which task finished, but it doesn’t list the languages that were part of that task. To download only the relevant translations we need to retrieve this information with an additional API call:
async function getTaskTargetLanguages(taskId: number): Promise<string[]> { // Request full details for the task we just received in the webhook const task = await lokaliseApi .tasks() .get(taskId, { project_id: lokaliseProjectId }); // Each element in task.languages has a language_iso field (e.g. "fr", "es") return task.languages.map((lang) => lang.language_iso);}
What happens here:
tasks().get() – fetches the complete task object, including its language list, by ID.
project_id – ensures the API call addresses the correct Lokalise project.
Mapping to ISO codes – converts the array of language objects into a plain string array (["fr", "es", "de"]).
Step 5: Downloading target translations
After a task is closed we want to:
Ask Lokalise for the translated files, only for the languages involved in that task.
Receive an archive (ZIP) from Lokalise.
Unpack it so that the folder structure mirrors what we uploaded earlier.
First, let’s define the download parameters:
async function downloadFromLokalise(downloadLangs: string[]) { const downloadFileParams: DownloadFileParams = { format: "json", // Request JSON output original_filenames: true, // Keep the same filenames we uploaded (en.json, main.json, …) indentation: "2sp", // JSON with two-space indents directory_prefix: "", // No extra prefix inside the archive filter_data: ["translated"], // Export only segments with a translation filter_langs: downloadLangs, // Languages we got from getTaskTargetLanguages() };}
We use JSON format
Keep original filenames (explained below)
Use 2 spaces for indentation within JSON files
Don’t add any additional directory prefixes as we want to preserve the original file structure
Filter only translatd data
Download the target languages
Next, we’ll say where to extract our translations to. When you initially uploaded the English source files, Lokalise stored both the file paths and the file names on per-key basis. Because we set original_filenames: true, Lokalise will preserve that exact structure on export. As you recall, during upload we placed the files under:
locales/en/en.jsonlocales/en/main.json
Lokalise automatically converts the en folder into a placeholder %LANG_ISO%. Your keys on Lokalise should be assigned to the filenames like locales/%LANG_ISO%/%LANG_ISO%.json and locales/%LANG_ISO%/main.json.
So when you later download French translations, the archive will look like this:
locales/└── fr/ ├── fr.json └── main.json
Every target language gets its own sub-folder (fr, es, de, …) with the same filenames we originally provided. Because the ZIP already contains the full path (locales/<lang>/…), we only have to decide where to unpack it. Unzipping straight into the project root (./) recreates the folder tree exactly where the English files live:
const extractParams: ExtractParams = { outputDir: "./", // extract at project root so "locales/..." is restored as-is};
Finally, we need to start the download and wait for its completion. The downloaded archive will be unpacked automatically:
async function downloadFromLokalise(downloadLangs: string[]) { const downloadFileParams: DownloadFileParams = { /* see above */ }; const extractParams: ExtractParams = { outputDir: "./" }; try { console.log("Starting download…"); console.log("Languages:", downloadLangs.join(", ")); await lokaliseDownloader.downloadTranslations({ downloadFileParams, extractParams, }); console.log("Download completed successfully!"); } catch (error) { console.error("Download failed:", error); throw error; // bubble up so the webhook route can decide how to respond }}
That’s it, brilliant job!
Conclusion
Congrats, you now have a working pipeline that:
uploads your base language files to Lokalise,
tags the new/updated keys for tracking,
creates an AI-powered translation task,
waits for the task to complete via webhooks,
and downloads translated files directly back into your project.
It’s fully automatic and customizable — you can control languages, input/output structure, even tweak the tone of AI translations through task descriptions.
This setup is especially useful for dev teams building multi-language apps with continuous deployment. You push your English files — boom, translations follow shortly after.
Not a developer?
No worries. Lokalise also offers Workflows, a visual editor where you can design similar translation processes using a drag-n-drop UI. You can:
chain actions like upload → translate → review,
set up scheduled triggers (e.g., “run every Monday at 9am”),
assign manual review steps to team members,
and monitor everything without writing a single line of code.
Workflows are great for non-technical PMs, translators, and ops folks who want to automate translation pipelines without touching code.
Ilya is the lead for content, documentation, and onboarding at Lokalise, where he focuses on helping engineering teams build reliable internationalization workflows. With a background at Microsoft and Cisco, he combines practical development experience with a deep understanding of global product delivery, localization systems, and developer education.
He specializes in i18n architectures across modern frameworks — including Vue, Angular, Rails, and custom localization pipelines — and has hands-on experience with Ruby, JavaScript, Python, Elixir, Go, Rust, and Solidity. His work often centers on improving translation workflows, automation, and cross-team collaboration between engineering, product, and localization teams.
Beyond his role at Lokalise, Ilya is an IT educator and author who publishes technical guides, best-practice breakdowns, and hands-on tutorials. He regularly contributes to open-source projects and maintains a long-standing passion for teaching, making complex internationalization topics accessible to developers of all backgrounds.
Outside of work, he keeps learning new technologies, writes educational content, stays active through sports, and plays music. His goal is simple: help developers ship globally-ready software without unnecessary complexity.
Libraries and frameworks to translate JavaScript apps
In our previous discussions, we explored localization strategies for backend frameworks like Rails and Phoenix. Today, we shift our focus to the front-end and talk about JavaScript translation and localization. The landscape here is packed with options, which makes many developers a
Build a smooth translation pipeline with Lokalise and Vercel
Internationalization can sometimes feel like a massive headache. Juggling multiple JSON files, keeping translations in sync, and redeploying every time you tweak a string… What if you could offload most of that grunt work to a modern toolchain and let your CI/CD do the heavy lifting? In this guide, we’ll wire up a Next.js 15 project hosted on Vercel. It will load translation files on demand f
Hands‑on guide to GitHub Actions for Lokalise translation sync: A deep dive
In this tutorial, we’ll set up GitHub Actions to manage translation files using Lokalise: no manual uploads or downloads, no reinventing a bicycle. Instead of relying on the Lokalise GitHub app, we’ll use open-source GitHub Actions. These let you push and pull translation files directly via the API in an automated way. You’ll learn how to: Push translation files from your repo to LokalisePull translated content back and open pull requests automaticallyWork w