In this tutorial, we are going to discuss the JSON file format and how to translate JSON files used in the localization process with the help of an online editor. We will also cover JSON technical specifications, how JSON files can store translation values, how placeholders and plurals are typically written, and how localized time can be handled within these files. On top of that, I’ll explain how to hire professionals to perform translations for you.
In this section, we'll cover some technical details regarding the JSON file format. If you're not really interested in all these details, and instead you'd like to start translating your files as soon as possible, please proceed to the next section.
So, JSON is a data interchange format that was introduced in the early 2000s. Since then it has gained lots of traction, beating other formats like XML, CSV, and SOAP. Why is it so popular? Because it's very simple! Take a look at the following i18n JSON file example:
{ "header": "Welcome to our tutorial!", "home": "Home page"}
This is a basic JSON file that contains some text values. All JSON files are structured in the key-value format, with the strings to the left being the keys (header and home in the example above).
JSON is used for many purposes, for example, in Python translate and Node.js apps, but in this tutorial we will concentrate on storing translation values in these files and translating them into other languages. To make a long story short, translation keys are specified in the application source code, and when the app is served to the user, they are replaced with the corresponding translation values based on the requested language.
Here's a simple example from Vue that shows the usage of translation keys:
<h1>{{ $t("home") }}</h1>
$t is a method for performing translation. When the user browses this HTML page, they won't see the home key — rather, they'll be presented with the corresponding translation (Home page).
JSON technical specifications
While the JSON format is lightweight and simple, there are some things to keep in mind when working with these files. So, let's summarize the key points taken from the RFC 8259:
JSON can represent four primitive types (strings, numbers, booleans, and nulls), as well as two structured types (objects and arrays).
Boolean and null literals must be written in lowercase without any quotation marks.
JSON files are opened and closed with curly or square brackets.
Keys are always represented as strings, and they have to be wrapped with double quotation marks.
Key-value pairs are separated with commas.
JSON files must be encoded in UTF-8.
Here's a more complex example of a valid JSON file:
The level of nesting is not limited. When storing translations, it's usually a good idea to utilize nesting so that parent keys act as namespaces. This way, you can organize your translation data.
The second type is flat JSON. In contrast to nested JSON, it does not allow any nesting at all, and the namespaces are provided as prefixes:
The third type is structured JSON, which is used for translation purposes in certain technologies. This type implies that we have keys with nested translation data, including the translation itself as well as the additional notes, context, and character limit. Here's an example:
{ "about": { "translation": "About us", "notes": "Title for main menu", "limit": 20 }, "home": { "translation": "Home page", "context": "Displayed on the main website page" }, "admin::login": { "translation": "Administrator login" }}
First of all, it's important to mention that the structured JSON allows only a single level of nesting. In other words, you cannot create a namespace like this:
To nest keys, you should provide prefixes like: admin::login.
Each parent translation key must contain an object with the following keys:
translation – the actual translation (required)
notes – description of the key (optional)
context – context of the key (optional)
limit – character limit of the key (optional)
So, that's it, we've covered all the major JSON types!
What about placeholders?
When storing translations inside JSON files, you'll often need to provide placeholders. For example, if you wish to greet the currently logged in user, you'll do something like this: "Welcome, USERNAME!".
But the problem is that JSON is a general-purpose format, thus its specification doesn't mention anything about translations or, more specifically, placeholders. This is unfortunate as it leads to confusion: different technologies and libraries require placeholders in different formats.
For instance:
"key": "Text {placeholder}"
"key": "Text {{placeholder}}"
"key": "Text %{placeholder}"
"key": "Text %s" — %s here means an interpolated string
So, at the end of the day you'll need to study the docs for the actual internationalization solution you're using to understand how exactly you should specify placeholders.
How do I perform pluralization?
Well, the situation with JSON pluralization is quite similar to the use of placeholders: unfortunately, there's no standard approach. Once again, different libraries have different ways of specifying plurals. But in general, there are four main ways: using nested keys, using postfixes, using separators, or writing ICU expressions.
In my opinion, using nested keys is the most convenient way:
{ "num_visits": { "one": "This page has been visited {{n}} time", "other": "This page has been visited {{n}} times" }}
In this example, we are providing two plural forms for the num_visits key: one and other. These are the two plural forms used in English. I must say that other locales might have more complex pluralization rules (for example, there are three forms in Latvian and four forms in Russian), but the overall approach is the same.
The second way of writing plurals is to add plural forms as postfixes:
{ "num_visits_one": "This page has been visited {{n}} time", "num_visits_other": "This page has been visited {{n}} times"}
Here, the main portion of the key name stays the same, and we just add postfixes to it. This method of writing plurals is found in the i18next framework.
The third, and arguably least convenient, way of providing plurals is by separating all forms with some kind of a delimiter:
{ "num_visits": "This page has been visited {n} time | This page has been visited {n} times"}
This approach can be found in Vue apps, for instance.
Finally, you might encounter ICU (International Components for Unicode) expressions inside JSON files (which is less typical):
{ "num_visits": "{count, plural, one {This page has been visited {count} time} other {This page has been visited {count} times}}"}
These expressions are understood by certain solutions like gettext. You can learn more about ICU expressions in our tutorial.
So, once again, it all depends on the actual library that you are using to translate your application.
How to open and translate JSON files in the Lokalise online editor
Alright, now let's see how we can easily translate JSON files into multiple languages with neural networks and export the results in separate files.
Meet Lokalise, a translation management system (TMS) that's here to save the day. It supports a variety of translation files, provides a convenient web interface for translation management, provides tools for collaboration, enables you to connect with third-party services, and much more.
Let's discover how to start working with Lokalise.
Registration and creating a new project to translate JSON
So, to get started, register on Lokalise to grab your 14-day trial. Enter your name and email (no credit card needed). When the trial expires, you’ll be switched to a Free plan that provides access to the core features, but, of course, it'll also be possible to purchase a paid subscription.
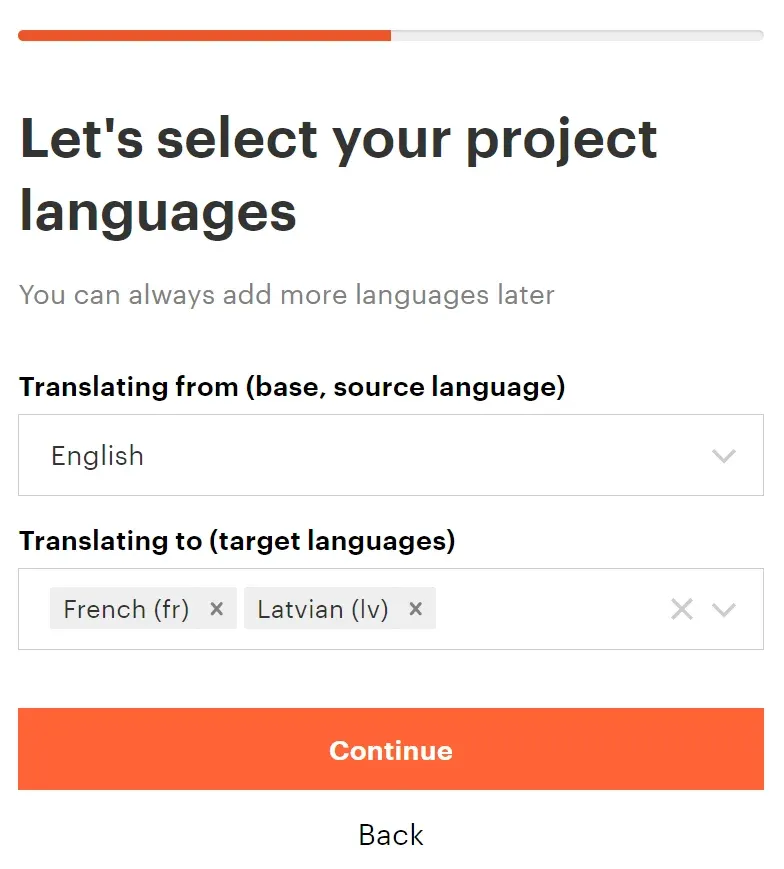
Then, following the wizard’s instructions, you’ll be asked to create a new team or join an existing one. For the purposes of this demo, we'll create a new team. Next, provide a name for your translation project. A project on Lokalise actually contains all your translations and keys. In the next step, choose the language you're translating from and one or more languages to translate into:
My JSON file is in English, and I'd like to translate it into French and Latvian; that's why I've provided the setup shown in the screenshot above.
Next, the wizard will suggest adding a new key. You can simply click Continue because all our keys will be uploaded from the JSON file. Finally, it'll ask for a platform but for now you can choose any option, really. Once you are ready, click Get started.
Uploading JSON files
After following the wizard's instructions, you will be brought to the Upload page where you can add your JSON files.
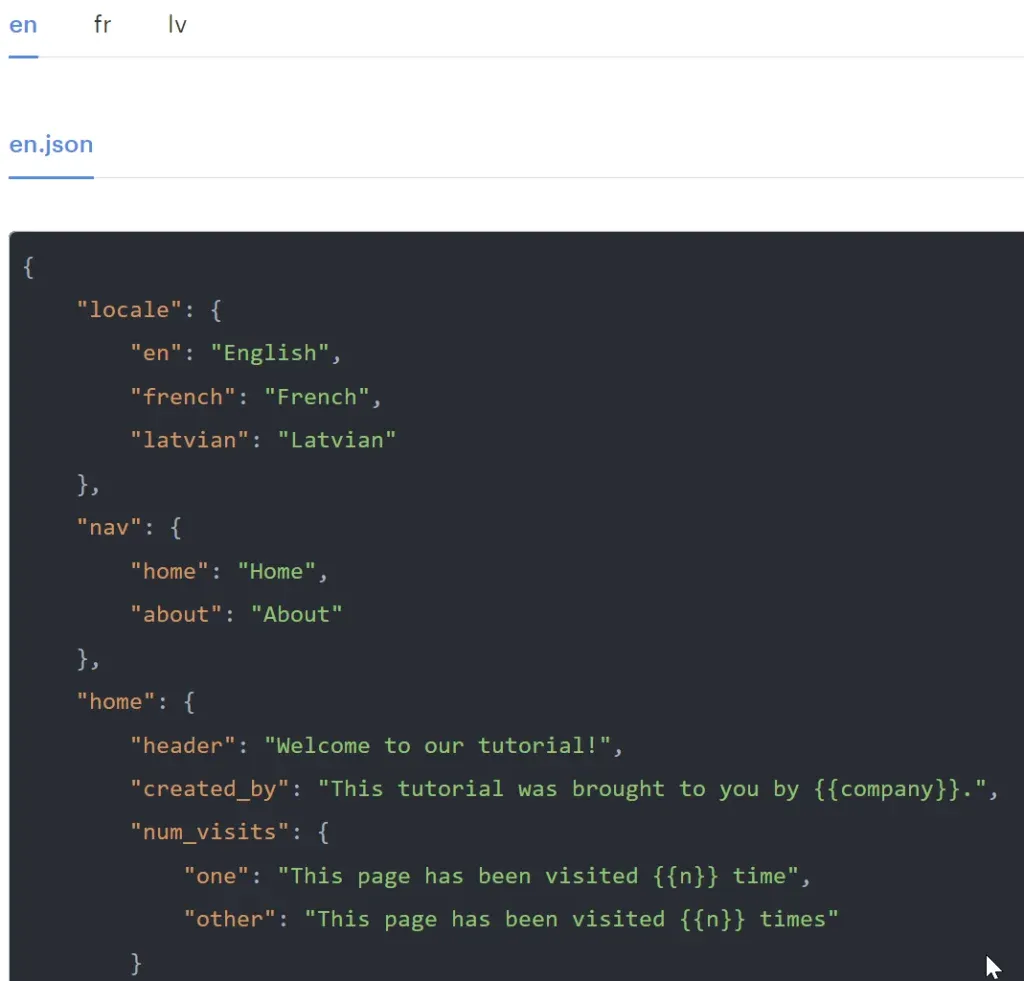
I'll update the following sample JSON i18n file called en.json:
{ "locale": { "en": "English", "french": "French", "latvian": "Latvian" }, "nav": { "home": "Home", "about": "About" }, "home": { "header": "Welcome to our tutorial!", "created_by": "This tutorial was brought to you by {{company}}.", "num_visits": { "one": "This page has been visited {{n}} time", "other": "This page has been visited {{n}} times" } }, "about": { "header": "About us", "donations": "Donations raised: {{donations}}" }}
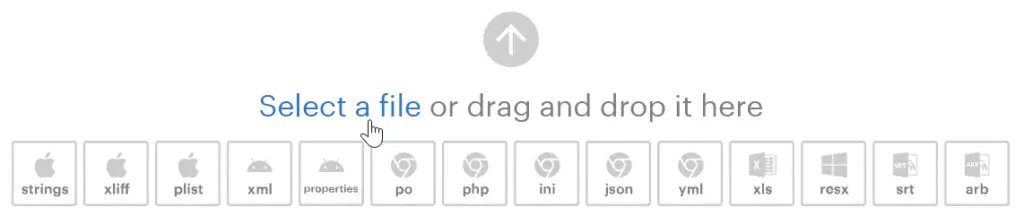
You can keep following the wizard or simply close it and click Select a file:
Alternatively, drag and drop your files directly into the webpage.
Lokalise supports lots of file formats, including JSON, YAML, XLIFF, XLSX, SRT, and many others.
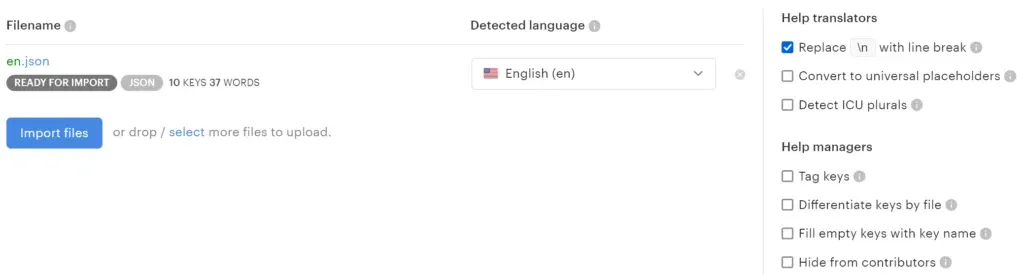
After choosing your JSON file, you’ll be able to adjust the upload options:
Click on the filename (en.json) to adjust it.
Click on the language dropdown to choose a different locale. The locale is automatically detected with the help of a machine translation engine.
To the right, you can see the upload options. You can leave them set to their default values unless your JSON contains ICU expressions — in this case, you'll need to check Detect ICU plurals. Refer to our documentation to learn more about these options.
Once you are ready, click Import files. Lokalise will parse your content, and save translation keys and values so that you can edit them with ease.
How to translate JSON files in the Lokalise online editor
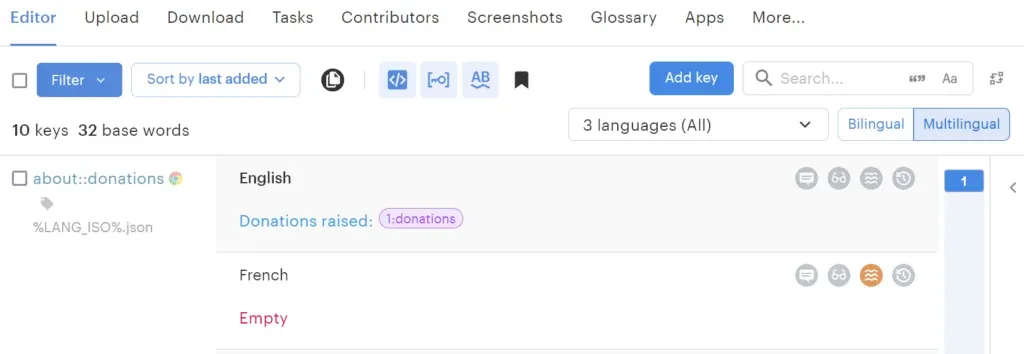
Next, after your translation files are uploaded, you can switch to the Editor tab in the top menu:
Let's do a quick overview of what we see here:
To the left, there's a translation key name (about::donations). You can click on the key name to adjust advanced settings. The :: separator represents a single level of nesting. When you go to download translations back, this separator will be removed and the original nesting will be utilized. More on that later.
The "Chrome" icon next to the key means that it was automatically assigned to the web platform. Why? Well, because JSON is mostly used with web apps! Simply speaking, the platforms on Lokalise dictate which file formats the key can be exported in. If you want to download your translations in JSON, you can safely ignore this platform.
Next, there's the filename (%LANG_ISO.json). Why was it converted to this funny format if our original name was en.json? The answer is quite simple. The %LANG_ISO% is a special placeholder, and Lokalise will replace it with a specific locale code once you export your translations. Thing is, if you are translating into multiple languages, you'll want to separate these translations into multiple files, right? In other words, French goes into fr.json and Latvian goes into lv.json. So, to facilitate this process the system has added this placeholder to the filename.
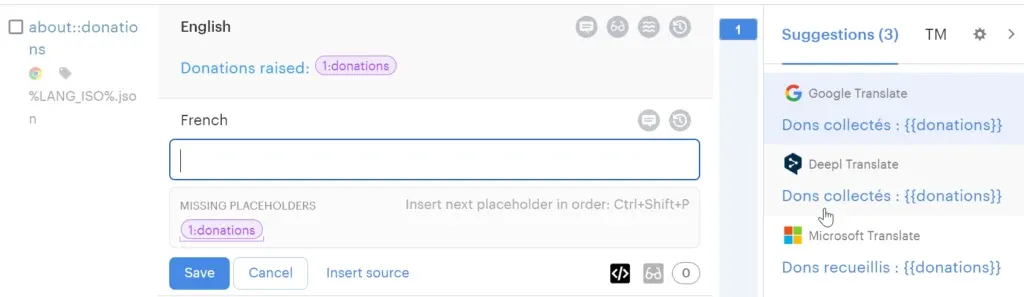
To the right, you can see the languages and corresponding translation values. Just click on a value to edit it:
You can enter text manually or choose one of the machine translation suggestions. Once you are ready, simply hit Save. That’s it! You can learn more about the project editor and the translation editor in our docs.
What's the deal with the placeholders?
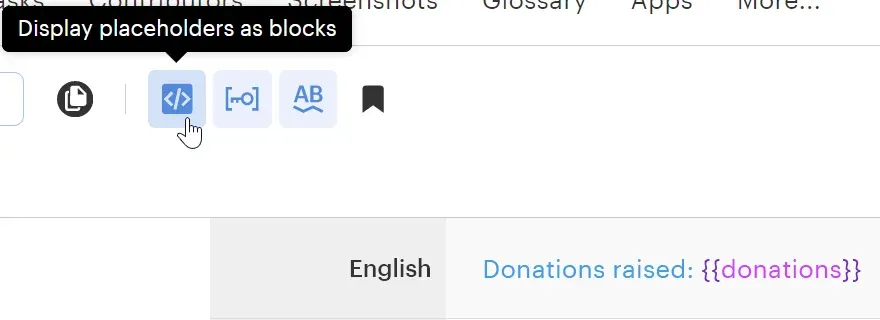
In the screenshot above, you probably noticed that our {{donations}} placeholder has been replaced with some strange-looking element. What does it mean? In fact, it was done for your convenience so that you don't accidentally break this placeholder. It's also convenient for linguists invited to the project — they can easily understand that this "donations" thing should not be translated or modified.
However, if you'd like to see placeholders in plain text, simply disable the Display placeholders as blocks option:
What about my plural keys?
Your plural keys are safe with Lokalise! The system can understand some popular formats for storing plurals, and your content will be displayed in the following way:
Here you can easily provide translations for each plural form.
Okay, smart guy, but I don't know these languages!
Don’t worry, I understand that you might not be able to speak the languages that our JSON content should be translated into. Luckily, Lokalise provides us with all the necessary tools to alleviate this problem. First of all, you can simply click on the empty translation and pick a suggestion provided by a neural network, as shown in the screenshot above. Alternatively, you can automate the process by integrating the Lokalise API into your workflow.
Using Google MT to translate JSON files
Alternatively, click on the Google-translate empty values button under the key name:
After this button is pressed, Lokalise will provide translations for all the empty values under this key.
Using professional services to translate JSON files
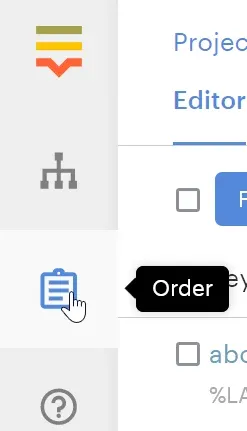
If, however, you want to handle many keys in one go, take advantage of professional translation service. Click on the Order tab in the side menu:
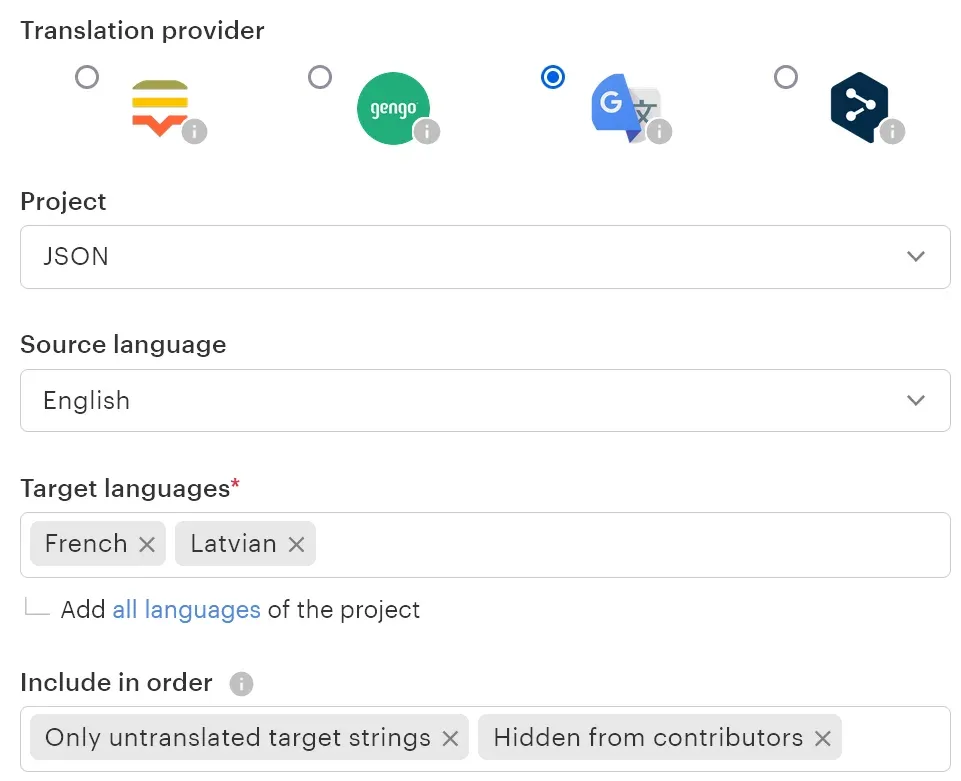
Then press Get an instant quote. You'll see the following screen:
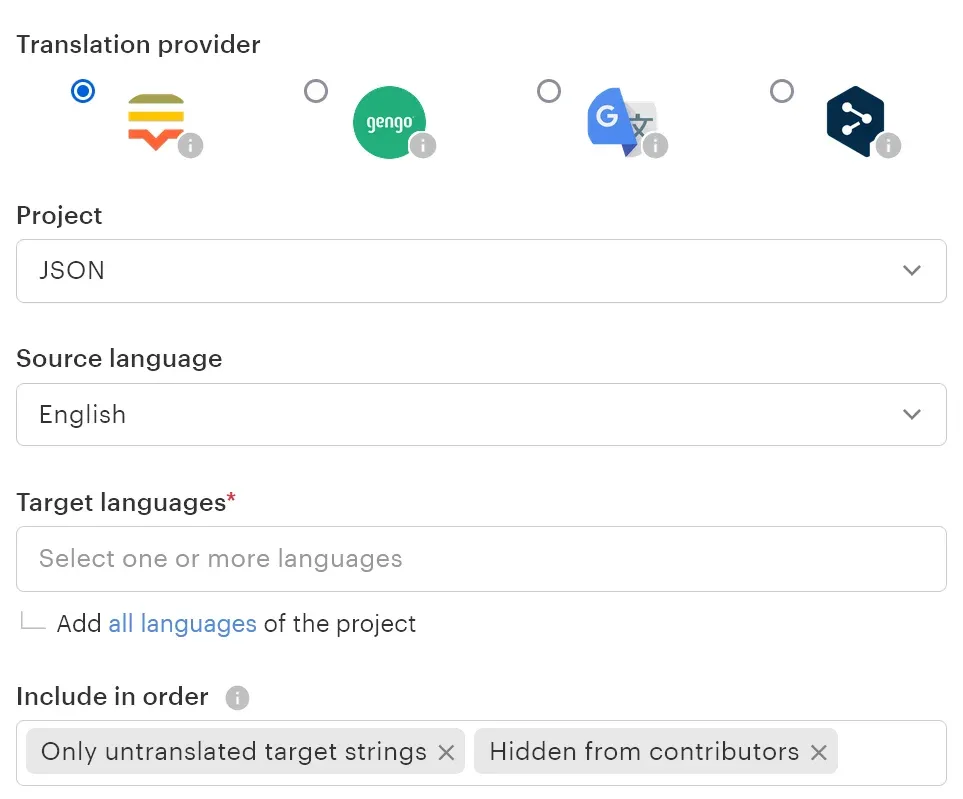
Here you should choose a translation provider and what exactly should be translated. If you're not sure what to choose and you don't want to spend too much time learning all the specifics, here are some quick tips.
If you simply wish to translate all the keys as soon as possible for a very low price, then pick Google Translate as the provider, choose your project from the dropdown, set the Source language to English, and click Add all languages under the Target languages dropdown:
Leave all other options set to their default values, press Go to checkout, enter your credit card details, and wait a few moments for your order to be completed. The price per word when using neural networks is $0.001, so if it's a small text, chances are you won't even be charged and the order will be completed on the house.
Hiring human translators to translate JSON
If, however, you're looking for top quality, then you'll need to hire a human. In this case, choose either Lokalise or Gengo (the first two providers). Lokalise is more expensive, but translators will join your project, you can collaborate using comments, and we also provide a lifetime guarantee for all the translations. Gengo is much cheaper, but you won't be able to talk to the translators (as they'll work outside of Lokalise), and you'll have to review the text and request any changes within a 5-day period.
So, choose any option that works for you, and then, once again, choose the source and the target languages, and proceed to the checkout. Of course, when hiring human translators, the order will not be delivered instantly but it's worth the wait.
How to export translated JSON files
Okay, so once your content is translated, you'll want to download it, right?
To achieve that, proceed to the Download page (before doing that, you might want to delete the sample key added by the wizard):
You might see a warning message saying that there are some QA issues, but it's safe to ignore it for the purposes of the demo. Otherwise, it's always worth checking over any potential QA issues.
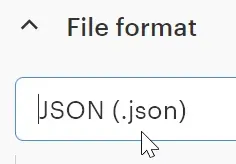
Choose the JSON as the output file format if you'd like to use the original nesting used in the uploaded file:
Lokalise also supports flat and structured JSON formats, and you can learn more about them in the section above.
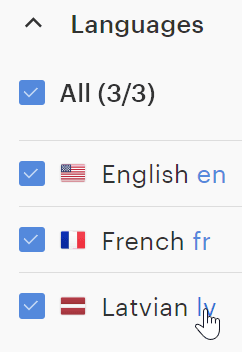
Next, choose one or more languages to export. Click on the locale codes to adjust their values if needed:
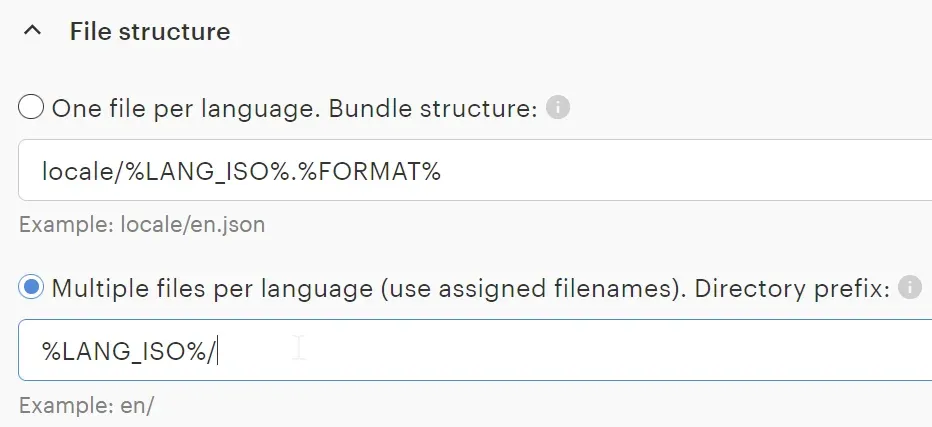
Finally, you'll have to decide how the files should be structured and adjust their path:
If you'd simply like to export all the translation keys that were initially uploaded to Lokalise (in other words, you haven't added any new keys while working with the TMS), then choose the Multiple files per language option. Keep the directory prefix if you'd like to further separate files into directories, or remove it if preferred.
If you've added multiple keys manually, then the safest bet would be to choose One file per language. Here, Lokalise will simply generate multiple translation files named after the chosen locales.
Once you are ready, scroll to the bottom and press Build and download:
You'll get a ZIP archive with all the translations. Alternatively, click Preview to understand how your translations will be structured:
In the screenshot above, we can see that our translation files will be nested into separate directories.
And that's it: we have learned how to translate JSON file into multiple languages!
How can I validate the structure and integrity of a JSON file?
If you'd like to make sure your JSON file is properly formatted and does not have any issues, you can take advantage of online validators. Actually, there are a few of them available and one example is jsonlint.com.
You just head to the website, paste your JSON content, click Validate, and instantly get the result. Simple, eh?
Conclusion
And that's it for today, folks! We have seen how JSON files are organized, we've discussed some technical aspects, and then we've seen how to translate JSON files with ease.
To learn more about Lokalise, you can check out our onboarding guides. If you have further questions on the platform, please don't hesitate to reach out to us. Thank you for staying with me and until next time
Ilya is the lead for content, documentation, and onboarding at Lokalise, where he focuses on helping engineering teams build reliable internationalization workflows. With a background at Microsoft and Cisco, he combines practical development experience with a deep understanding of global product delivery, localization systems, and developer education.
He specializes in i18n architectures across modern frameworks — including Vue, Angular, Rails, and custom localization pipelines — and has hands-on experience with Ruby, JavaScript, Python, Elixir, Go, Rust, and Solidity. His work often centers on improving translation workflows, automation, and cross-team collaboration between engineering, product, and localization teams.
Beyond his role at Lokalise, Ilya is an IT educator and author who publishes technical guides, best-practice breakdowns, and hands-on tutorials. He regularly contributes to open-source projects and maintains a long-standing passion for teaching, making complex internationalization topics accessible to developers of all backgrounds.
Outside of work, he keeps learning new technologies, writes educational content, stays active through sports, and plays music. His goal is simple: help developers ship globally-ready software without unnecessary complexity.
Libraries and frameworks to translate JavaScript apps
In our previous discussions, we explored localization strategies for backend frameworks like Rails and Phoenix. Today, we shift our focus to the front-end and talk about JavaScript translation and localization. The landscape here is packed with options, which makes many developers a
Syncing Lokalise translations with GitLab pipelines
In this guide, we’ll walk through building a fully automated translation pipeline using GitLab CI/CD and Lokalise. From upload to download, with tagging, version control, and merge requests. Here’s the high-level flow: Upload your source language files (e.g. English JSON files) to Lokalise from GitLab using a CI pipeline.Tag each uploaded key with your Git branch name. This helps keep translations isolated per feature or pull request
Build a smooth translation pipeline with Lokalise and Vercel
Internationalization can sometimes feel like a massive headache. Juggling multiple JSON files, keeping translations in sync, and redeploying every time you tweak a string… What if you could offload most of that grunt work to a modern toolchain and let your CI/CD do the heavy lifting? In this guide, we’ll wire up a Next.js 15 project hosted on Vercel. It will load translation files on demand f