With Android’s global reach, getting Android localization and localized time right is an important part of app development
Whether you're a new developer working on your first app or an experienced programmer adding another one to your collection, the key question is: Who are you building this app for? In other words, who's your target audience?
If you want your mobile apps to grow beyond your local area, possibly reaching users across different countries, here’s something to consider: most of the world doesn’t speak English. Eventually, you’ll need to support multiple languages.
Incorporating software internationalization into your development process from the beginning will help streamline localization efforts, making it easier to adapt your app for different languages and cultural contexts later on.
That’s why localizing your Android app is necessary. In this article, we’ll show you how to get started with Android localization using clear, step-by-step examples.
To start your Android localization journey, first create a new Android project using the "Empty Activity" template in Android Studio. Android Studio not only simplifies project setup but also provides a built-in emulator for testing your mobile application translation on various devices and configurations, which is essential when verifying localization across different locales.
For this example, we’ll be building a Kotlin-based project. Kotlin is a modern, concise language that integrates seamlessly with Android development, making it easier to manage localization and other app features.
Here’s the project configuration we’ll use:
Name: LokaliseI18n
Package name: com.example.lokalisei18n
Language: Kotlin
Minimum SDK: API 31
Having entered this information, hit Create and proceed to the next step.
Step 2: Add some elements
Next, let’s add some content to the empty MainActivity. Open the activity_main.xml file located in the app/src/main/res/layout directory. Add a simple TextView displaying the string "Hello world!" (note the ID attribute):
However, there’s an issue here: the "Hello world!" string is hardcoded directly into the TextView. This is generally bad practice, as it makes the app harder to maintain and adapt, especially when you want to support multiple languages.
For proper localization, you'll need to handle text dynamically so the app can easily change languages based on user preferences.
How to add Android language resources
Step 1: Add string resources
Let’s start by adding language resources to our Android app. These resources will hold the localization-related values, acting as static assets for multiple languages.
Android provides a specific structure to organize app resources. Inside the res/values directory, you’ll find a strings.xml file that holds the text strings for the app.
Let’s add a new string resource to strings.xml for the "Hello world!" text:
Here, we've added the hello_world key to store the text "Hello world!". While it's fine for simple contexts like this, it’s a good habit to create self-explanatory names for your keys. For best practices, check out our blog post on working with translation keys.
Step 2: Add more resources
Next, let's add localization for another language, such as Latvian. Android Studio has built-in support for localization (l10n), which makes this easier.
Create a resource file
Right-click on the res folder and choose New > Android resource file.
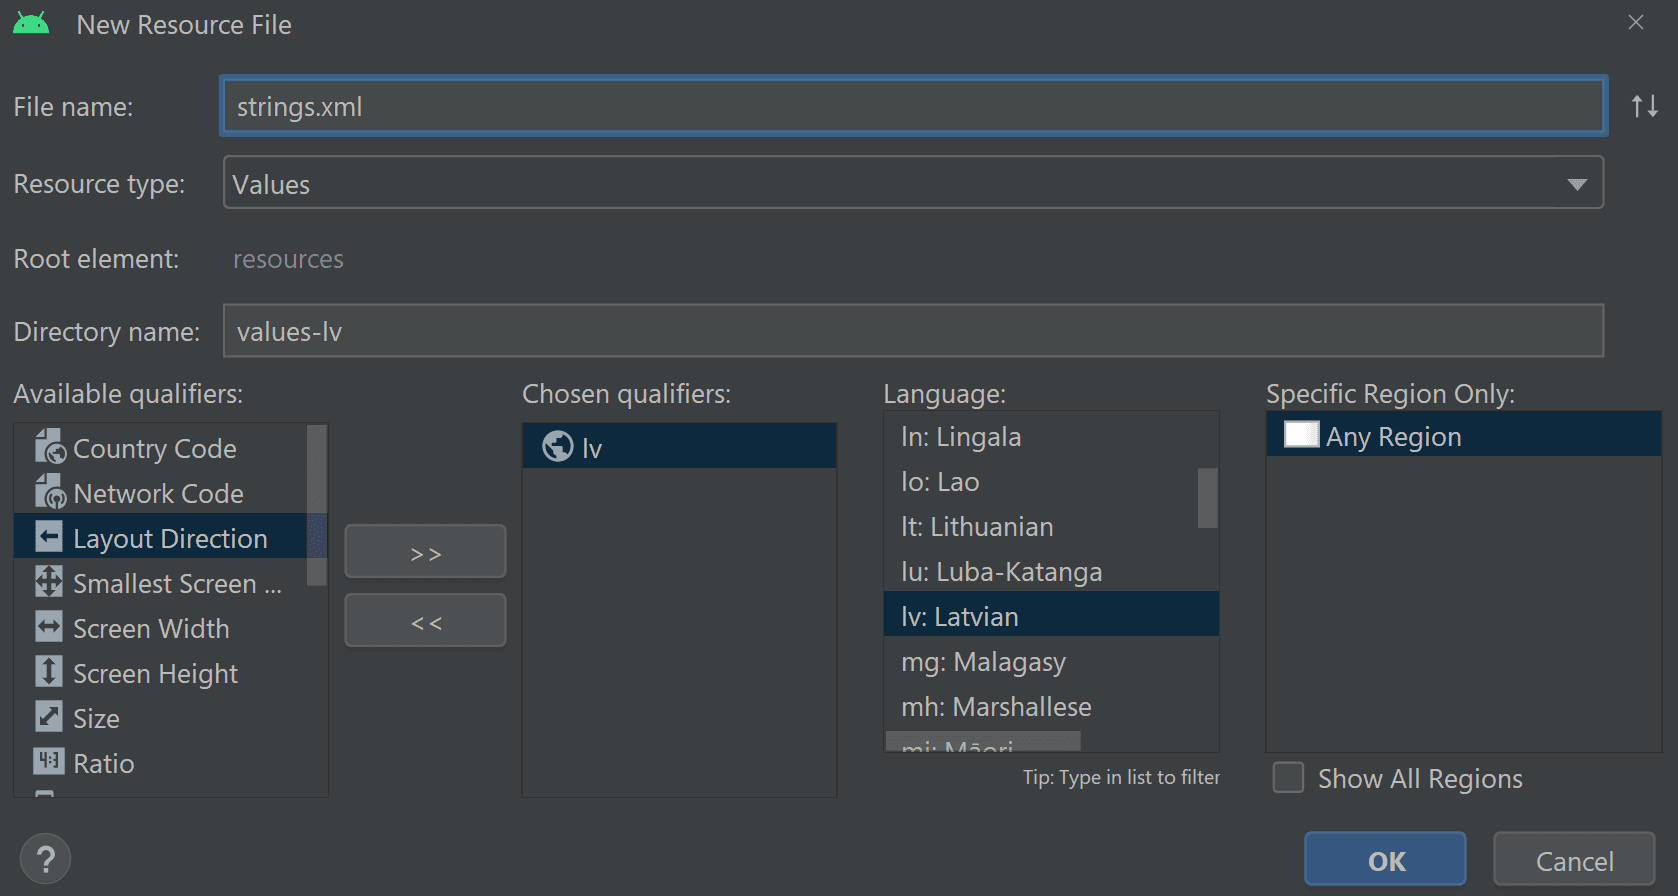
In the resource file wizard, choose Values resource type from the dropdown menu and select Locale from the list of available qualifiers.
Choose lv: Latvian from the language list. Keep the region setting at "Any region".
Name the file strings.xml. Android Studio will automatically create the folder res/values-lv/.
Click OK. A new strings.xml file will open in the res/values-lv/ directory.
Add the Latvian resources to the newly created file:
Now our mobile app has two supported languages: American English and Latvian.
Step 3: Refer to the resources
Once your language resources are set up, let’s reference them in the TextView. Open activity_main.xml and update the android:text attribute to use the resource key hello_world:
This key acts as a placeholder that will be replaced with the actual translation.
Step 4: Refer to resources dynamically
If you need to change the TextView text dynamically, do it programmatically in MainActivity.kt. Use the following code:
package com.example.lokalisei18nimport android.os.Bundleimport androidx.appcompat.app.AppCompatActivityimport android.widget.TextViewimport androidx.appcompat.app.ActionBarclass MainActivity : AppCompatActivity() { override fun onCreate(savedInstanceState: Bundle?) { super.onCreate(savedInstanceState) setContentView(R.layout.activity_main) val actionBar: ActionBar? = supportActionBar actionBar?.setTitle(R.string.app_name) // Set ActionBar title val textView = findViewById<TextView>(R.id.test_text_view) textView.setText(R.string.hello_world) // Set TextView text }}
Main things to note:
The ActionBar title is set to the app_name string resource.
The test_text_view text is set to the hello_world string resource.
Now your app is localized for two languages: English and Latvian.
Step 5: Test Android localization
You might be thinking, "It looks the same as before!" But in reality, the "Hello world!" text is no longer hardcoded. Instead, it’s pulled from the localized resources based on the device’s system language. To test this, run the app on an Android device with the system language set to Latvian.
However, how do we switch our app to another language without touching the device settings? We'll explore this in the next section.
How to change the application locale programmatically
By default, Android loads resources based on the system language set on the user's device. For example, if Agnese, a Latvian user with her phone set to Latvian, opened our app, she’d see the content in Latvian. But what if another user wants to use Latvian while their phone's default language is set to English?
In this case, we need to override the default system locale programmatically. Let’s walk through how to achieve this by creating a new ContextUtils.kt file.
Step 1: Create a utility class to update the locale
Create a new utils/ContextUtils.kt file with the following code to add a method for updating the locale:
We create a new ContextWrapper with the locale updated to Latvian ("lv").
This updated context is then passed to the attachBaseContext method of MainActivity.
When the activity starts, it runs in a context with the locale set to Latvian, even if the device’s system language is set to something else.
Step 3: Test the locale change
Now, run the app in the emulator. You should see the text localized to Latvian without needing to change the system language manually.
And that's it! You've successfully overridden the system locale programmatically.
In the next section, we’ll cover other challenges you might encounter during your Android app localization journey.
How to pluralize nouns
When dealing with nouns, it's important to pluralize them correctly according to the language's rules. For example, you don't want your app to say "I have 3 cat" instead of "3 cats." This is where Android’s built-in support for quantity strings (plurals) is useful. Let's walk through how to implement it.
Step 1: Add TextViews for pluralization
First, add three TextViews to activity_main.xml, which will display the text for one, few, and many quantities:
In the MainActivity.kt file, set the pluralized text in the TextViews using Resources.getQuantityString. Here’s how to do it:
override fun onCreate(savedInstanceState: Bundle?) { // ... with (resources) { val pluralViewOne = findViewById<TextView>(R.id.plural_view_one) val quantityStringFor1 = getQuantityString(R.plurals.my_cats, 0, 0) pluralViewOne.text = quantityStringFor1 val pluralViewFew = findViewById<TextView>(R.id.plural_view_few) val quantityStringFor2 = getQuantityString(R.plurals.my_cats, 1, 1) pluralViewFew.text = quantityStringFor2 val pluralViewMany = findViewById<TextView>(R.id.plural_view_many) val quantityStringFor5 = getQuantityString(R.plurals.my_cats, 3, 3) pluralViewMany.text = quantityStringFor5 }}
getQuantityString uses the plural resource and the count to retrieve the correct string.The second parameter is the quantity, and the third is the value to replace %s in the string.
Step 5: Test the pluralization
Run the app and check if the text is properly pluralized for both English and Latvian.
How to localize date and time
To localize date and time in your Android app, you can use the getDateTimeInstance method from the DateFormat class, which automatically formats date and time according to the current locale.
Step 1: Add a TextView for displaying the localized date and time
First, add a TextView in activity_main.xml that will display the localized date and time:
Step 2: Set the localized date and time in MainActivity
Now, let's update the MainActivity class to show the localized date and time in the TextView when the app launches. Add the following code in the onCreate method:
// other imports...import java.text.DateFormatimport java.util.Dateclass MainActivity : AppCompatActivity() { override fun onCreate(savedInstanceState: Bundle?) { // ... val currentDateTime = Date() // 1 val localizedDateTimeView = findViewById<TextView>(R.id.localized_date_time_view) localizedDateTimeView.text = DateFormat.getDateTimeInstance().format(currentDateTime) // 2 } } // ...}
Explanation:
Create a Date object: val currentDateTime = Date() creates a Date object that represents the exact date and time at the moment of its creation.
Format the date and time: DateFormat.getDateTimeInstance().format(currentDateTime) automatically formats the date and time according to the device's locale, using the DateFormat class.
Step 3: Test the app
Now, run the app to ensure the date and time are displayed in the appropriate format based on the device's locale.
Use Lokalise for Android localization
If you've made it this far, you're clearly serious about internationalization for your Android app. But let's be real: do you or your team have the time to dive into all these new classes, methods, and deprecated variables just to handle localization?
Probably not.
As your app grows, so will the number of strings and languages you need to manage. That’s where a translation management system like Lokalise comes in handy. Let's walk through how it works.
Step 1: Set up a Lokalise project
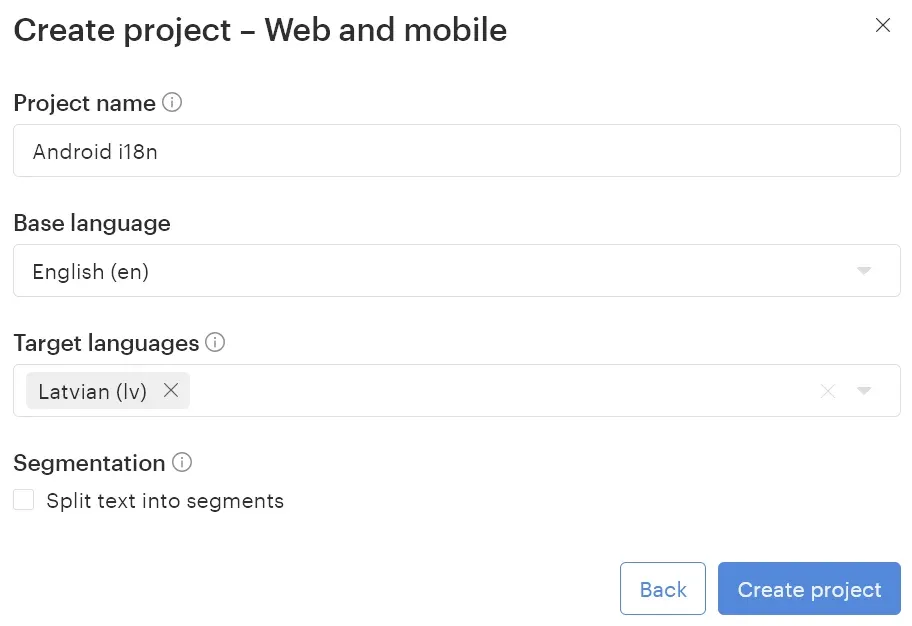
To get started, create a free account or log in to Lokalise. In the dashboard, click the New project button and create a Web and mobile project. Enter the following information:
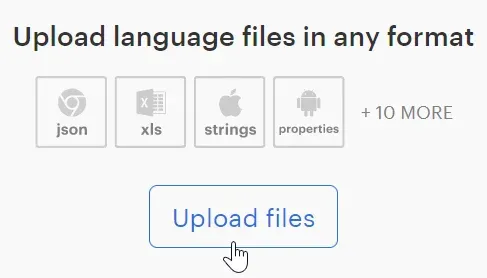
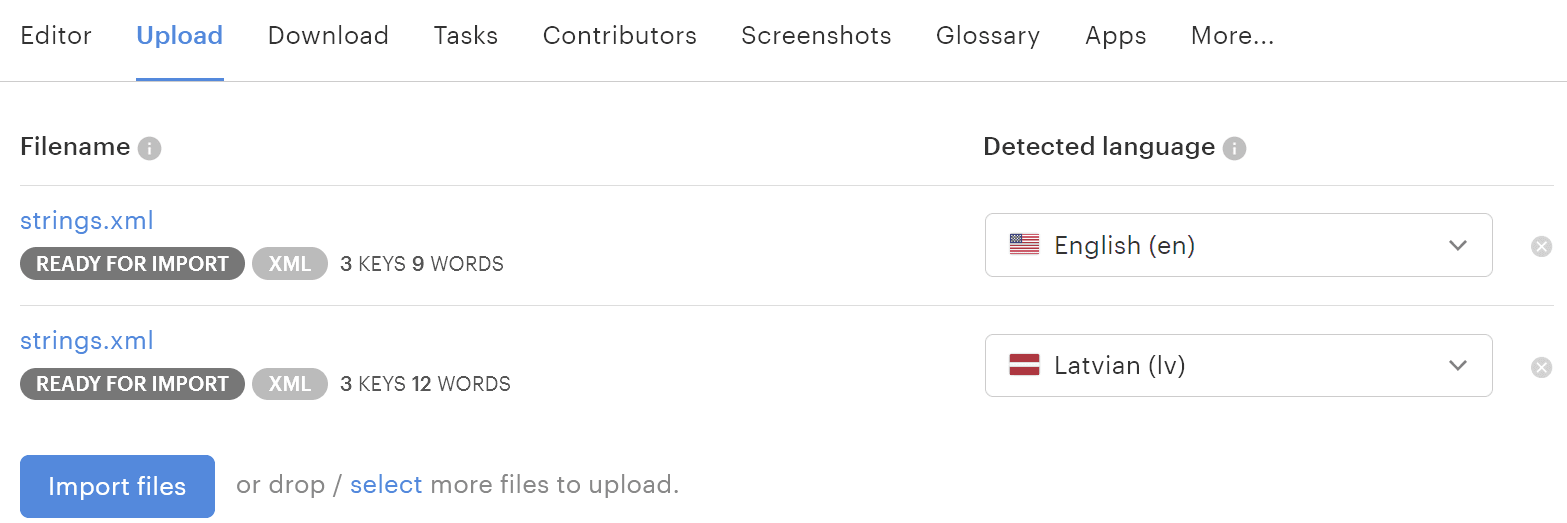
Once the project is created, click Upload files:
Upload your language resource files, such as the strings.xml files we created in the tutorial. If Lokalise detects the wrong language, select the correct one from the dropdown menu.
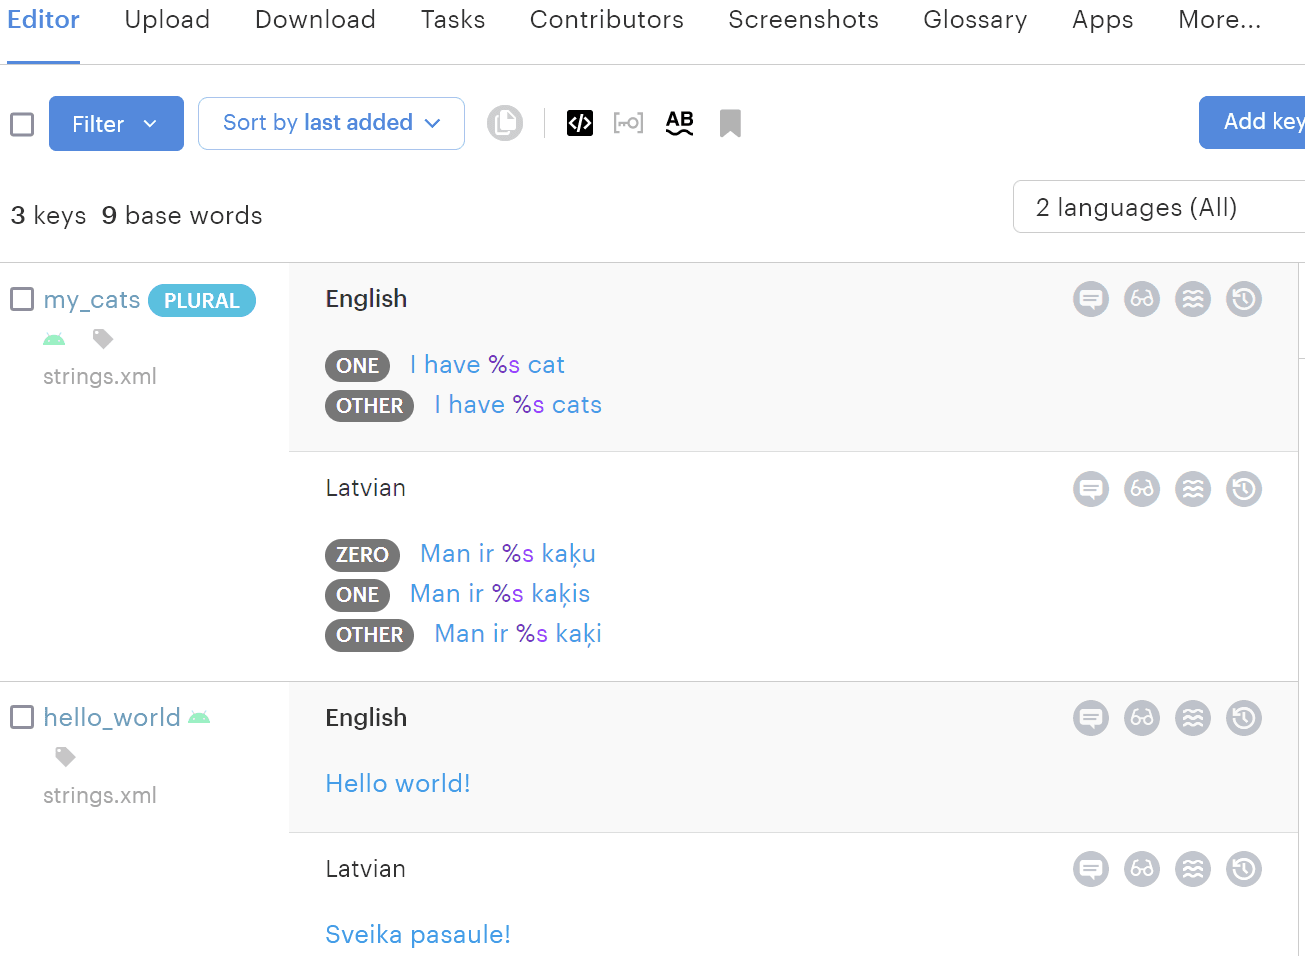
Click the Import files button to complete the resource uploading process. In the Editor tab, you’ll see all your project's resources neatly organized.
Step 2: Manage resources with Lokalise
Once your language resources are uploaded, Lokalise allows you to:
Easily edit translations in the UI.
Request professional translation services.
Use AI to perform translation.
Generate translation files for multiple locales.
Integrate with numerous third-party services.
And many more!
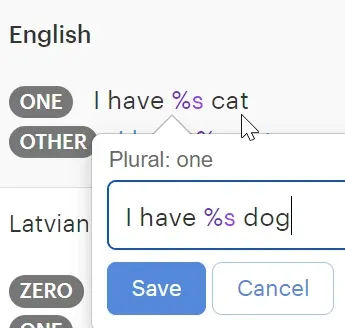
For example, if you’re a dog person and want to change all instances of "cat" to "dog," simply click on the translation and edit it.
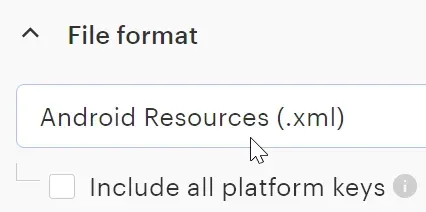
Then, head to the Download page and select the Android Resources (.xml) format from the dropdown menu:
Click Build and download to get a ZIP file with your updated translations. Replace the old resource files in your project with these new ones.
Step 3: Over-the-air (OTA) updates
Lokalise also offers an over-the-air (OTA) feature, allowing you to deliver translation updates without needing to rebuild or republish your app to Google Play or other stores. This is useful for minor adjustments like fixing typos.
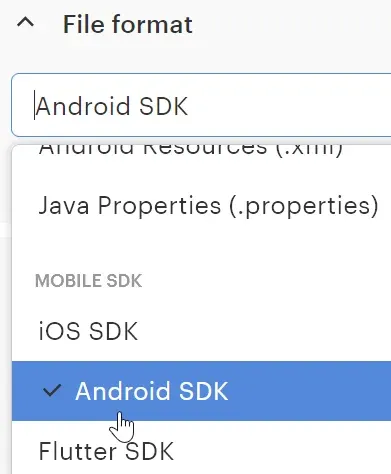
To use OTA, go to the Download page and select Android SDK under the Mobile SDK section from the dropdown menu:
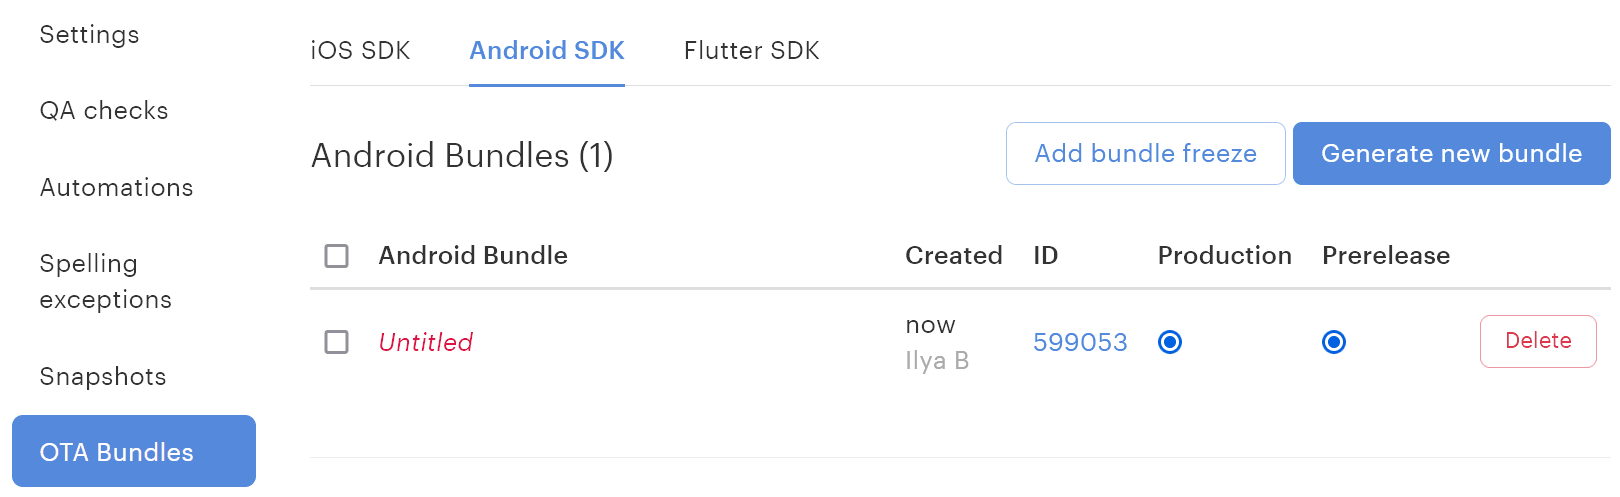
Scroll down and click Build only to generate an OTA bundle. You can manage the bundle by going to More > Settings > OTA bundles. In the OTA bundles section, switch to the Android SDK tab and view your bundle. Optionally, rename it.
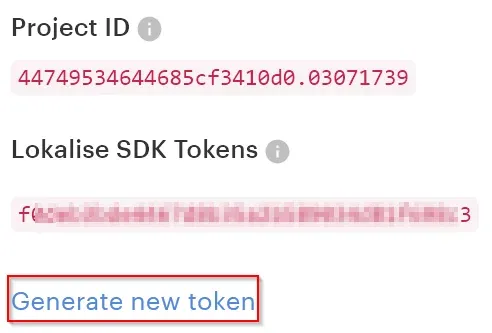
Make sure to replace "YOUR_TOKEN" and "YOUR_PROJECT_ID" with the values from your Lokalise project.
To get these values, head over to your Lokalise project's dashboard and click More > Settings. Here, take note of the Project ID, click Generate new token, and note down the resulting token value as well:
Update your AndroidManifest.xml to use MyApplication (note the android:name=".MyApplication" part):
In MainActivity.kt, modify the attachBaseContext method to wrap the context with Lokalise:
override fun attachBaseContext(newBase: Context) { super.attachBaseContext(LokaliseContextWrapper.wrap(newBase))}
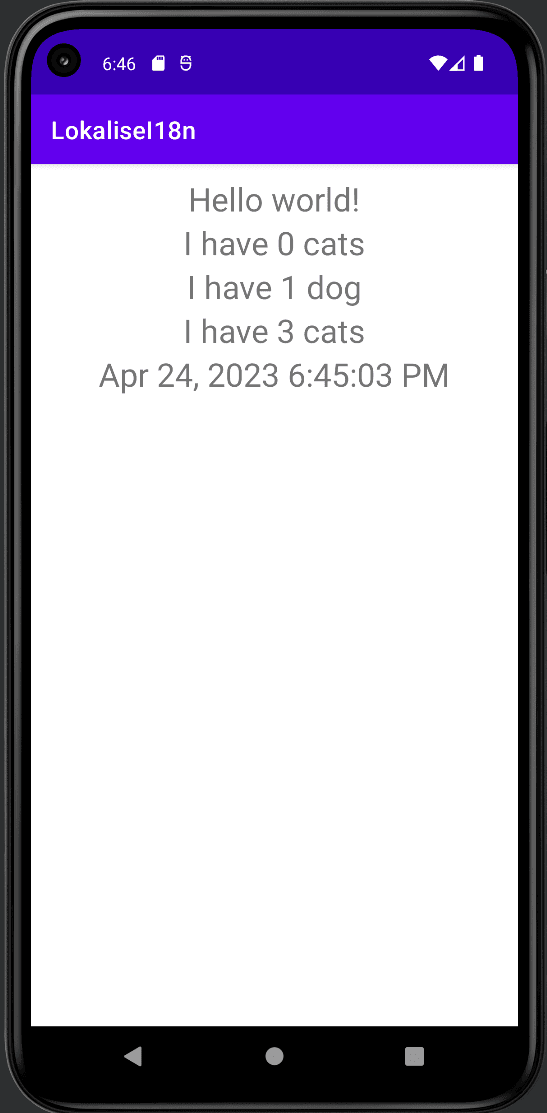
Step 5: Test the OTA updates.
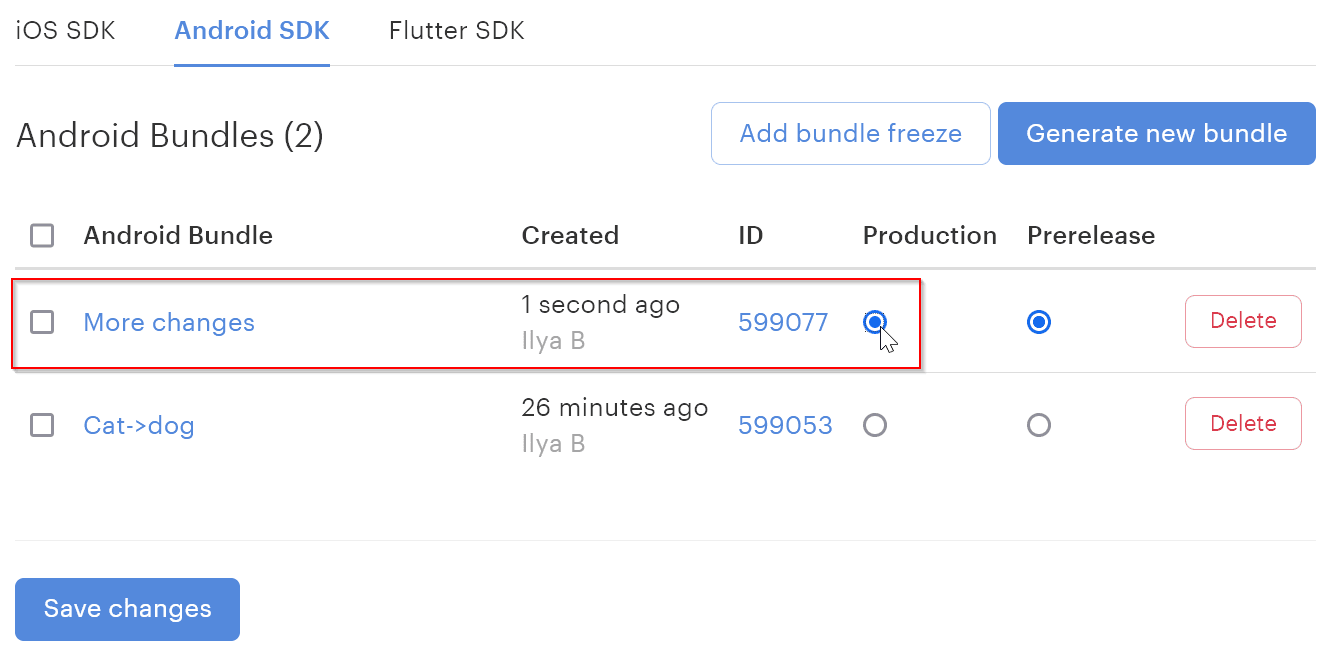
Now, run your app in the emulator and check that the text reflects the updated translations. You can easily make more changes in the Lokalise editor and generate new OTA bundles. When ready, set the bundle as production and save the changes.
Of course, you can perform additional changes in the Lokalise editor and generate a new Android SDK bundle. However, in this case make sure to set this new bundle as production and click Save changes:
In this tutorial, we covered how to localize an Android app for multiple locales. We tackled some of the challenges posed by API deprecations that make Android localization trickier, and we learned how to switch between languages—whether by changing the device’s language or programmatically within the app using a modified Context.
We also explored how Lokalise streamlines the process by delivering localizations over the air (OTA) without the need to republish mobile apps into Google Play using the Lokalise API. Along the way, we learned how to pluralize nouns with Android’s quantity strings and localize date and time formats.
With these tools and techniques, you're well-equipped to handle Android app localization. Until next time—happy coding!
Ilya is the lead for content, documentation, and onboarding at Lokalise, where he focuses on helping engineering teams build reliable internationalization workflows. With a background at Microsoft and Cisco, he combines practical development experience with a deep understanding of global product delivery, localization systems, and developer education.
He specializes in i18n architectures across modern frameworks — including Vue, Angular, Rails, and custom localization pipelines — and has hands-on experience with Ruby, JavaScript, Python, Elixir, Go, Rust, and Solidity. His work often centers on improving translation workflows, automation, and cross-team collaboration between engineering, product, and localization teams.
Beyond his role at Lokalise, Ilya is an IT educator and author who publishes technical guides, best-practice breakdowns, and hands-on tutorials. He regularly contributes to open-source projects and maintains a long-standing passion for teaching, making complex internationalization topics accessible to developers of all backgrounds.
Outside of work, he keeps learning new technologies, writes educational content, stays active through sports, and plays music. His goal is simple: help developers ship globally-ready software without unnecessary complexity.
Build a smooth translation pipeline with Lokalise and Vercel
Internationalization can sometimes feel like a massive headache. Juggling multiple JSON files, keeping translations in sync, and redeploying every time you tweak a string… What if you could offload most of that grunt work to a modern toolchain and let your CI/CD do the heavy lifting? In this guide, we’ll wire up a Next.js 15 project hosted on Vercel. It will load translation files on demand f
Hands‑on guide to GitHub Actions for Lokalise translation sync: A deep dive
In this tutorial, we’ll set up GitHub Actions to manage translation files using Lokalise: no manual uploads or downloads, no reinventing a bicycle. Instead of relying on the Lokalise GitHub app, we’ll use open-source GitHub Actions. These let you push and pull translation files directly via the API in an automated way. You’ll learn how to: Push translation files from your repo to LokalisePull translated content back and open pull requests automaticallyWork w