If you're a mobile developer, you might already be familiar with Flutter, Google's open-source UI toolkit for building beautiful, natively compiled applications for mobile, web, and desktop from a single codebase.
Initially known as "Sky" and exclusive to Android, Flutter now supports iOS, Linux, Mac, Windows, and Google Fuchsia. An essential aspect of using Flutter is mastering Flutter localization to make your app accessible to a global audience.
Integrating software internationalization practices can enhance your Flutter localization process, ensuring your app meets the diverse needs of users across different regions.
A well-structured localization process ensures seamless integration of translations and cultural adaptations within the app, optimizing user experience across all markets.
In this article, you'll learn how to easily translate your Flutter application into multiple languages, leveraging effective translation management techniques to streamline the process.
You might be also interested in checking out our Flutter SDK, which offers over-the-air support for your apps.
In this article, we'll explore how to add Flutter i18n and l10n to your application. Before diving into the internationalization part, you'll need to set up your working environment by following the official guide at docs.flutter.dev.
This tutorial assumes you have basic knowledge of Flutter. Once you have everything installed, create a new Flutter application by running:
flutter create i18n_demo
We also need content to demonstrate the process of Flutter localization, so let's do some more preparations.
This file specifies where our translation files will be located, what the template file is, and where the compiled translations should be placed. For more options, refer to the official docs.
That's it! Now let's take care of the translation files.
Creating Flutter translation files
ARB files and Flutter localization
Translations for Flutter apps are usually stored in ARB files, which are similar to JSON files. These simple key-value files will be compiled into special Dart files used by the app.
Start by creating an l10ndirectory within the libfolder. Inside, create two files: intl_en.arb and intl_ru.arb to store English and Russian translations. You can choose any other locale as Flutter supports over a hundred languages.
In this file, we typically don't provide metadata but we still have to provide the country code.
Compiling Dart files from ARB
Although you and your translators will work with ARB files, Flutter requires translations in a different format. Convert the ARBs into Dart files by running:
flutter gen-l10n
Rerun this command whenever you update your translations.
You'll notice a new .dart_tool/flutter_gen/gen_l10n folder in the project root. It contains three files: app_localizations.dart, app_localizations_en.dart, and app_localizations_ru.dart. The first file stores information about all supported locales and exposes useful methods, while the other two store the translations.
Avoid modifying these files manually as they will be recompiled every time you run the flutter gen-l10n command.
Performing simple translations
All right, so now that we have two translation keys it's time to use them in the source code.
Translating the app title
First, I'd like to display the app title. Open the app/my_app.dart file and import the app_localizations.dart:
This code sample shows how to use translation keys in your app by referencing AppLocalizationsclass and calling the property named after your translation key (appTitlein this case).
Displaying the welcoming message
For another example, open the app/pages/my_home_page.dart file and add this import:
In this case, we don't need to use onGenerateTitle(it's only needed for the global title).
That's it! You can now run your Flutter app on a mobile phone or emulator to ensure everything runs smoothly. If you change the system locale in the phone settings, the app will be translated accordingly.
Interpolation and placeholders in Flutter translations
Inserting custom text
To enhance your Flutter localization, you might need to interpolate custom values within your translations.
Let's say we want to display copyright information with the company name. Update the intl_en.arb file in the lib/l10n directory:
First, add a new Text widget before or after the const CurrentLocaleWidget() in the my_home_page.dart file:
/ ...children: <Widget>[ const LanguageWidget(), Text(AppLocalizations.of(context)!.currentDate(DateTime.now())), // <--- add this Text(AppLocalizations.of(context)!.pressButton), // ... other text widgets here...],// ...
We are displaying the current date and time. Different formats can represent this information, and the DateFormatclass from the intlpackage helps us choose the appropriate format.
To display the current year, month, weekday, and day, update the intl_en.arb file by adding localized string:
{ // ... "currencyDemo": "Here's a demo price: {value}", "@currencyDemo": { "description": "A demo showing how to localize currency", "placeholders": { "value": { "type": "int", "format": "currency", "optionalParameters": { "decimalDigits": 2 } } } }}
This example uses the currency format, which follows the pattern <CURRENCY_NAME><FORMATTED_NUMBER>. For the English locale, the default currency is USD, while for Russian, it's RUB. We also specify two decimal digits.
Great — our currency information is properly localized!
Pluralization
Pluralization adjusts the text based on a count. We have a button that increments a counter, so let's adjust the displayed text according to the counter's value.
First, update the Text widgets in the my_home_page.dart file:
children: <Widget>[ const CurrentLocaleWidget(), // ... Text(AppLocalizations.of(context)!.pressButton), // <-- change this Text( AppLocalizations.of(context)!.buttonPressed(_counter), // <-- change this style: Theme.of(context).textTheme.headlineMedium, ),],
Then, update the intl_en.arb file:
{ "pressButton": "Press the button below", "buttonPressed": "{count, plural, =0{Has not pressed yet} =1{Pressed 1 time} other{Pressed {count} times}}", "@buttonPressed": { "description": "Shows how many times the button has been pressed (pluralized)", "placeholders": { "count": { "type": "num", "format": "compact" } } }}
The buttonPressedkey uses a plural expression to display different texts based on the countvalue. There are three cases: when countequals zero, one, or any other value.
Flutter also supports the selectexpression for handling gender information:
Different languages have different pluralization rules. In this case, Russian requires four options (plural forms).
That's it! You've now translated your app, and you can rerun it to ensure everything works smoothly.
Switching the locale programmatically
While the app language can be changed by switching the system locale, this isn't always convenient. Let's see a simple way to add a locale switcher to your Flutter app.
Adding a locale provider
First, we'll need to add a new dependency called providerthat will help us manage state. Run the following command:
flutter pub add provider
Next, create a locale_provider.dart file inside the app/providers directory:
This widget reads the currently set locale and displays a dropdown menu. It lists all supported locales and includes an onTap event that calls the setLocalemethod in our provider.
Displaying the language switcher
Import the locale_switcher_widget.dart in the my_home_page.dart file:
Awesome! Now reload the app and try switching locales using the dropdown in the top menu.
Use Lokalise AI to translate into multiple locales
Managing translation files can be tedious, especially for larger applications. Additionally, you might need to support languages you don't speak. You can hire a professional or use AI. Meet Lokalise, a translation management system that simplifies Flutter localization and supports ARB files fully. With features like:
Easy integration with services (GitHub, Figma, Asana, and more)
Collaborative translations
Translation quality assurance tools
Centralized dashboard for managing translations
Plus, loads of others
Lokalise makes it easy to expand your Flutter app to various locales and enhances your localization workflow.
Uploading ARB translation files
To get started, sign up for a free trial (no credit card information required). In your projects dashboard, click the New project button:
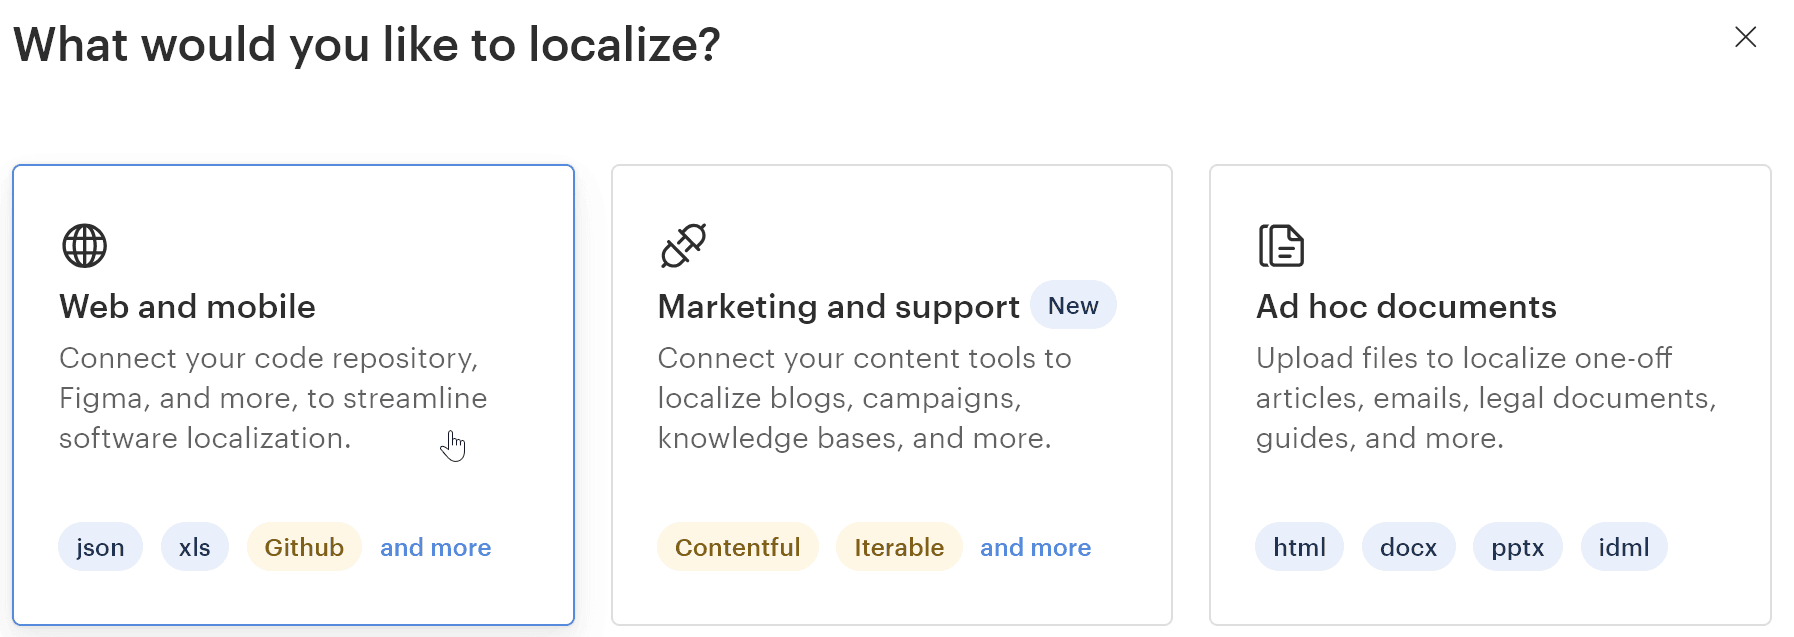
In the dialog, choose Web and mobile:
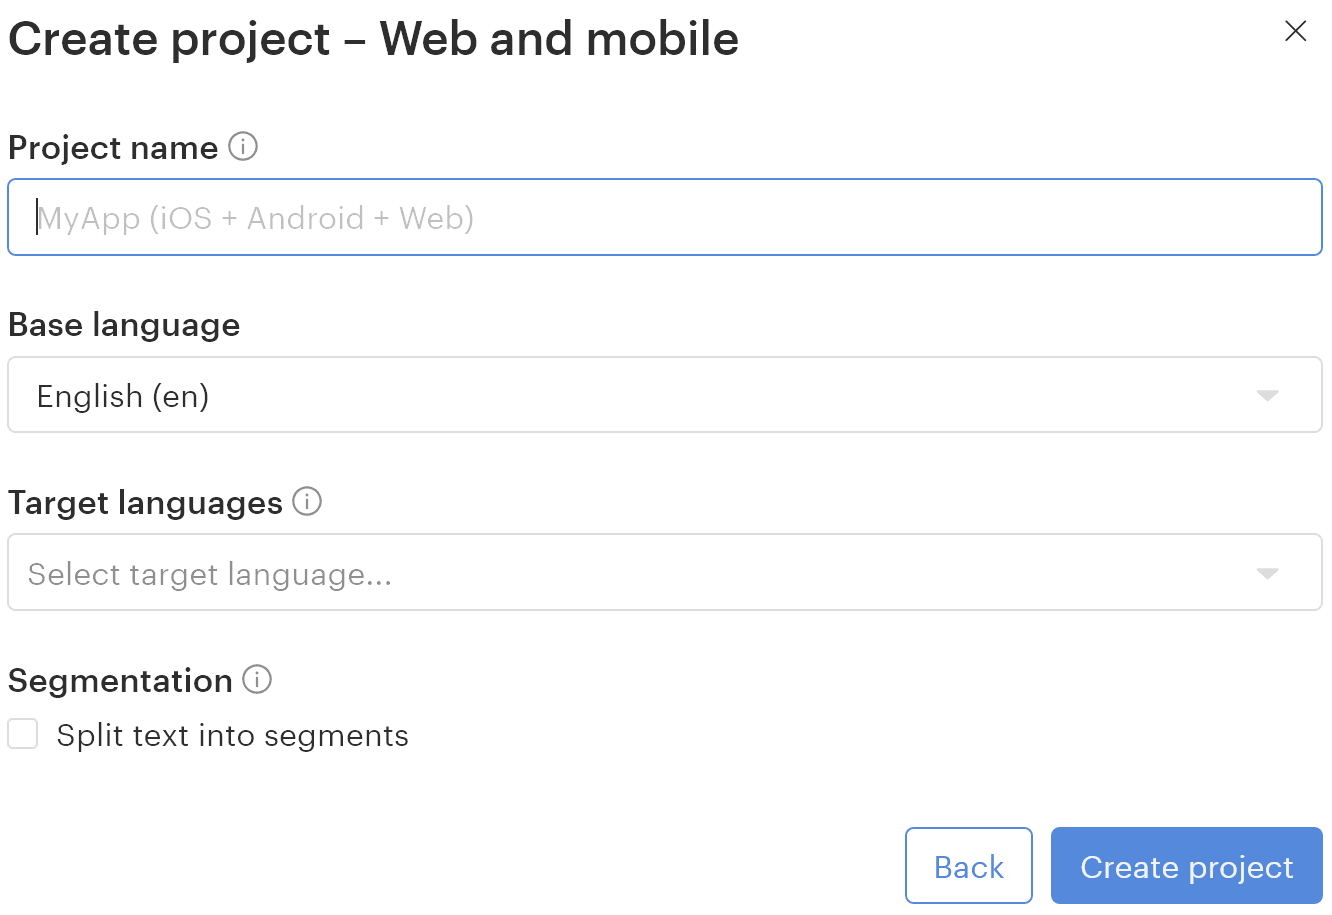
Next, give your project a name, choose English (or another default language) as the Base language, and choose one or more Target languages (the ones to translate into):
Let's suppose that I would now like to translate into French in addition to Russian.
Then hit Create project.
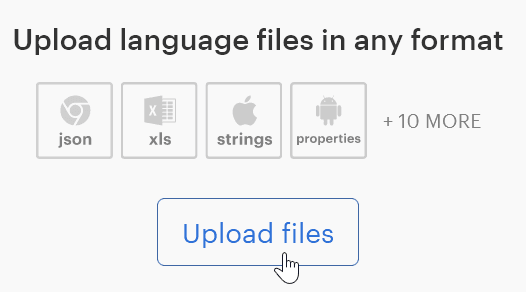
On the next screen, click Upload files:
Choose the ARB files from your project (don't upload Dart files). You can upload intl_en.arb unless you need to adjust Russian translations.
Check the Detect ICU plurals option if you use pluralization in your ARB files (because the pluralis actually an ICU expression):
The main part of the screen will look like this:
To manage filenames better, add a %LANG_ISO% placeholder. Click the filename and provide this placeholder, which will be replaced with the locale code upon export.
Adding this placeholder is beneficial because it will be replaced with the actual locale code once the file is exported back to the project. Otherwise, all the translation files will have identical names.
Press "Import files" when ready.
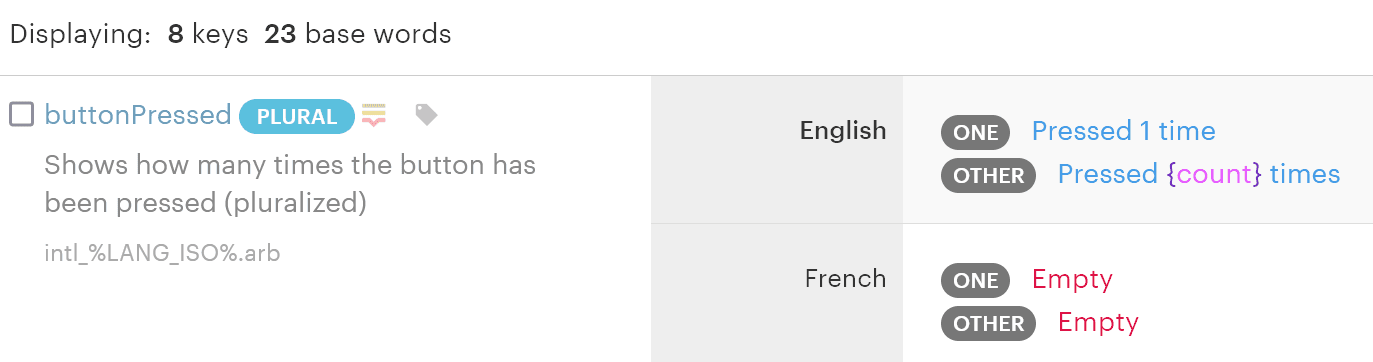
Next, click "Editor" in the top menu to view your translations:
You might notice that the buttonPressedkey lacks the zero plural form because it's not standard for English, which only has oneand other.
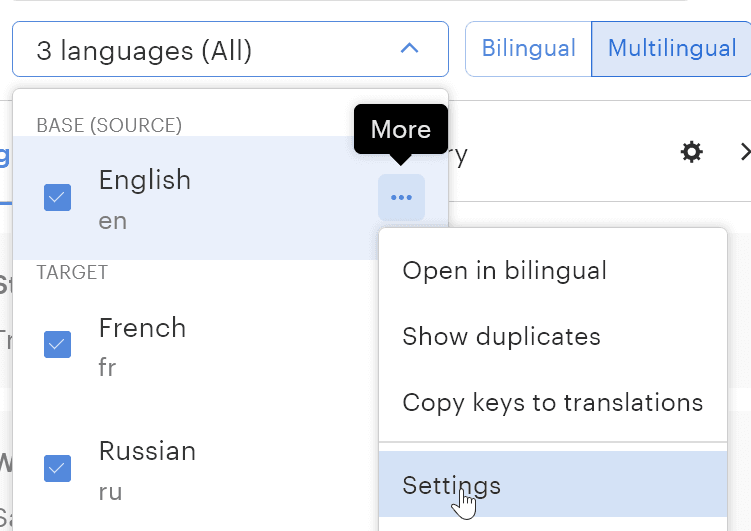
For additional forms, click the languages dropdown in the top menu, select the desired locale, and go to Settings:
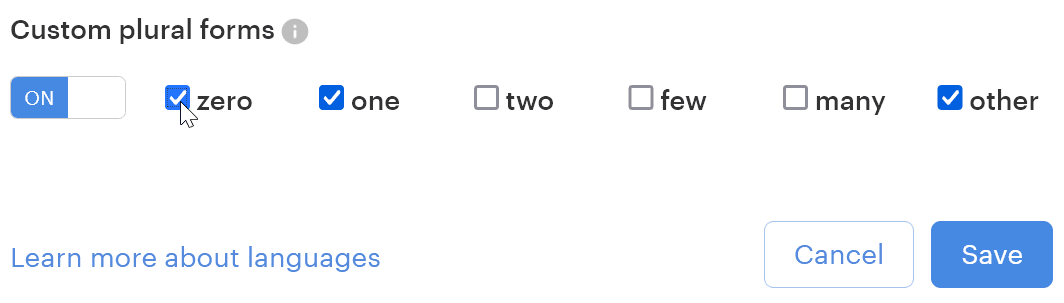
Enable the Custom plural forms switch and adjust as needed:
Re-upload the translation file, enabling Detect ICU plurals and Replace modified values options.
You can manually edit these texts or use Lokalise AI for translations.
Using Lokalise AI
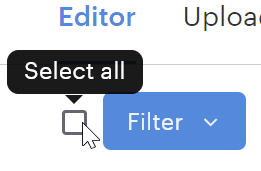
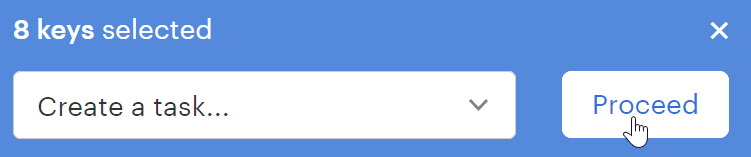
So, let's employ Lokalise AI to translate into French. Select all your translation keys by checking the box in the top left corner:
Select Create a task from the dialog and hit Proceed:
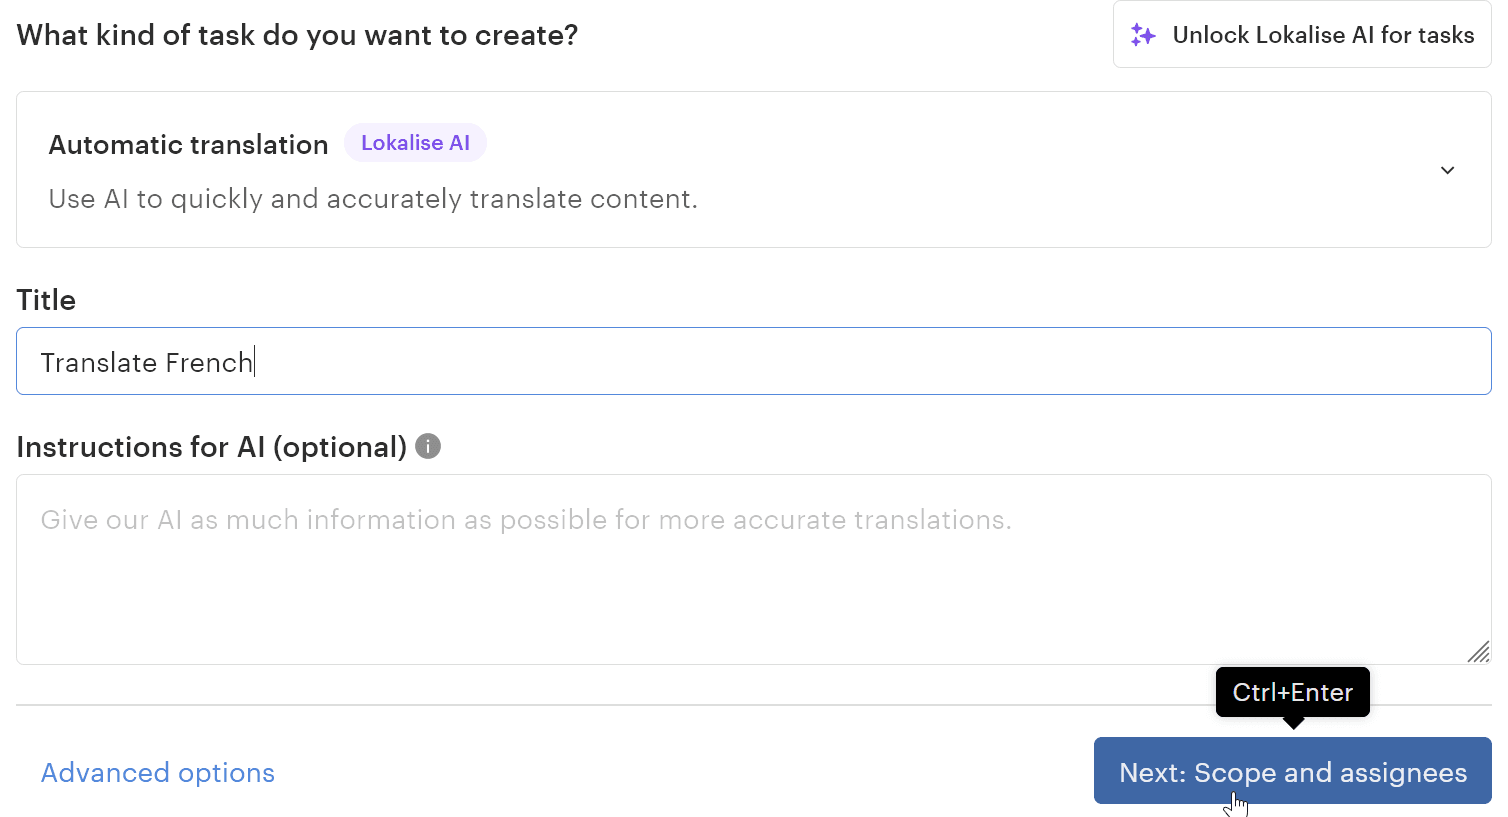
Pick the Automatic translation task type, name it, and optionally provide additional instructions for the AI:
Click Next.
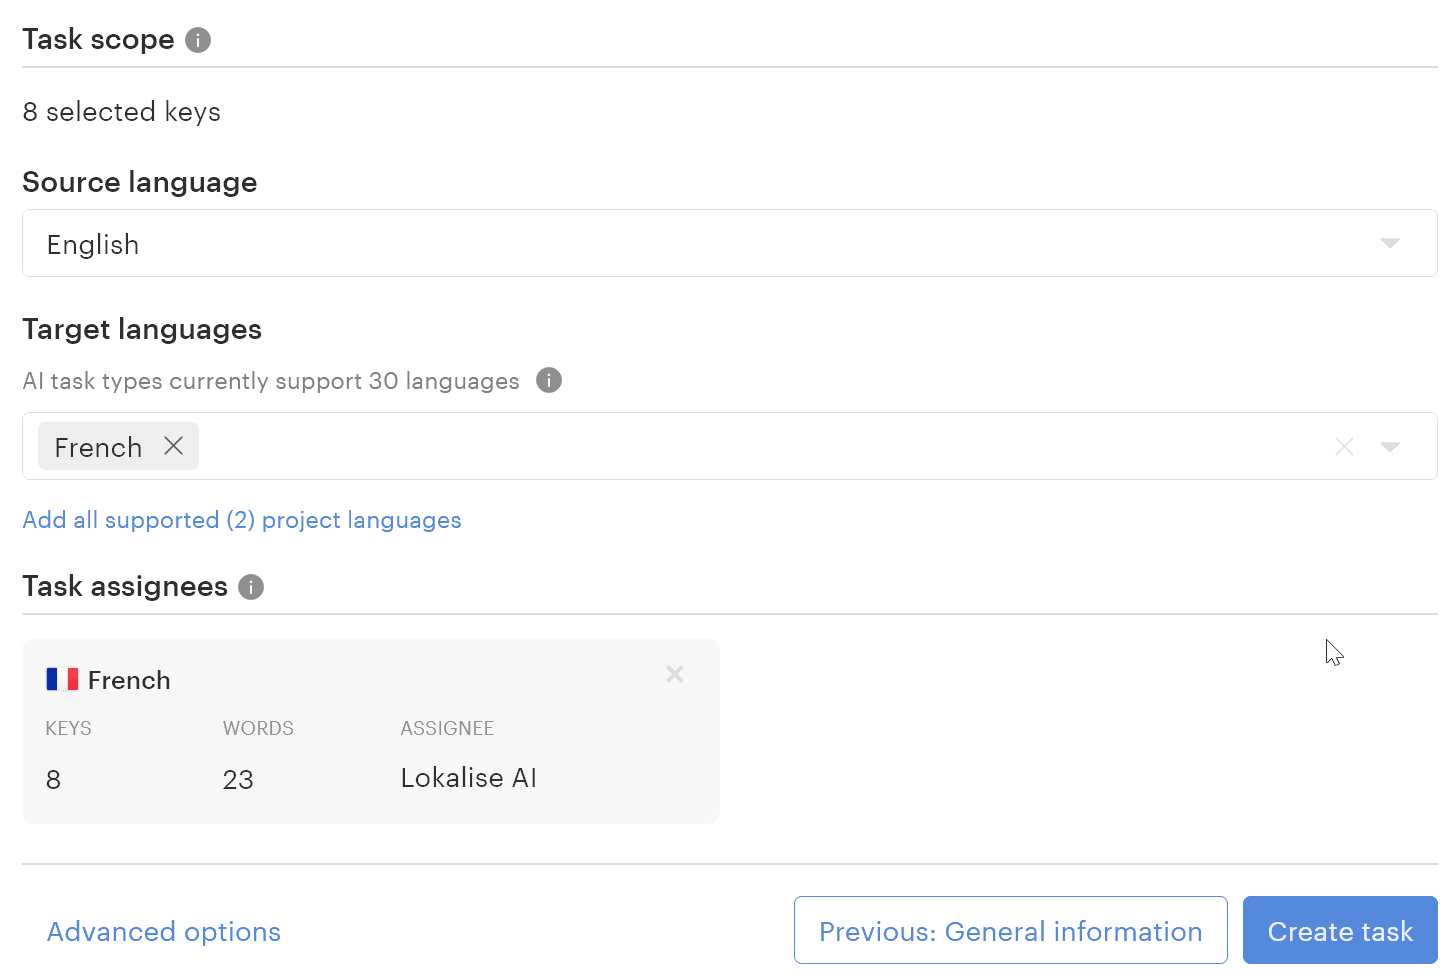
Choose the Source language (English in my case) and one or more Targetlanguages to translate into:
Press Create task and wait for the AI to complete the translations. You'll receive a notification email once done.
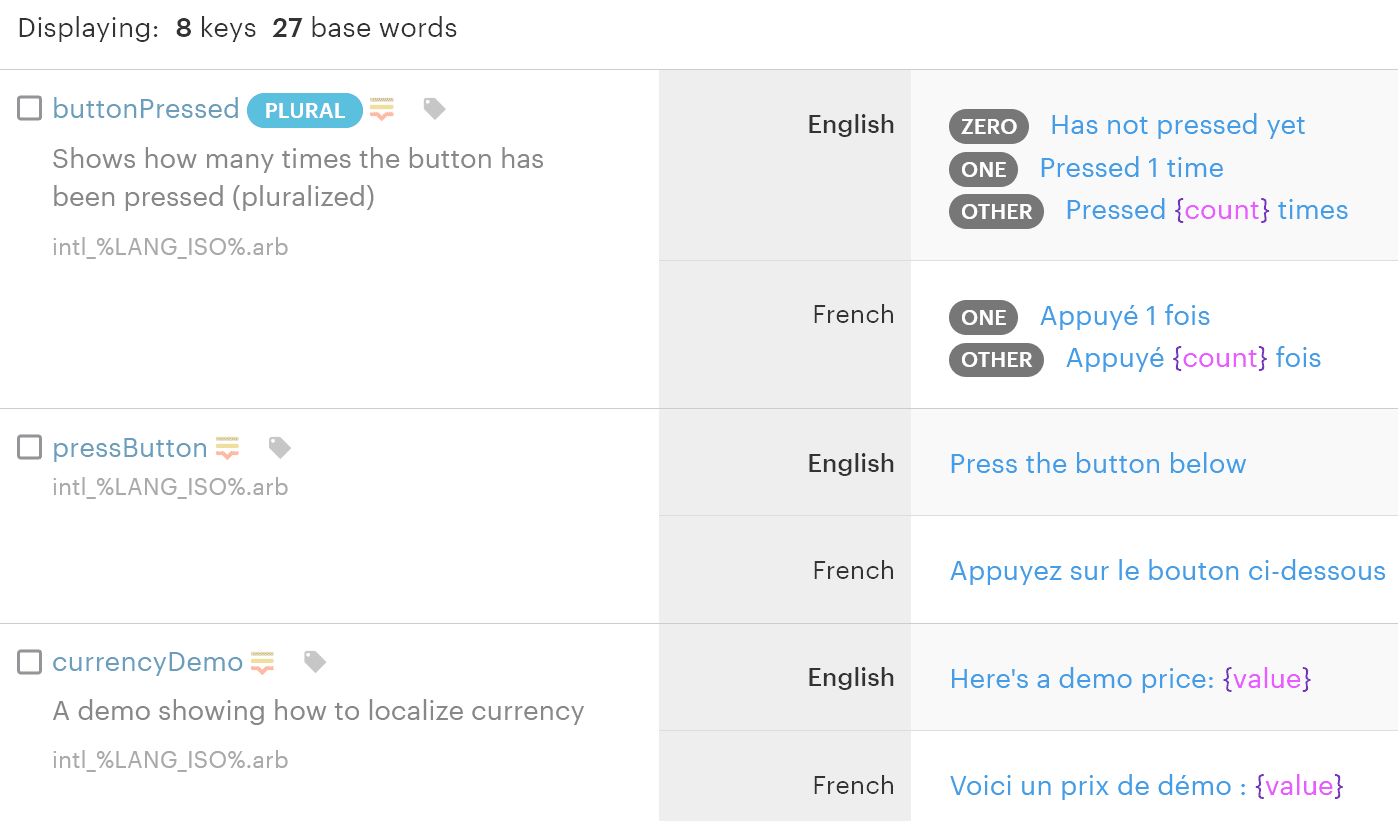
Return to the editor to review the translations:
Note that the AI correctly handles plural forms. However, double-check all AI-generated translations for accuracy.
Once ready, download your translations back to the Flutter project.
Downloading translation files
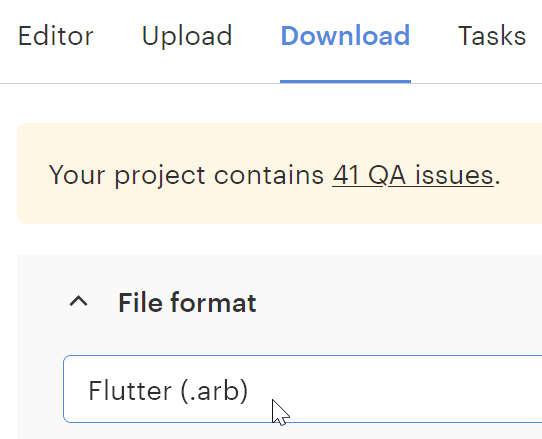
Click Download in the top menu and choose Flutter (.arb) from the File format dropdown:
Avoid picking Flutter SDK as it relates to OTA, which we’ll briefly discuss soon.
Now pick one or more languages to include in the download bundle. Since I have only amended the French translations, I'll choose one language:
Then click Build and download:
Extract the archive into the l10nfolder of the project and run the flutter gen-l10n command again.
Run the app to ensure it supports three languages. How cool is that?
Introducing the over-the-air flow
Lokalise also offers a feature called over the air (OTA). It allows you to deliver updated translations to users without releasing a new app version. Sounds like magic? Well, it’s pretty close, and you can easily set it up in your Flutter project.
Check out the OTA tutorial for full details on utilizing this feature.
Conclusion
So, in this article we have learned how to translate Flutter apps into multiple languages, how to perform pluralization and localization, and how to programmatically set the locale. On top of that, we have utilized AI to translate our app into a new language. Great job!
You may also be interested in reading our article on Android localization.
Thank you for staying with me today and happy coding!
Ilya is the lead for content, documentation, and onboarding at Lokalise, where he focuses on helping engineering teams build reliable internationalization workflows. With a background at Microsoft and Cisco, he combines practical development experience with a deep understanding of global product delivery, localization systems, and developer education.
He specializes in i18n architectures across modern frameworks — including Vue, Angular, Rails, and custom localization pipelines — and has hands-on experience with Ruby, JavaScript, Python, Elixir, Go, Rust, and Solidity. His work often centers on improving translation workflows, automation, and cross-team collaboration between engineering, product, and localization teams.
Beyond his role at Lokalise, Ilya is an IT educator and author who publishes technical guides, best-practice breakdowns, and hands-on tutorials. He regularly contributes to open-source projects and maintains a long-standing passion for teaching, making complex internationalization topics accessible to developers of all backgrounds.
Outside of work, he keeps learning new technologies, writes educational content, stays active through sports, and plays music. His goal is simple: help developers ship globally-ready software without unnecessary complexity.
Libraries and frameworks to translate JavaScript apps
In our previous discussions, we explored localization strategies for backend frameworks like Rails and Phoenix. Today, we shift our focus to the front-end and talk about JavaScript translation and localization. The landscape here is packed with options, which makes many developers a