Localization involves much more than just changing copy from one language to another.
Depending on the size of your company, it can be a complex process involving multiple teams, hundreds of different files, and dozens of target languages.
Whether you’re a globalization veteran or a first-timer just dipping your toes, laying out a thorough and proven localization process is your first move toward turning a slow and laborious journey into a rapid ride that delivers localized experiences in a flash.
Don’t worry if you’ve already started localizing. It’s never too late to design your localization process. Once in place, it’s likely you’ll find yourself continuously improving it based on hard-earned experience and valuable feedback from colleagues and users alike.
Let’s dive into the details and see how you can create a continuous localization process that’s flexible, scalable, and efficient.
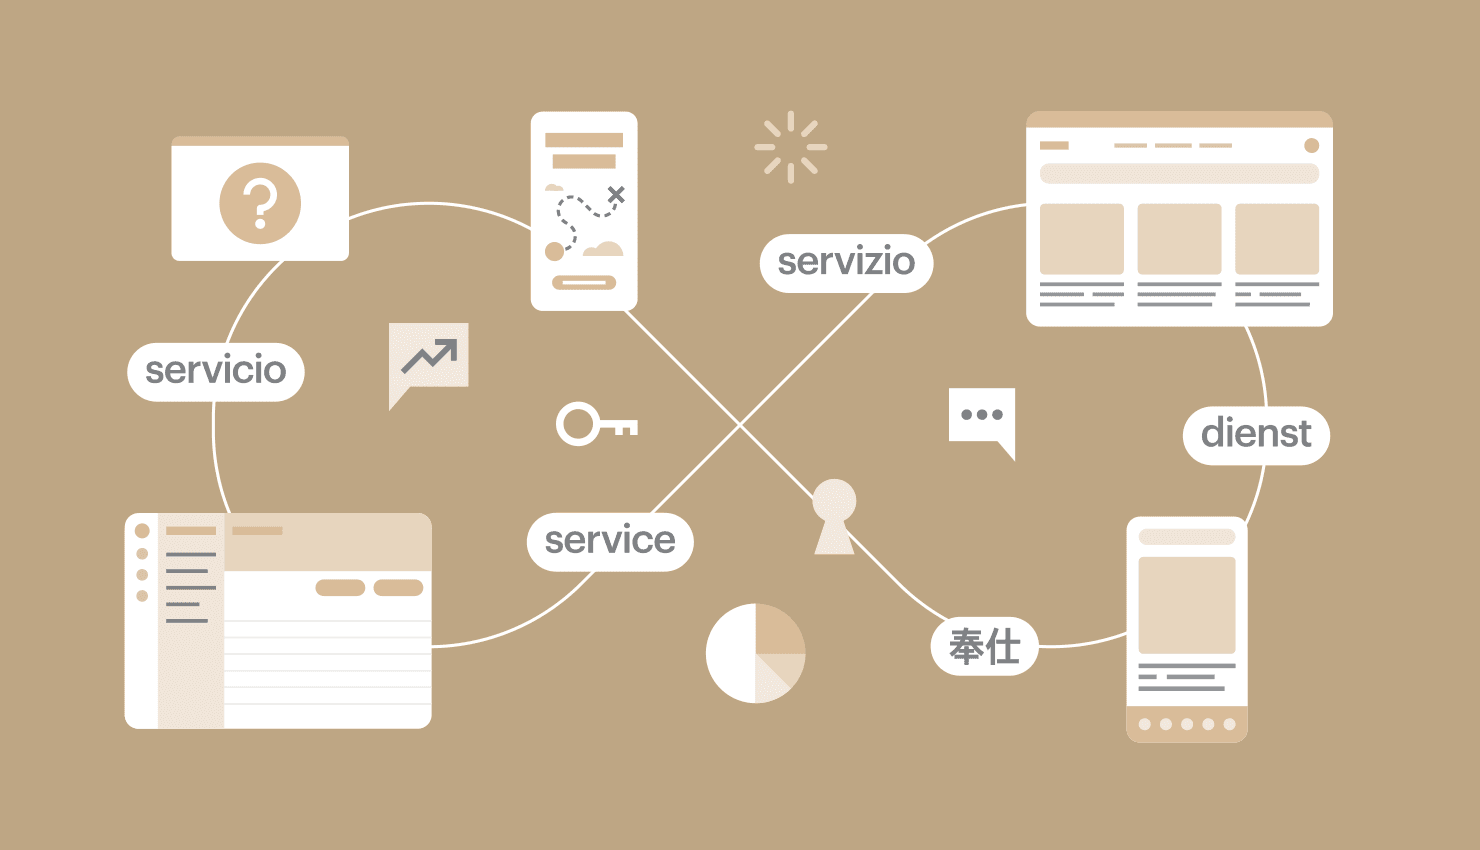
Localization, or L10n (there are 10 letters between the “l” and the “n”), is the process of adapting your content or software to a new country or region. This can include translating the content, changing the imagery, using different measurements, and incorporating other cultural differences.
A localization process is a compilation of steps and procedures outlining how localization is performed at your company. Localization involves a significant number of stakeholders and roles – both in your company and externally. This means even small misunderstandings can easily descend into chaos. Having everything written down and agreed upon can prevent the usual uncertainty you may often find in other non-standardized tasks.
To design a localization process that’s sustainable and effective, start by talking to as many of your colleagues as possible. If you’re already localizing some content using translation software, approach those who are involved. If not, consider who will need a seat at that table once you start. It’s likely they already have some ideas on how to ensure their part of the process goes well.
A quick side note here. Localization is different from internationalization (I18n). Internationalization is the process of designing and developing products that can be easily adapted to new markets and languages. Internalization makes localization much easier since your team has already designed products with cultural differences in mind.
Localization lineup: Which stakeholders should be part of your localization process?
One great thing about designing your own localization process is that you can fully customize it to your company’s needs and structure. At an SMB, for example, it’s likely most – if not all – staff members will have some presence in your process. On the other hand, working for a global-first enterprise will limit this process to a much smaller employee subsection. As a rule of thumb, make sure it includes anyone involved in creating copy, getting it localized, or implementing it.
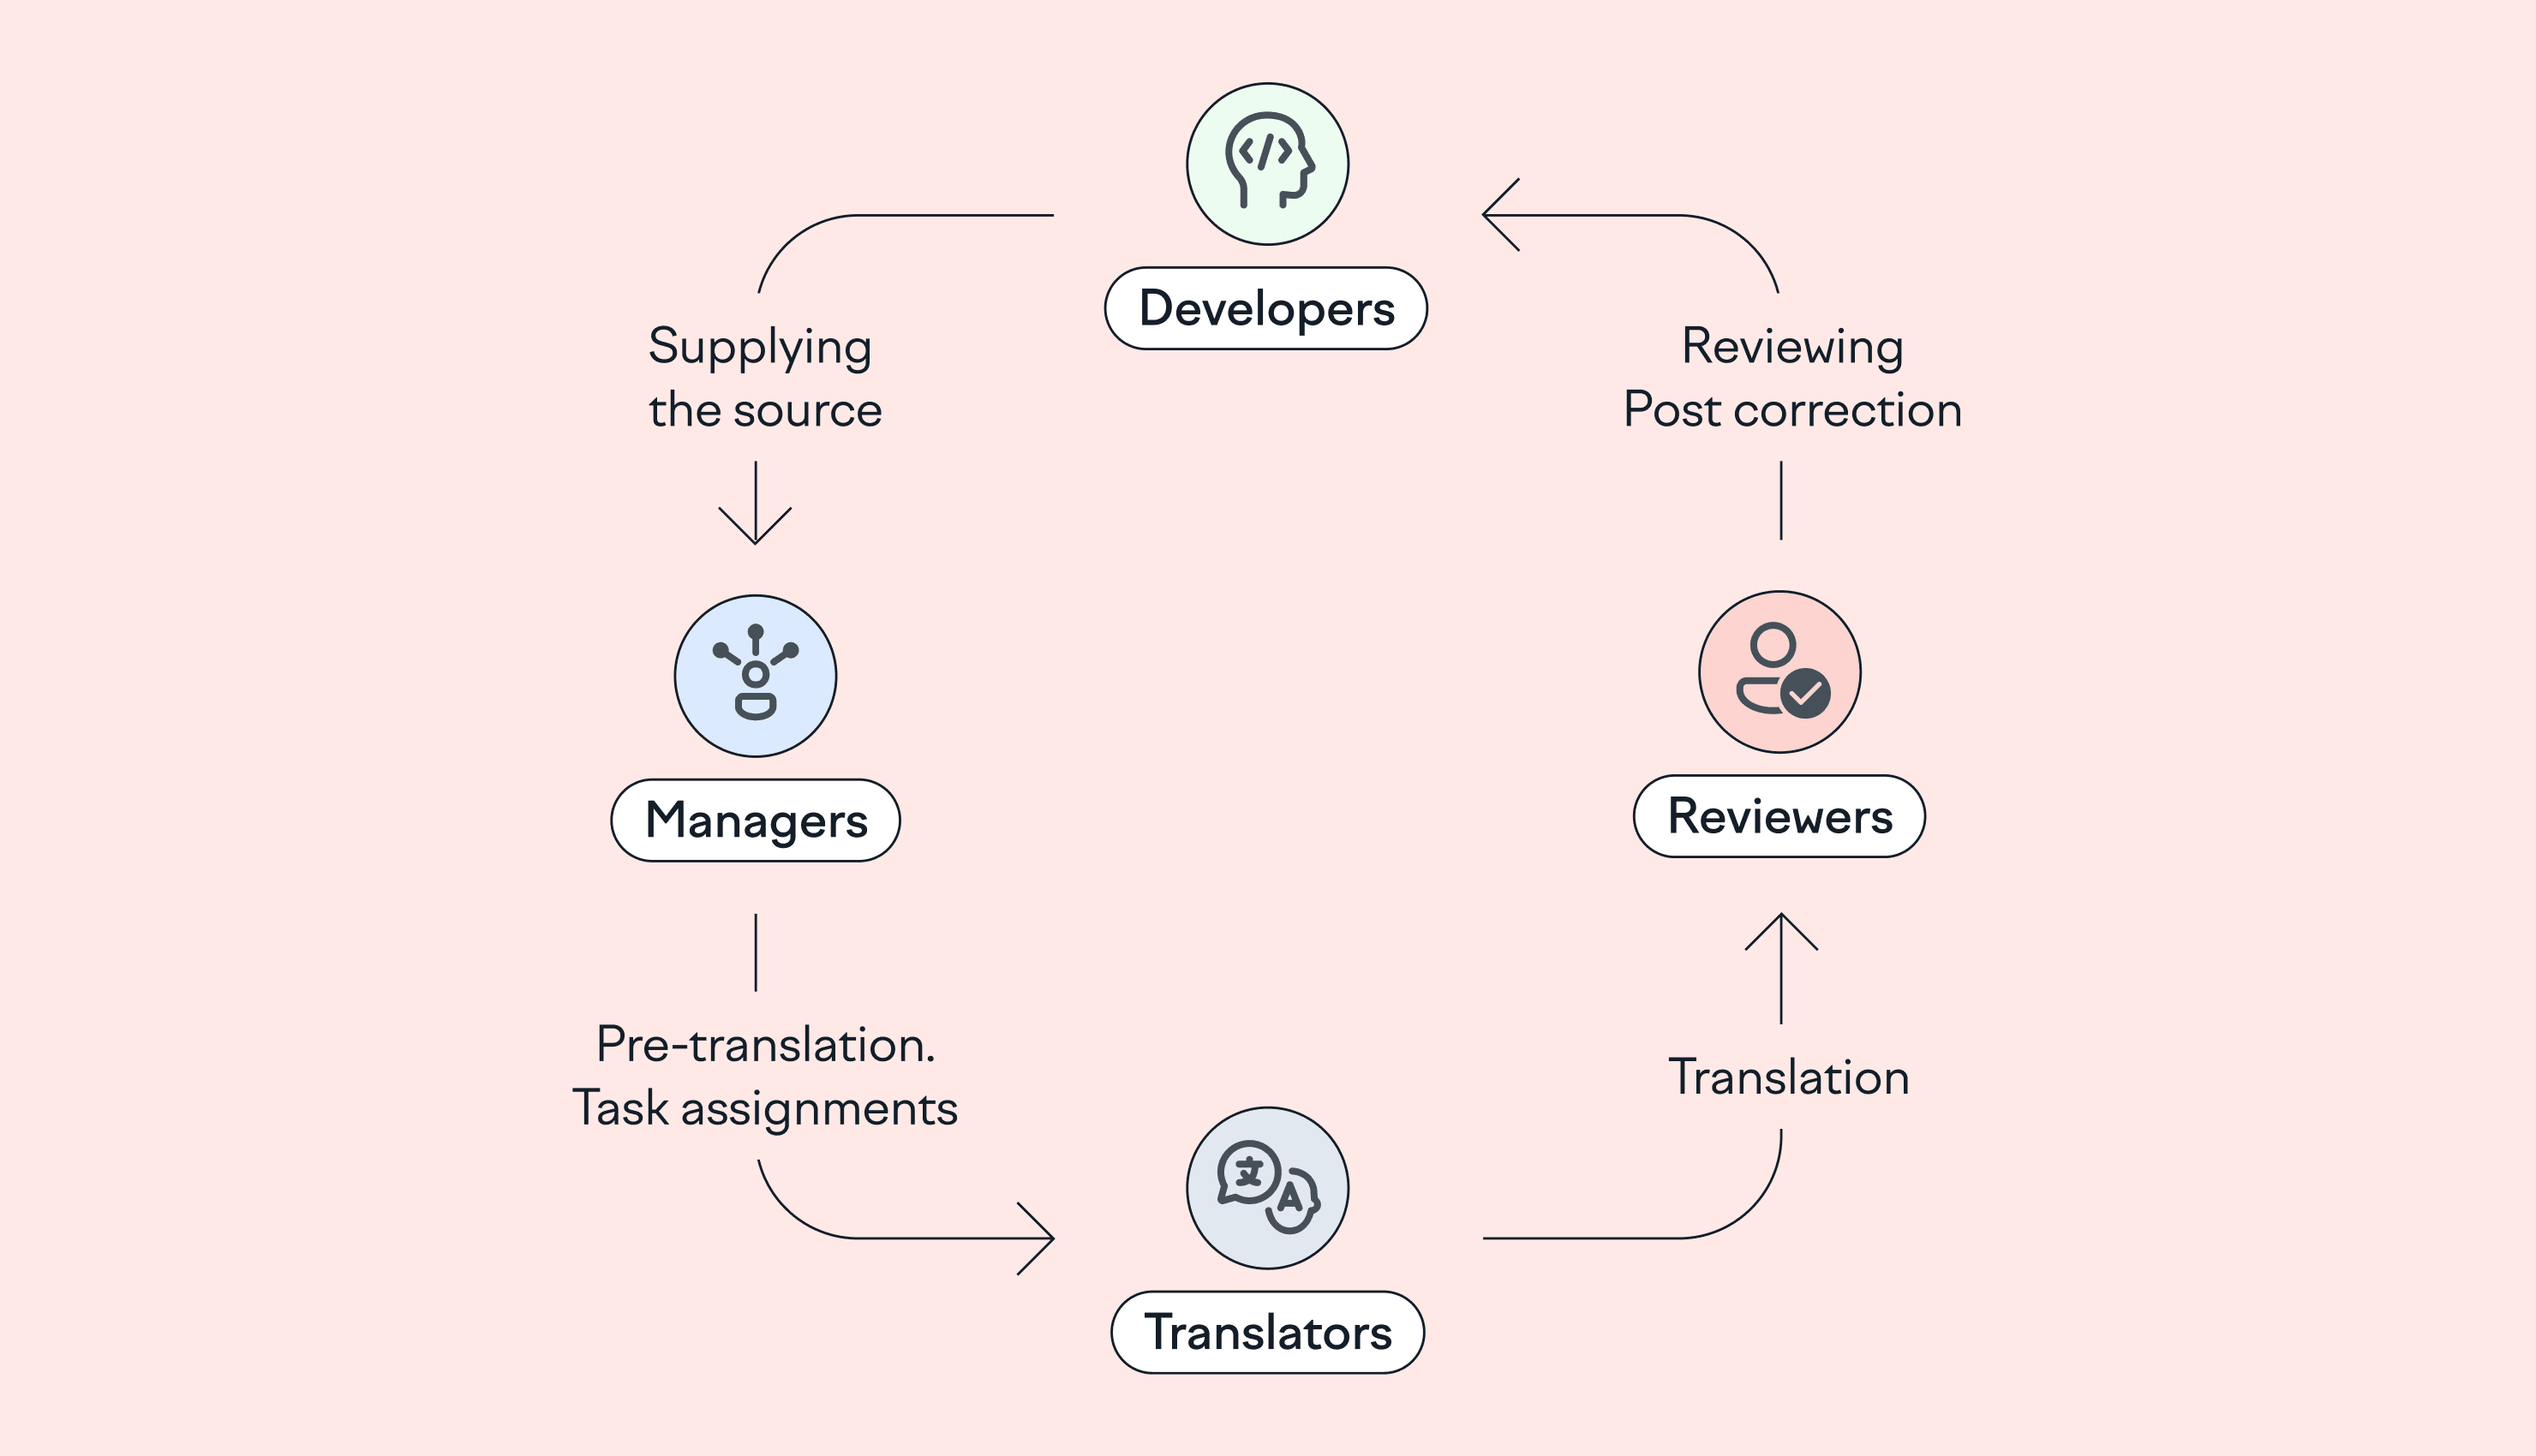
Usually, any localization process will include at least the following people:
The UX and design team in charge of crafting the product or feature you’re currently localizing
The copywriters and/or UX writers who write the copy to be localized
The translators who will be localizing the copy into your various languages
The product managers who are in charge of overseeing the flow and keeping everyone in sync
The developers who will be required to push the actual strings to localization and pull them back in after it’s done
The marketing team tasked with launching the new product or feature in the new market
However, your specific use case may require the involvement of other stakeholders. For example, some companies localizing sensitive content may want legal on board. Others dealing with culturally specific copy may seek advice from local consultants throughout the process. Consider anyone who may have something to contribute, and ask them directly if they think they should be included.
How to build a strong localization team
With exclusive insights and real-life examples from companies such as ActiveCampaign and Onfido, this ebook will show you how to assemble the best possible localization team.Download [Download]
What steps should your localization process have?
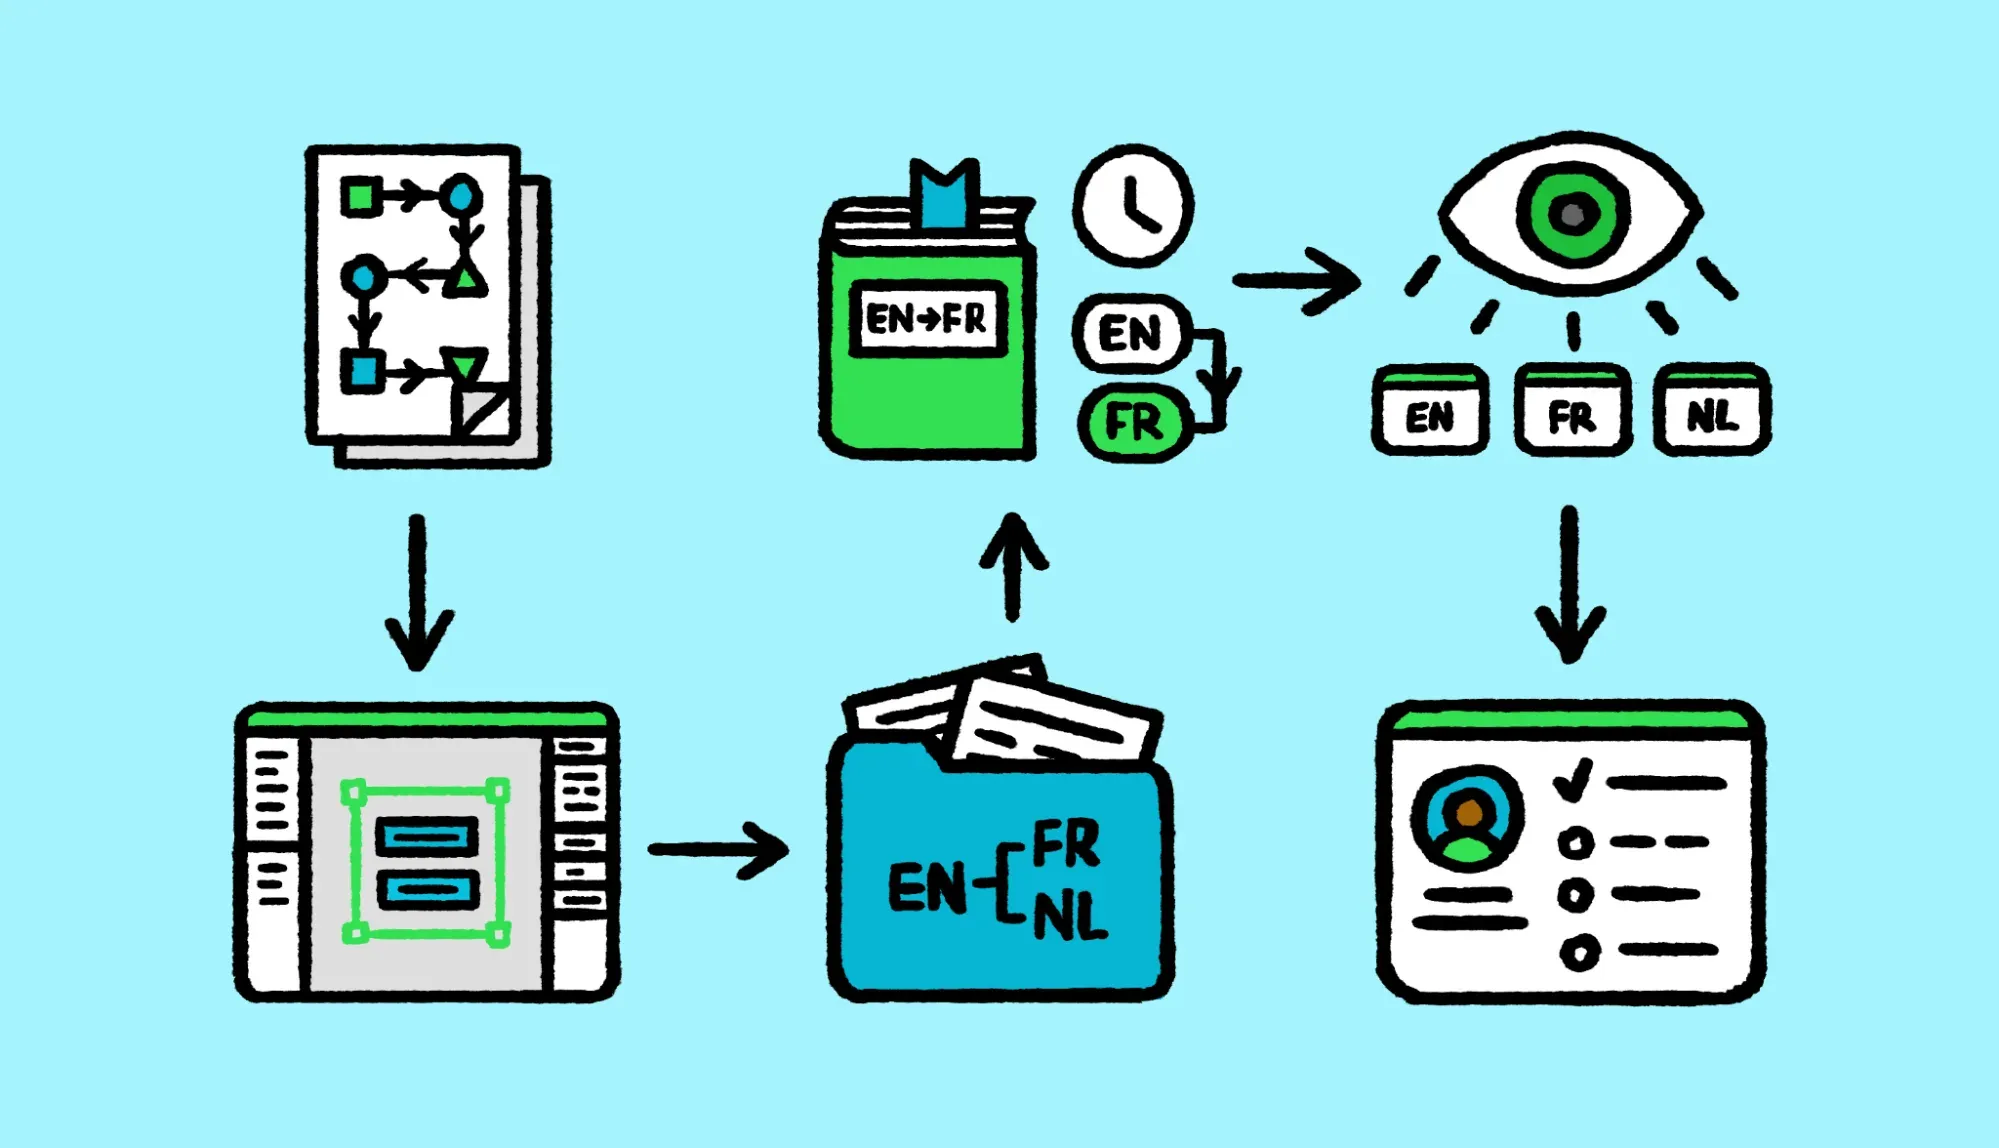
To create your localization process, start by writing down the path your copy takes from the moment it’s created to the moment it’s seen by users in your target market. Highlight every friction or turning point – those will be your main phases.
Then, break each phase down to pinpoint the various steps it’ll include. Consider things like scalability, quality, and efficiency (more on that in a bit). And, of course, think about the procedures and guidelines your team will need at each step, ensuring they have them at hand.
Your localization process should be designed for your needs, but it’s likely to include the following steps:
Step 1: Define the scope and goals
Generalized strategies have no place in the world of localization. Companies require a unique approach that considers their products, markets, goals, and timelines.
Start by sitting down with your team to determine what features or materials will be included in the current localization round. This is also your chance to consider what you’re hoping to achieve, define key metrics for success, and plan how long the process will take.
Being clear about exactly what you want to achieve and how to measure success will help you choose the right combination of people, approaches, and tools in the following steps.
Companies with lofty goals looking to tackle multiple markets simultaneously will almost certainly need the help of a comprehensive translation management system (TMS), for example. Where time is of the essence, AI translation will be indispensable.
It’s also worth spending time here deciding how you’ll approach marketing alongside your localization process. Will you include international SEO efforts like localized meta descriptions and title tags when translating content, for instance? What about PPC landing pages? You can easily miss plenty of small pieces of marketing copy if you aren’t careful.
Once you get your localization cycle going, carve out some time to review what you’ve learned from previous rounds. By leaning on past experiences, you’ll be able to keep tweaking and improving your process over time.
Step 2: Build a localization team
If you want to execute your localization process efficiently, you need to build a team of dedicated in-house and external professionals.
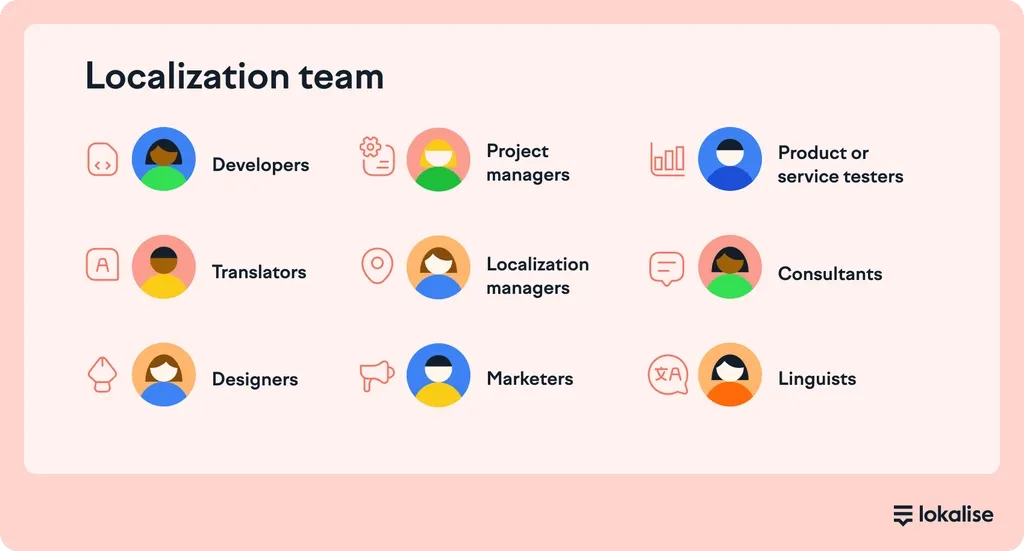
Typically, you’ll need to hire people in the following roles:
Developers to code localized landing pages
Translators to translate copy into your target languages
Designers to localize the design of products and pages
Project managers to oversee localization tasks, progress, and efficiency
Localization managers to create a localization strategy and oversee individual localization efforts
Marketers to create or adapt campaigns for local markets
Product testers to provide quality assurance on your efforts
Consultants to advise on cultural differences
Linguists to provide further quality assurance on your translation efforts
Many of these individuals will already reside within your company, especially if you work for a large global-first business. But many — especially translators and linguists — will be contractors, freelancers, or agency workers.
Having a way to recruit and manage these individuals is essential. A translation management system (TMS) is usually the way to go here.
You can find translators and language service providers directly through TMSs like Lokalise, where you even get access to machine and AI translation tools like Google Translate, DeepL, and Lokalise AI.
Inside a TMS everyone can communicate and collaborate in a very easy way, while automated workflow capabilities mean you can automatically assign tasks to individual team members.
Step 3: Setup a design-stage localization process
There are several workflows you can use when building a localization process, but we recommend product teams use design-stage localization. This approach front loads translations during the design stage so that products and marketing campaigns are fully translated before they go into development.
It’s a particulary powerful approach for agile teams or any business that rely on continuous development — products like mobile apps, websites and games — because it significantly decreases time to market. It’s less likely the design or programming will have to be altered once translations go live, too.
It also allows product teams to collect feedback before product release. When translation happens alongside design, fully localized MVPs are ready for user testing sessions.
If you want to pursue a design-stage approach to localization and are using Lokalise as your TMS, then you can use dedicated plug-ins for Figma, Sketch, and Adobe XD so that designers, developers, and translators can work in parallel.
Step 4: Implement localization tools
You’re almost ready to begin the localization process. But first, you need to find and implement a TMS to streamline and automate your workflow.
A TMS is particularly beneficial if you’re localizing multiple digital assets, like a website, mobile app, blog, and help center. Keeping consistent and high-quality translations can be a nightmare without a tool that centralizes your efforts and acts as a project management application.
There are several things you’ll want your TMS to do for you.
It should be a single source of truth for your localization efforts.
It should act as a communication tool that lets you manage your localization team
You should be able to automate your workflows using pre-defined rules and triggers
You should be able to perform high-quality translations at scale using AI tools
It should have automated download and upload capabilities, along with integrations with leading platforms like Figma, GitHub, and WordPress, Bitbucket, and Jira
Expect quality assurance workflows with the help of tools that automatically correct typos, misspellings, and grammatical errors
Lokalise offers all these features and more. It’s a one-stop solution for localization at scale, whether you want to leverage AI technology, work with a language service provider, or rely on human translators.
Step 5: Gather source materials
Essentially, this step includes everything to do with creating your product in its source language. For example, designing mockups or wireframes, determining the required tone of voice, and writing the UX copy to be localized.
These tasks are not exclusive to localization, and they often make up every product design effort. However, keeping localization in mind while you do them will save you time later and ensure you’re better prepared for the next steps.
Where these elements are already designed, written, or coded, you’ll need to extract the text so your translators can get to work. This is made easier with a TMS that connects to the tools you already use through integrations, APIs, and SDKs, to automate large chunks of the localization process and allow anyone to make translations on the fly.
Step 6: Prepare content for localization
During this step, you’ll be putting together a localization package for your translators or localization agency. On top of the actual strings for localization, this should always include a localization brief and detailed contextual information.
In some cases, you’ll need to alter existing designs for translation. Languages like German, Finnish, and Hungarian, for example, take up a lot more space than English, which means you’ll need to redesign CTA buttons and other elements.
Now’s also the time to set up the channels you’ll be using to communicate with your linguists. You want to be able to answer their queries and provide additional information when they need it. Once you have it ready, pull the strings for localization into your CAT (computer-assisted translation) tool.
Step 7: Localize content
It’s go time! Send your linguists the package you’ve prepared so they can familiarize themselves with the requirements and brand voice. Then, run the copy through the translation process and editing steps – and any additional steps you’ve implemented to ensure you get high-quality output.
An entire book can be written on this step alone. In fact, entire books have been written. In a nutshell, your role here is to support your linguists as they find the most fitting words in their language. You can achieve this by doing the following, for example:
Send them the aforementioned contextual information;
Provide a well-maintained glossary and translation memory;
Ensure they feel comfortable asking questions and give detailed, clear replies;
Give them enough time to work on the copy;
Be clear about technical requirements, e.g., character limits;
Send them translated screenshots/mockups for final review.
While expert human translations will always deliver high-quality results, don’t be afraid to leverage technology if you want to localize products and web pages at scale.
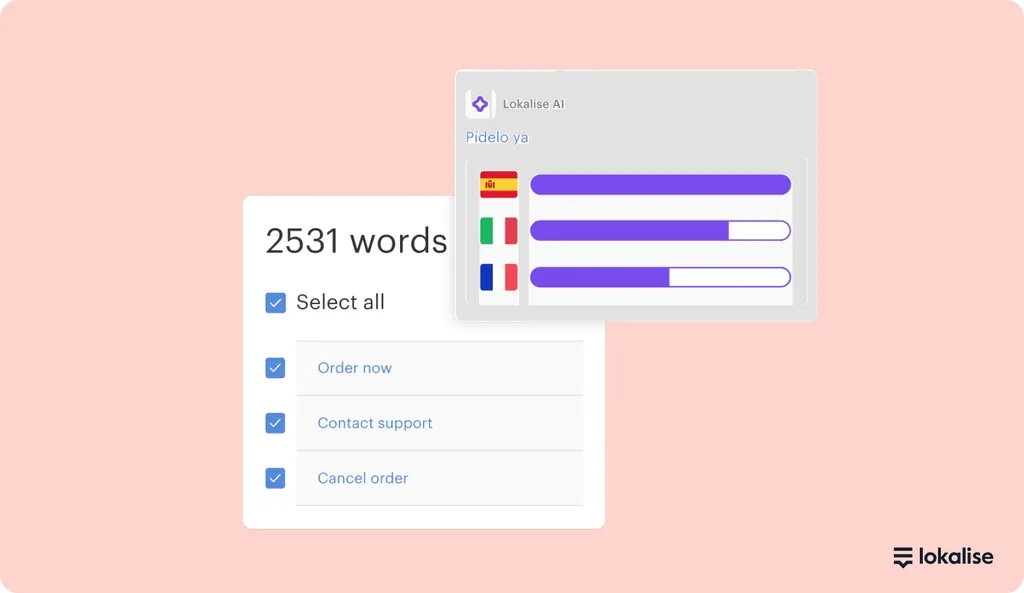
One approach is to use machine translation, a software-based process that translates content without human intervention using algorithms and pre-defined rules. This is an excellent choice for simple phrases (like the copy for a call-to-action button) since it dramatically lowers the cost of translation.
For more advanced or complex phrases, it makes sense to use advanced AI tools that create contextually accurate translations. Lokalise AI, for example, translates content into multiple languages at just the click of a button. You can provide context by uploading a glossary or style guide, and you can supply instructions to ensure you get the best translation possible.
Step 8: Perform thorough quality assurance
Mistakes happen. But that doesn’t mean you have to publish poorly translated content. Ensure as many errors as possible are spotted during the translation phase by using a TMS with built-in quality assurance features that check the quality of localized content.
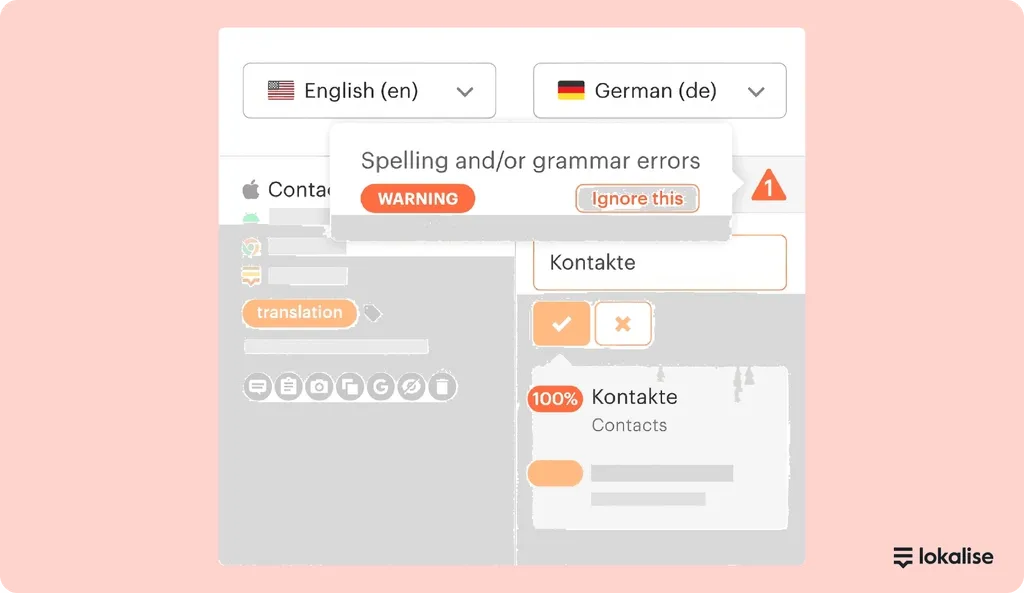
Lokalise provides a range of automated quality assurance checks that flag issues like typos and grammatical errors in 22 languages. It also lets you improve the accuracy of your translations over time by creating a multilingual glossary that ensures consistency.
Localization is done, but you’re not – yet. A lot can go wrong after you push your localized strings to production, so make sure you carefully review all screens for layout, context, or formatting issues.Don’t settle for in-house here – provide your linguists with screenshots or a link to the localized product. Since they speak the language, they’re much more likely to notice the issues. Plus, they’ve probably been dealing with some of these problems as users for years.
If you want to go all out, consider getting beta feedback from users in your target locale, too. This will help you pin down critical issues and cultural mishaps before they go live.
Lokalise’s quality assurance features automatically flag misspellings and grammatical errors.
Once approved, it’s time to upload your content back onto your site or app. You should be able to do this via the same method you used to download content, whether that was a plug-in, API, or otherwise.
Step 9: Set up a feedback loop
It’s not uncommon for localization efforts to cause minor issues like poor functionality or broken designs — even if you have internationalized your app before translating content.
To further ensure the continuous quality of your content, it’s a good idea to create a regular feedback loop. Schedule regular sessions with stakeholders or send a survey to ensure that every step is working as it should and that the process is adding real value to your company.
Are all localization processes born equal?
Designing a flexible process is that much more important when handling different localization needs. An app-only process will have one stream of data flowing through it, with the same people involved every time. But if your needs are more complex than that, you’ll need to establish different workflows to facilitate them.
Considering the use and goal of each channel you’re localizing will help you design this effectively – and find the right linguists to help. For example, an app localization task will require UX writing and product expertise. But for a landing page, you want your linguists to bring marketing and conversion knowledge on board.
Designing your localization process: things to consider
1. Think about scalability from the get-go
Even if your localization needs are few and your team small, it’s best to think big when it comes to your process. Setting up the right procedures from the start will prevent future issues, so your company can scale globally as quickly and smoothly as possible.
When Revolut started localizing, for example, they only had around 20 people on the team. Having no dedicated team meant they had to create their process to run alongside their other business tasks. However, they were wise enough to plan ahead, incorporating advanced tech tools like Lokalise into their workflow. They’re now a 2000-person company, and their scalable process helped make the switch to a localization agency seamless.
“When we started to work with RWS Moravia, they already had their own internal workflow. Lokalise was flexible enough to allow them to simply plug their workflow into it. And we were able to plug our workflow into Lokalise and organize the translation processes really well, not only with internal Revolut people but an external company as well,” says Edward Cooper, Head of Mobile at Revolut.
2. Pick a single source of truth
When workflows are complex and involve different companies and tools, it’s easy to miss a crucial change or update. For example, let’s say your product team changes a small bit of English copy directly in your repository or CMS. By skipping the mockup and localization stages, they effectively create an inconsistency that’s almost impossible to track or identify.
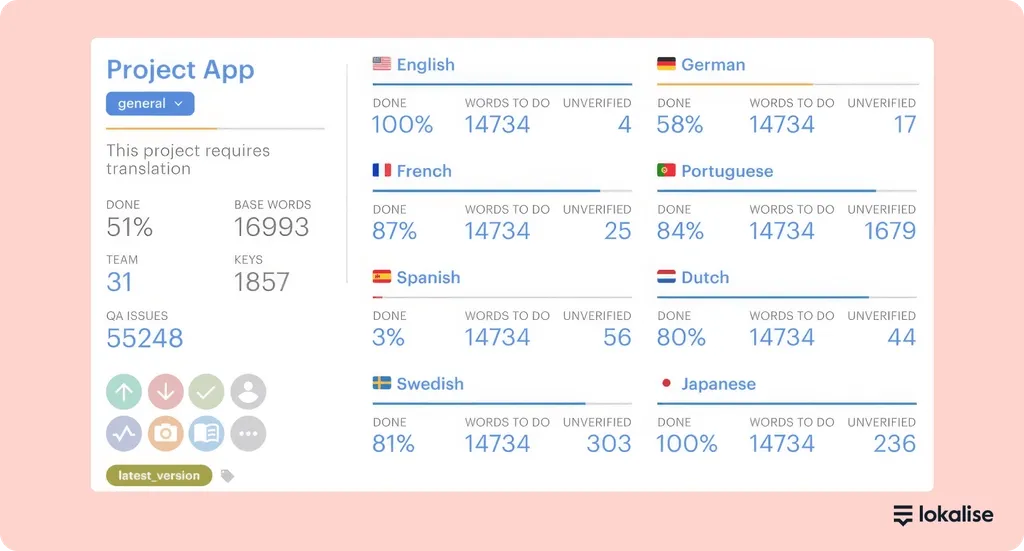
The Lokalise project dashboard lets you keep track of every project at a glance.
To prevent this from happening, it’s essential to define a single source of truth for your copy – in both the source language and the localized ones. Whether it’s your mockups, your CMS, or your localization tool, ensure copy always flows in the same direction from point A to point Z.
3. Keep humans in the loop
In our quest for maximum productivity and efficiency, we sometimes forget our localized copy is meant for people. When designing your localization process, keep your users in mind. Incorporate the right steps to ensure the quality stays high, the target copy is clear and fluent, and the layout supports all languages.
A great way to do that is to include a user feedback phase at specific intervals (e.g., once a month or when a new major feature is launched). This will give you insights into how your target copy is accepted by your users and what you should focus on to improve it further in the future.
4. Give translators context
There are several ways to improve the quality of your translations, including quality assurance and functional testing. But one of the best ways to create great translations from the get-go is to provide context to translators.
If social media has taught us anything, it’s that context matters. It’s all too easy to take a headline or quote out of context and change its meaning entirely. So, the more information you can give to translators about how and where the copy will be used, the better.
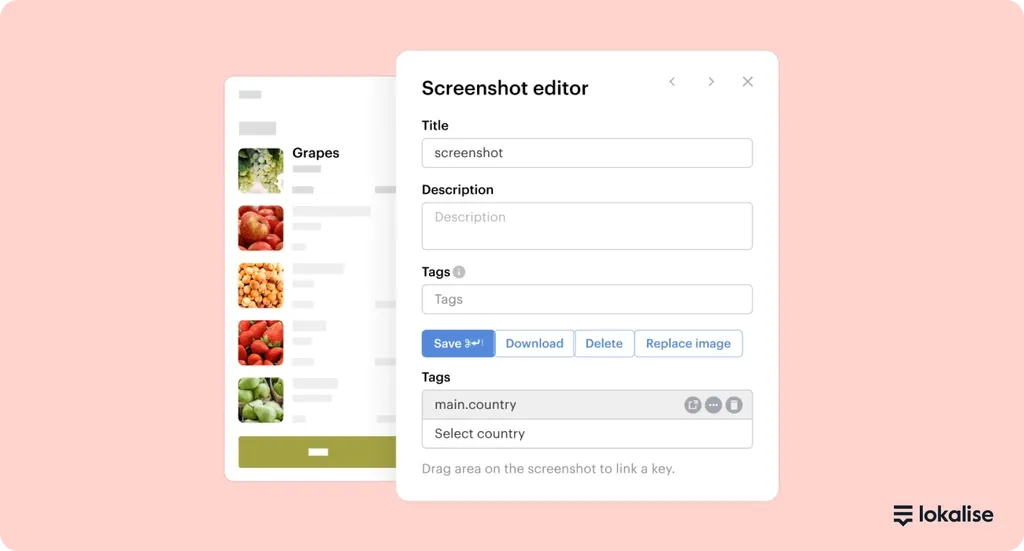
Provide additional context by attaching screenshots with Lokalise’s in-context editing tools.
That’s why Lokalise comes with several features that allow you to provide a level of context that results in more accurate translations.
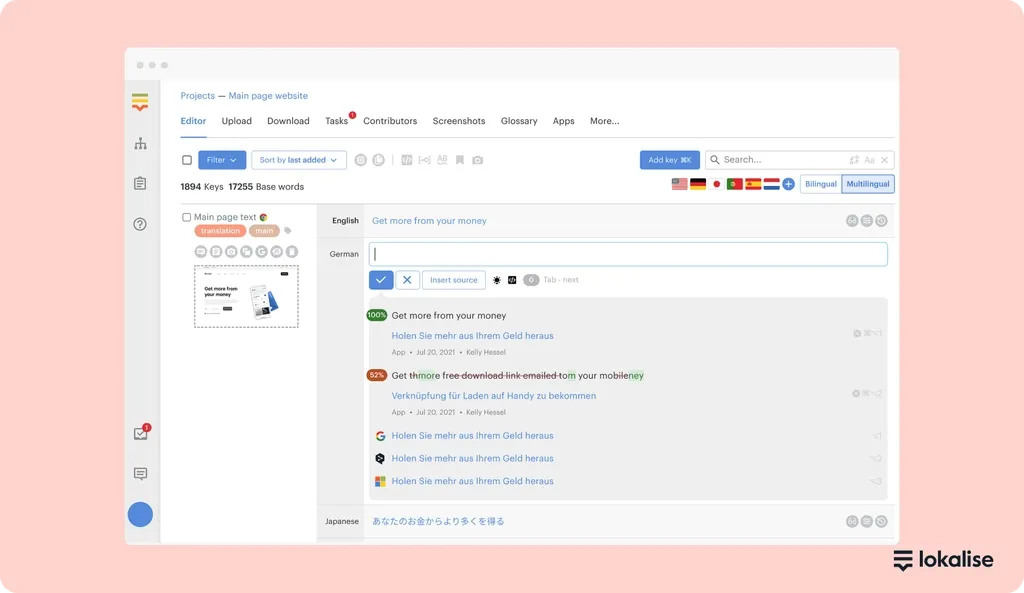
For existing products, the LiveJS editor lets translators make real-time translations while browsing your site. You can also provide screenshots that show how and where translations will be used.
If your team is still developing products or landing pages, you can share visual context through Lokalise’s integration with design tools like Adobe XD, Figma, and Sketch.
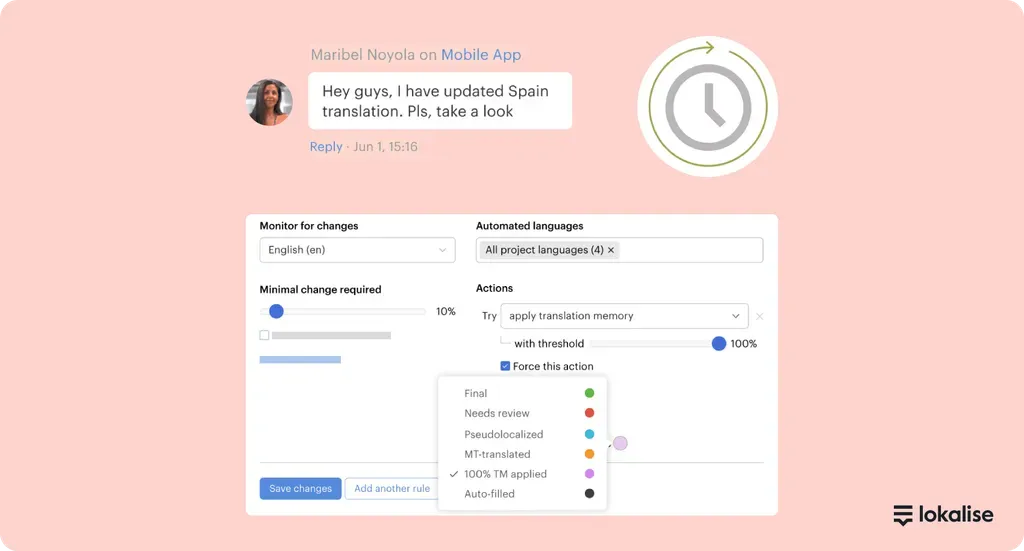
5. Automate, automate, automate
Workflow Automationis probably one of the biggest advantages of bringing in an advanced localization tool like Lokalise. Not only does it let you route your professional workforce to other tasks, but automating repetitive tasks can dramatically reduce human error and delays.
Once you set up your automated workflows, you can sit back and watch localization happen almost contact-free. No need to wait for a single developer to pull localized strings to production or manually run a QA check.
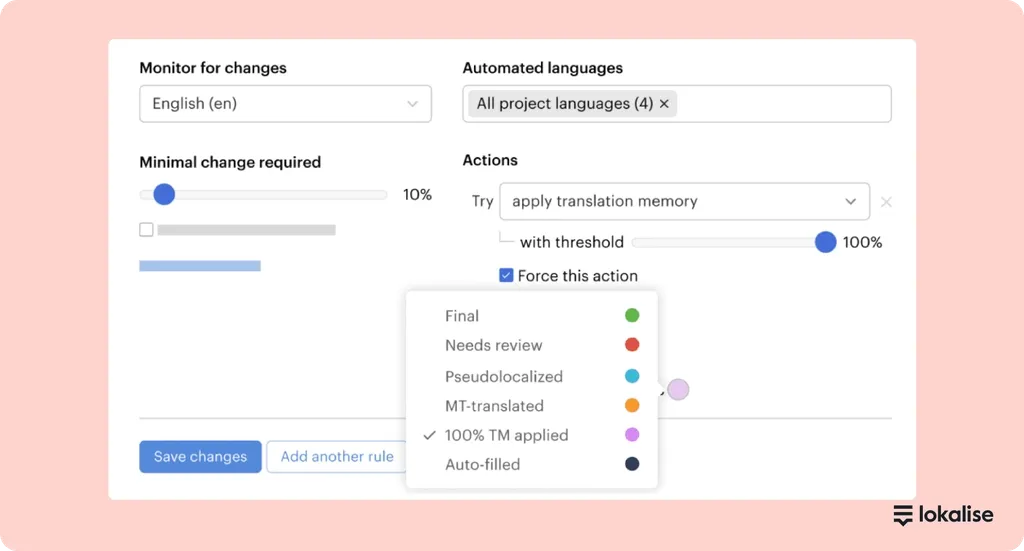
Use automated rules to accelerate translation projects without having to manually assign tasks.
At Deliveree, for example, the team was able to eliminate hours of work previously spent idly waiting for translations to arrive. By streamlining their translation-to-development workflow, they made the entire localization process significantly more time- and cost-efficient.
6. Get continuous feedback
A localization process will never be perfect from day one. Once you implement things, your teammates will start noticing what works well and what still needs improvement. This is your time to gather their feedback, learn from it, and iterate to iron out the kinks.
Encourage in-app feedback requests to ensure your translators are hitting the mark.
It’s a good idea to define set time points for feedback collection. Depending on the size of your team, it’s best to meet with the different stakeholders in person to get their take on how the new process is going. If that’s not possible, you can also distribute a questionnaire to collect their feedback.
Ready to start?
Even the most thorough and carefully crafted localization processes can be complex, especially if you’re overseeing the work of dozens of employees and contractors.
Localization software can simplify your process by creating a single source of truth, automating workflows, and providing access to tools like AI translations and quality assurance checks.
Lokalise offers all these features and more, which is why global-first companies like Revolut and Mastercard use it to manage their localization process.
Join them by trying Lokalise for free for 14 days, with no credit card required.
Best Practices for Localization: Process and Workflow
In the localization of any software — from websites to web applications, mobile apps to games, and IoT to standalone software — there is no single instructional document to guide the process. There are, however, localization best practices and localization management approaches that can help streamline your workflow
How to implement continuous localization in your CI/CD workflow
What if your translations updated the moment your code changed? Continuous localization is a DevOps-aligned workflow where translation is integrated into the software development lifecycle (SDLC). Unlike traditional waterfall methods, it automates the synchronization between code repositories and translation platforms, so global content updates in real time as new code is pushed to production. This removes translation latency, keeps context intact, and ensures every market sees th