In this tutorial we're going to discuss how to implement Gatsby internationalization i18n in your apps. Gatsby is an open-source front-end framework that allows you to create dynamic and optimized websites. It uses React to build pages and structure content and GraphQL to manage site data. Furthermore, it provides a cloud platform to host your application. Like in many frameworks, it also supports localization and internationalization through several packages. In this tutorial, we are going to discuss how to use gatsby-plugin-react-i18next for Gatsby internationalization.
First, let's briefly discuss what internationalization and localization are and why they are crucial. Internationalization (i18n) is making your web content usable for different regions or locales in the world without engineering changes. Internationalization is essential for a website that has users worldwide. Effective translation management system plays a vital role in ensuring that the localization process is smooth and consistent. Localization involves text translation, formatting of numbers, strings, currencies, measurement units, and dates based on the users’ detected locale. While implementing l10n you also should take cultural specifics into account. Localization helps to create more user-friendly interfaces for a diverse range of users.
In addition, it gives the customers a positive user experience, leading to an increase in the customer base. A well-defined localization process not only enhances efficiency but also ensures that the content resonates with local users.
Incorporating software internationalization strategies early in development can simplify the localization process, making it easier to adapt your Gatsby app for global audiences.
Let’s move on to discover how we can implement Gatsby i18n in a given application. I have developed a small application using the example code snippets in this article. You can find it on GitHub.
There are several React i18n libraries you can use for Gatsby localization. When choosing a React plugin for localization, ask yourself the following questions:
Are you already using the package in another project?
Does the chosen package meet your and your users’ needs?
Is there any package familiar to you or your team?
In our guide, we will be using the Gatsby-plugin-react-i18next library to achieve localization.
Gatsby i18n with gatsby-plugin-react-i18next
The gatsby-plugin-react-i18next library allows you to build Gatsby websites in multiple languages. Providing seamless integration with react-i18next, the gatsby-plugin-react-i18next library creates routes for each language enabling search engines to quickly find the correct website version. You don’t need to create separate pages for each language when using this plugin, like pages/en/index.js or pages/es/index.js. Instead, you can specify multi-language URL routes in a single page component.
Moreover, it does code splitting and load translation for each page separately. Finally, this process automatically redirects to the appropriate content format according to the users’ preferred language.
You can refer to gatsby-plugin-react-i18next documentation here.
Getting Started with Gatsby
In the previous section, we went through a detailed description of the gatsby-plugin-react-i18next plugin. Now let’s move to the implementation of our application. Let’s first create a small Gatsby Application.
Create a minimalist Gatsby site
Let’s install gatsby CLI with the following command:
npm install -g gatsby-cli
Please note that you need to have Node v12.13 or newer installed on your machine before executing this command. We are using Node v14.15.4 and NPM 6.14.10 for this implementation.
Next, we need to create a Gatsby application with the following command:
gatsby new
After typing this command, it will open up an interactive prompt asking you some questions about the application you want to build. Choose the following answers:
What would you like to call your site?
√ · Gatsby_Localization
What would you like to name the folder where your site will be created?
√ Gatsby/ gatsby_localization
Will you be using a CMS?
√ No (or I'll add it later)
Would you like to install a styling system?
√ No (or I'll add it later)
Would you like to install additional features with other plugins?
√ Install gatsby-plugin-gatsby-cloud
Shall we do this? (Y/n)
√ Yes
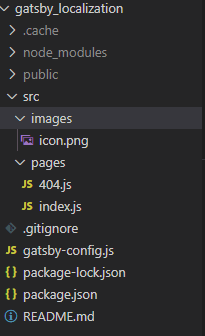
According to the answers, it will create an application with the folder structure as shown below:
Open your src/pages/index.js file and replace its contents with the following code:
import * as React from 'react';const IndexPage = () => { return ( <main> <h1>Welcome to my Gatsby site!</h1> <p>My name is Shanika</p> <p>My profession is SSE</p> </main> )};export default IndexPage;
Then go to the application's folder by typing the following command:
cd gatsby_localization
Finally, start the development server by running the following command:
gatsby develop
You can now open your app in the browser by visiting http://localhost:8000/.
You can edit src/pages/index.js (or any other file), and it will update in real-time!
Okay, now we have a very simple Gatsby application that we can use to integrate the gatsby-plugin-react-i18next package!
Configuring gatsby-plugin-react-i18next for Gatsby i18n
Installing npm packages
We need the following three npm packages to build our application:
Let’s discuss their usage before installing them. The i18next library is a popular internationalization framework for browsers or any other JavaScript environment. The react-i18next is a powerful internationalization framework for React / React Native, which is based on i18next. We can install all these npm packages with the following command:
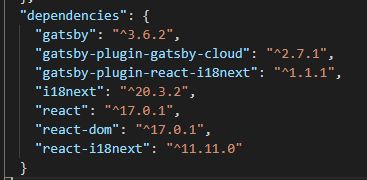
If you have successfully installed those packages, your package.json file should have the following dependencies:
Now, let’s add localization capability to our application. We will be using three languages for localization in our application: English, French, and Arabic.
Adding language JSON resources to the project
Create a new locales folder inside your gatsby_localization project and add three folders — en, fr, ar — for each language. Then, add language-specific JSON resource files. For example:
/locales/en/translation.json
/locales/fr/translation.json
/locales/ar/translation.json
To load these JSON resources, you need to install the gatsby-source-filesystem plugin and then fetch using GraphQL query. You can install the package using the following command:
gatsby-source-filesystem
Setting up gatsby-config.js
Next, you need to insert the following configurations in your gatsby/config.js file:
Let’s see the meaning of each configuration option from the following tables.
Gatsby-source-filesystem options
Option
Description
path
Path to the directory where you keep the language-specific JSON resource file. In this example, it is in the /gatsby_localization/locales folder
name
Specify the name to identify that folder
Gatsby-plugin-react-i18next options
Option
Description
languages
These are the codes corresponding to each language. We will be using three languages in the demo application for this tutorial: English, French, and Arabic.
defaultLanguage
The default language code when loading the site. For this example, we will set it to ‘en.’
localeJsonSourceName
The gatsby-source-filesystem will load the name of the source folder where language JSON files are located. Its name is set in the ‘name’ option of the gatsby-source-filesystem options. Default is ‘locale.’
siteUrl
Your site URL.
pages
an array of page options used to modify plugin behavior for specific pages
Now that we have configured our application for localization, we will learn how we can do standard text translation in the next section.
Regular text translation in Gatsby i18n
Using UseTranstation React hook and Trans components
The gatsby-plugin-react-i18next exposes all react-i18next methods and components. Therefore, we can employ useTranslation hook and Trans component of react-i18next to translate your pages. With the Trans component, you can specify which text has to be translated:
import React from 'react';import {graphql} from 'gatsby';import Header from './header';import {Trans, useTranslation} from 'gatsby-plugin-react-i18next';const IndexPage = () => { const { t } = useTranslation(); return ( <main> <h1><Header></Header></h1> <h1><Trans>Welcome to my Gatsby site!</Trans></h1> <p><Trans>My name is Shanika</Trans></p> <p><Trans>My profession is SSE</Trans></p> <p><Trans>My Birthday is 1990/10/10</Trans></p> <p>{t('message')}</p> </main> )};export default IndexPage;export const query = graphql` query($language: String!) { locales: allLocale(filter: {language: {eq: $language}}) { edges { node { ns data language } } } }`;
As you can see, we have used the t("message") function in the return section. We can use this t function to translate content provided in the chosen language.
Adding translations into JSON resource files
Next, we have to add the relevant translated messages to JSON files we have already created. Add the following content to each corresponding JSON file accordingly. Note that you can always modify and add your text. If you have added the translations successfully, they should contain the following:
locales/en/translation.json file
{ "Welcome to my Gatsby site!": "Welcome to my Gatsby site!", "My name is Shanika": "My name is Shanika”, "My profession is SSE": "My profession is SSE"}
locales/fr/translation.json file
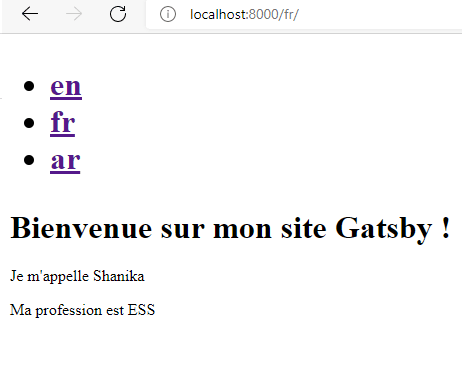
{ "Welcome to my Gatsby site!": "Bienvenue sur mon site Gatsby !", "My name is Shanika": "Je m'appelle Shanika", "My profession is SSE": "Ma profession est ESS"}
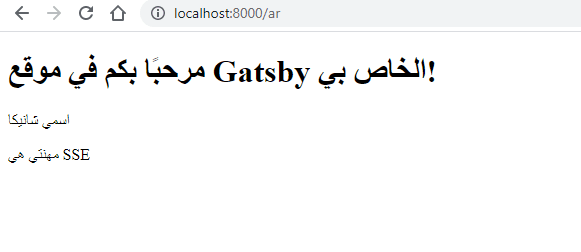
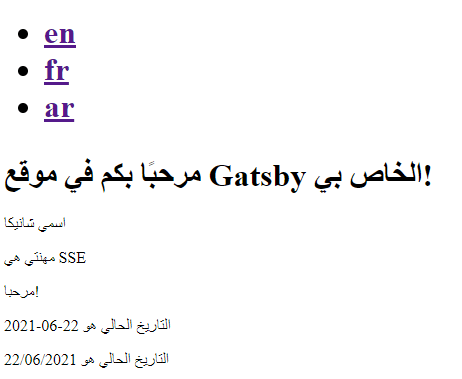
locales/ar/translation.json file
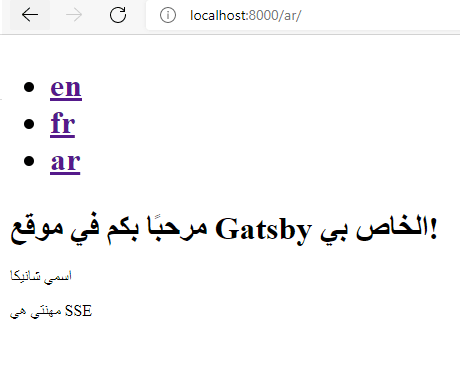
{ "Welcome to my Gatsby site!": "مرحبًا بكم في موقع Gatsby الخاص بي!", "My name is Shanika": "اسمي شانيكا", "My profession is SSE": "مهنتي هي SSE"}
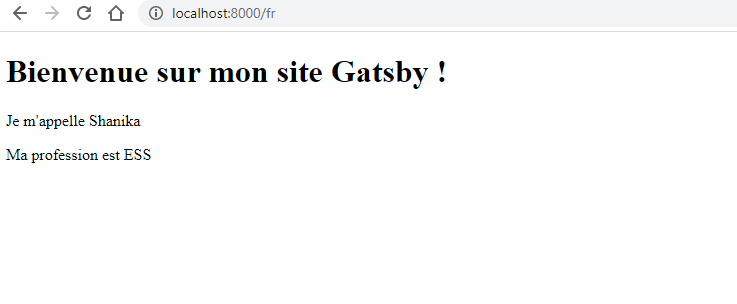
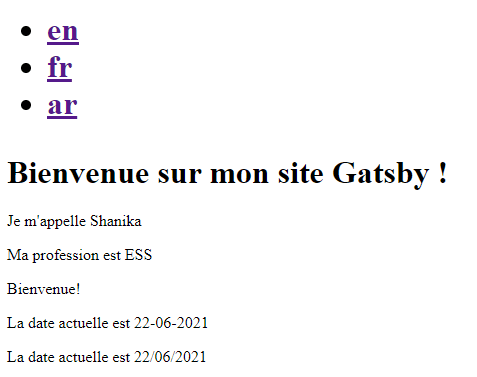
Now let’s test if we can load correct content through the browser. If you type the corresponding URL in the browser’s address bar, as you can see from the following images, it will load the translated version of the page accordingly:
Ok, we are done with our regular text translation part. Next, we will see how we can change the languages using a language switcher.
Language switcher
To implement a language switcher, you can use the useI18next react hook in gatsby-plugin-react-i18next plugin.
Lets’ create a <Header> react component containing the links to the languages. First, create a separate file in the src folder and name it header.js. Then add the following code to that file. Here we use the <Link> component to specify links to each language:
In this code, the originalPath attribute defines the page path for the language, and languages define the supported language keys.
Then include that component in the index.js file to include the language switcher on the main page:
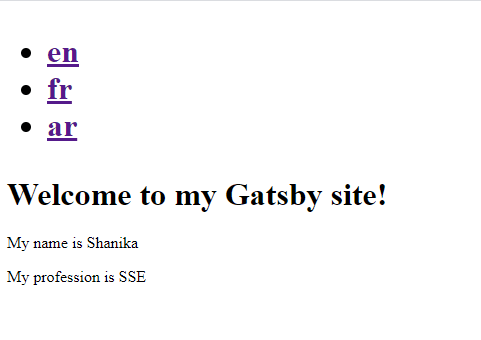
import Header from './header';<main> <h1><Header></Header></h1> <h1><Trans>Welcome to my Gatsby site!</Trans></h1> <p><Trans>My name is Shanika</Trans></p> <p><Trans>My profession is SSE</Trans></p> </main>
Then the page will look like the following:
As shown in the following figures, it will load the respective language resource files if you click on the links:
Excluding languages
You can also limit the languages for a specific page. In the example below, we have set the languages of the about page to only English, excluding other languages:
You also can exclude a page that has a language key in its URL path. Suppose you have a news page that uses a different language translator or plugin. You can exclude that page in the gatsby-config.js file:
To identify which part of the URL path specifies the language key, you have to set the :lang? parameter in the URL path. You can select the languages you need to exclude in the excludeLanguages option. In this example, you will get pages for all languages except for ‘es.’ Moreover, you can omit the excludeLanguages option if you want to get all the languages from the path.
Fetching translations for specific namespaces
We can also store translations for a single language in multiple files. For example:
- gatsby_localization/
--- locales/
----- de
------- translation.json
------- common.json
------- index.json
----- en
------- translation.json
------- common.json
------- index.json
If your app has large pages with lots of translations, you can employ Gatsby GraphQL queries to fetch specific namespaces. You can specify them under the ns and language fields. In the following example, we have added namespaces common and index. Therefore, it will load only common.json and index.json files. In addition, the plugin will add all other loaded namespaces as fallback namespaces:
You can format the dates of your Gatsby application usingmoment.js andnumeral.js or theintl api. I chose to use two different date formats, YYYY/MM/DD and DD-MM-YYYY, for this tutorial. First, install MomentJS using the following command:
npm install --save moment react-moment
Then, import the moment package into your project:
import moment from 'moment';
Now, let’s define two date variables with different formats as follows:
Next, insert the translated versions of key values to each language JSON file:
"date_format_one": " La date actuelle est {{date1}}","date_format_two": " La date actuelle est {{date2}}"
After saving the file, you can see the output of each date in a specific format:
That's it, great job!
Translating with Lokalise
Developing an application with internationalization is not that difficult as it seems to be. However, using the right tools and libraries will make this process much more manageable when applying internationalization to your project. You will no longer need to waste your time and energy translating each text and element right inside the codebase. And Lokalise is the perfect tool for internationalizing an app with the least amount of effort.
The process of integrating Lokalise with your application is relatively easy. Follow the below steps to start using Lokalise:
Then, install the Lokalise CLI to your PC. You can create projects, upload, and download translation files with this command-line interface.
Then open your Lokalise profile and navigate to the “API tokens” section. Create a new read/write token (remember to keep it private) and copy it.
Now, you can create a new translation project on Lokalise and set the base language to English.
Open your project, click the “More” button, and navigate to the Settings section.
There, you have to copy the project ID. Then you can execute the following command: lokalise2 file upload --token <token> --project-id <project_id> --lang_iso en --file PATH/TO/PROJECT/src/locales/translations/en/translations.json.
The above command will upload English translations from your Aurelia app to Lokalise. To upload more languages, you have to execute the above command to the relevant JSON files.
Now, you can proceed to the project page and perform translations there or invite a new collaborator to help you out.
Finally, you can download the modified translations with the following command: lokalise2 file download --token <token> --project-id <project_id> --format json --dest PATH/TO/PROJECT/src/locales/.
Lokalise provides other features, including project branching, integrations with popular services like GitHub or Bitbucket, quality assurance checks, and many more!
Conclusion
So, in this tutorial, we’ve discussed how we can use the Gatsby framework for developing an application that supports Gatsby i18n. We've learned how to translate a regular text with the gatsby-plugin-react-i18next and several other features such as how to exclude pages from translating, use specific namespaces, and date formatting. Finally, we discussed integrating a translation management system into our application to simplify the translation process. You can build much more complex Gatsby projects using the concepts taught here. Our website also provides other dev tutorials; for example, if you're a JS developer our React-intl and React i18next guides might come in handy.
Shanika is a software engineer by profession and a Graduate in Information Technology. Her fortes are Web and Mobile Development. Shanika considers writing as the best medium to learn and share her knowledge at the same time. She is passionate about everything she does and loves to travel and enjoy nature whenever she takes a break from her busy work schedule. You can connect with her at https://www.linkedin.com/in/shanikawickramasinghe/
Shanika is a software engineer by profession and a Graduate in Information Technology. Her fortes are Web and Mobile Development. Shanika considers writing as the best medium to learn and share her knowledge at the same time. She is passionate about everything she does and loves to travel and enjoy nature whenever she takes a break from her busy work schedule. You can connect with her at https://www.linkedin.com/in/shanikawickramasinghe/
Libraries and frameworks to translate JavaScript apps
In our previous discussions, we explored localization strategies for backend frameworks like Rails and Phoenix. Today, we shift our focus to the front-end and talk about JavaScript translation and localization. The landscape here is packed with options, which makes many developers a
Character encoding: Types, UTF-8, Unicode, and more explained
In this article, we’ll explore various types of character encoding used in the world of information technology. We’ll break down why encoding matters, explain how they function, and highlight the key differences between ASCII, UTF-8, UTF-16, and the Unicode Standard. Understanding these differences is essential for correctly handling text in any software application, especially when working with localized time and date formats that rely on proper ch
Syncing Lokalise translations with GitLab pipelines
In this guide, we’ll walk through building a fully automated translation pipeline using GitLab CI/CD and Lokalise. From upload to download, with tagging, version control, and merge requests. Here’s the high-level flow: Upload your source language files (e.g. English JSON files) to Lokalise from GitLab using a CI pipeline.Tag each uploaded key with your Git branch name. This helps keep translations isolated per feature or pull request