Website translation is important for several reasons, and it’s not just for ensuring that your potential buyers understand your offer. There’s more to it than bridging the language gap.
When you commit to properly translating your website, you’re creating an opportunity for new audiences to interact and connect with your brand in a meaningful way. Using translation keys efficiently in your localization process ensures that content is accurately translated and implemented across different languages. Moreover, you’re increasing your chances of appearing in local search, which directly impacts your marketing efforts.
But how to translate a website? Where to start?
We know that it might feel a bit overwhelming, but don’t worry. To help you learn how to translate your website, we created this step-by-step guide. We promise you, it gets easier when you have a checklist of things you need to do.
Website translation checklist
You can translate your website by organizing the process in three main phases:
1. Pre-planning phase
- Defining your website localization strategy
- Setting the quality bar for translations
- Assembling your website translation team
- Choosing your translation management system
- Defining the scope, project, and timeline
2. Translation phase
- Translating website content into new languages
- Exporting content from your translation management system
- Importing content into your CMS
3. Launch phase
- Getting your website live
- Measuring results and continuously improving
📚Read until the end
As bonus content to this guide, we added:
1. Detailed instructions on how you can translate your WordPress, Contentful, and Zendesk website
2. An FAQ section where you can learn more about translation costs, when using Google translate and machine translation makes sense, and more
Pre-planning: How to translate a website systematically
There are a total of five steps within the pre-planning phase. Here is a full checklist you need to cover before you jump into the actual translation process:
- Defining your website localization strategy
- Setting the quality bar for translations
- Assembling your website translation team
- Choosing your translation management system
- Defining the scope, project, and timeline
Bear in mind that if you rush things and choose not to have a systematic approach, you’ll likely encounter problems during the project.
For example, you might fall into a trap of treating localization as an afterthought, or struggle with freelance translators because of poorly set expectations, or face issues because of inadequate technology choices.
Let’s first take a look at how you can tackle each of the questions above. Then, once you do all the groundwork, we can move on to the step-by-step guide on how to translate your website.
1. Defining your website localization strategy
Before you translate a word of your website, you need to think about your entire localization strategy. Localization and translation are often used interchangeably, but they mean very different things.
Approach | What it is | Why it matters |
Website translation | Converting text of a website from one language to another. | To make the website content understandable to speakers of different languages. |
Website localization | Adapting a website to meet the cultural, linguistic, and functional needs of a specific target audience. | To make the website feel natural and relevant to users from different locales. |
When you translate your website, you are translating text while preserving original context and meaning.
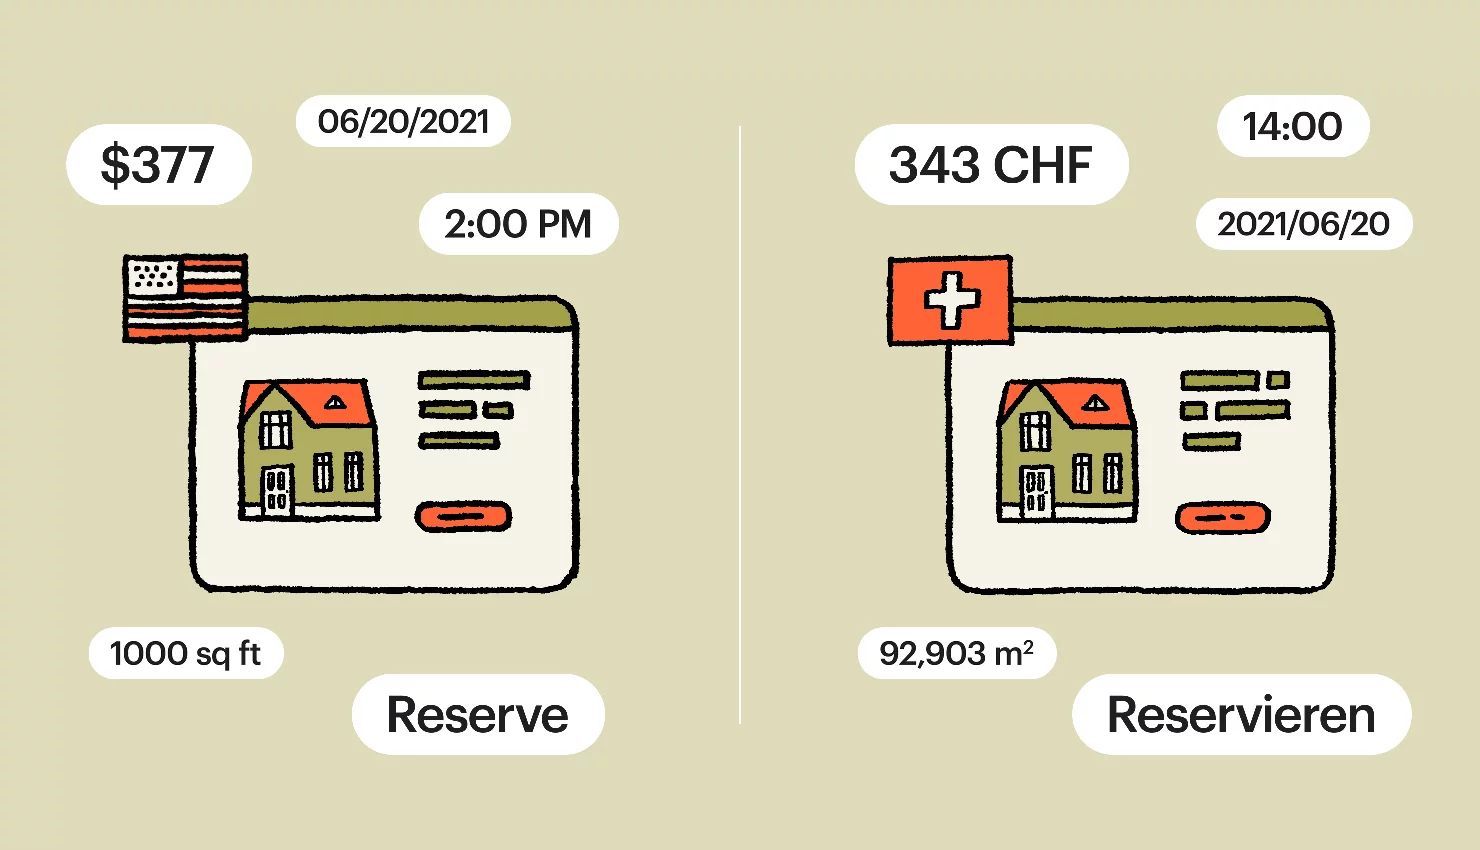
When localizing your website, you are translating text and adapting it for local idioms, slang, and cultural references. You’ll probably need transcreation services as well. Website localization goes beyond textual content. It also covers:
- Adjusting layout and design elements to accommodate different reading patterns or character lengths
- Modifying content, images, symbols, and even color schemes to suit cultural preferences
- Ensuring compatibility with local regulations, currencies, and payment methods
The bottom line is, you need to align internally on the go-to-market strategy and you need to document everything.
Your localization strategy is an important part of it. It refers to the overall plan for how you’ll adapt your offerings, messaging, and content to new countries and markets in a way that aligns with your brand. It considers each market’s language, culture, and social norms to determine the best expression of your messages.
📚Agile or waterfall localization?
For more complex websites, agile localization syncs the localization process with the website development process so they both operate simultaneously.
2. Setting the quality bar for translations
There are many degrees of translation quality. It’s on you to decide how important it is for a certain web page to be well translated. Accuracy should always be there, of course.
Sometimes, the information might be very straightforward or instructional (e.g. your contact page), in which case you can use machine translation. For pages that have marketing value, you might opt for a professional linguist or a native speaker. Different options will require more or less financial investments.
A professional linguist specializing in the target region will deliver top-quality work while taking the cultural specifics into consideration, but the resulting price might be quite high. Hiring a native speaker as a cultural consultant can also be beneficial.
Either way, translation quality will depend on three factors:
- Your internal definition of quality
- The strength and competency of your website translation team
- How you work (e.g., quality assurance process, project management, tools you use)
Now let’s take a look at the people who will be responsible for translating the website.
3. Assembling your website translation team
Obviously, you need to hire people who offer website translation services. There are three main options you can consider:
- Take the entire project in-house
- Hire individual freelance translators
- Hire a language service provider (LSP)
If you would like to fully control all translation aspects and do it in your own way, then in-house translation is the best choice. However, keep in mind that you’re essentially opting for a DIY approach. If you don’t have internal capacities and expertise to carry the project on successfully, it’s better to leave it to professionals.
Working with freelance translators means that you’re outsourcing one part of the process, but the actual implementation of translations, project management, and localization quality assurance are still on you.
An LSP is usually a translation agency, which will do almost everything for you provided you’re ready to pay the bill. They will assess your requirements, research the current state of your website, provide recommendations, and then translate the content for you.
It truly takes a village to properly translate a website. You need a strong localization team and translators are just one piece of the puzzle. From localization engineers and project managers, to quality assurance testers, developers, and designers–it’s a collective effort.
💡Pro tip: How to find freelance translators
The simplest way to find freelance translators is to contact a third-party company that provides such solutions (e.g., Gengo) and ask them for assistance.
Alternatively, you can scout out professionals on freelancer websites. In this case, make sure that you’re hiring a linguist with proper experience and expertise.
Finally, you can use Lokalise. Our service enables you to create professional translation orders with just a few clicks. You just select what you’d like to translate, which provider you’d like to use (hire Lokalise translators, order from Gengo, or use a neural network), choose the target languages, and wait for the order to complete.
4. Choosing your translation management solution
Lastly, you need to think about the translation tools you’ll use. From a tech perspective, you need to choose a solution that will help you centralize your work, automate manual tasks, and optimize your costs.
When choosing a tool, you should make sure that it enables you to optimize your website across all platforms (e.g., in web browsers and on mobile devices). Additionally, it should be developer-friendly since website translation and adaptation require technical inputs.
Lokalise ticks all of the boxes as the best tool for website translation. It allows you to shorten the release cycle and launch faster without compromising quality. More specifically, you can manage all translation files in different formats, assign and track progress of the translation tasks, set up automations, perform QA, facilitate content exchange with third-party services, and more.
If you want to explore other options, check out our guide to the best translation software for business growth.
5. Defining the scope, project, and timeline
For any website translation project, the scope will involve translating all existing website content. This means translating and adapting text, images with embedded text, and any downloadable resources, into the target language.
To ensure a healthy translation pace, you need to precisely define the scope and divide the website translation project into phases. The first step might include doing an initial content audit and creating a glossary, for example. After translating and localizing content, you’d need to review it.
Let’s see what this might look like in practice.
Translation phase: How to translate your website successfully
If you’ve taken all the necessary pre-planning steps, you’ve defined:
- Which parts of the website need to be localized
- How you’re going to ensure the optimal translation quality
- Who is going to work on the website translation project
- Your translation tools and tech stack
- The project budget and timeline
That’s great! We’re moving on to the translation phase which has three main steps. The steps might vary depending on the format of your source content (more on that in a bit):
- Translating website content into new languages
- Exporting content from your translation management system
- Importing content into your CMS
1. Translating your website content into the new languages
How do you organize the translation process of your website content? If you are using a tool like Lokalise, everything should run smoothly.
This is because collaboration-first translation management systems (TMS) allow you to invite your team members to a project by entering their emails (or sending a join link), provide the content to translate, and then track the progress.
In general, the process involves the following steps:
- Content is provided to translators
- Translators start working on the content
- Quality assurance specialist reviews the content
- Content is exported back to your application
Lokalise enables you to easily upload translation files in many different formats (JSON, XML, PO, YAML, SRT, XLSX, and others). Translation keys and values will be extracted from the uploaded files automatically and presented in a graphical user interface. Moreover, you can provide additional context for every key by adding comments and screenshots.
Instead of wasting time chasing email threads and documents, with a dedicated TMS, you do everything in one place. Additionally, the best tools simplify the process of visual translations, which are very important for localizing designs.
2. Exporting content from your translation management system
Once you’re done with translating the content, Lokalise allows you to export your translations. You can decide how the content should be structured, what to include in the download bundle, what to do with untranslated values, etc.
3. Importing content into your CMS
Finally, you need to import the translated content into your CMS. But does it have to involve so much copy-pasting and manual work? Not necessarily, if you use a translation management system that supports CMS integrations.
Check out different use cases in the box below.
💡Pro tip: What to do when your content is not stored in translation files
Let’s take a look at different scenarios on how to translate your website if you’re not working with ready-made translation files.
Scenario #1: Your content is stored in a CMS
There’s no easy way to organize this content into files. You can either give translators access to your CMS, or use a TMS like Lokalise to easily perform content import and export.
Scenario #2: You don’t have a website yet, the content is stored in design files
If your content exists in the form of design files, you’ll need to extract your texts from the design files and provide them to your translators. That might require a lot of copy-pasting. Luckily, Lokalise has ready-to-use plugins for Figma, Adobe XD, and Sketch. These extract translation data for you, create all the necessary data in the TMS, and can even auto-generate screenshots based on your design.
Scenario #3: Your text is hardcoded into the app itself
In this case, you need to ask your developers to implement internationalization first. You probably don’t want your translators to modify the source code files directly.
Now let’s discuss the steps involved in translating some of the most popular website types. If you are interested in learning more, please check out our documentation, which has instructions for other platforms as well.
Bonus #1: How to translate a WordPress website
WordPress remains a popular option (62% market share) for website hosting due to its adaptability and ease of integration with other types of technology, and its intuitive interface.
If you’re using WordPress, you can exchange posts and pages with Lokalise through our WordPress plugin. It lets project managers select WordPress content that they want localized and send it to Lokalise for processing. Then it can be pulled back into WordPress when it’s ready.
To localize WordPress content via the Lokalise plugin:
- Create a Lokalise account if you don’t already have one.
- Install the Lokalise plugin from your WordPress admin page.
- Install the WPML plugin that makes it possible to manage multilingual content on WordPress. Please note that it is a third-party solution not maintained by Lokalise
- Proceed to your Lokalise project, find WordPress in the Apps list, and connect WordPress to Lokalise by copying the authorization key in WordPress and entering it in on the setup page. You’ll also need to provide your site hostname.
- In your Lokalise project, you’ll see the different content that’s available for translation (e.g., posts, pages).
- Choose which content you want to import to your Lokalise project (for instance, pages) and choose “Import selected” to import strings.
- Translate as you would in any other Lokalise project.
- Export the translations to WordPress to populate your additional language.
For a detailed explanation of how the integration works and how to set it up, take a look at our WordPress integration tutorial.
Bonus #2: How to translate a Contentful website
If you’re using Contentful for your website, you can easily integrate directly with Lokalise. To translate the content on your Contentful website:
- Create a Lokalise account if you don’t already have one.
- Connect Contentful to Lokalise by navigating to the Apps page and finding the corresponding integration in the list.
- Once you authorize the connection, the list of spaces and relevant content types will appear. Select and import the required content types for further translation.
- Click the “Import selected” button to confirm the specific sections of the page that you want to translate.
- Then, you can add required languages and perform translations as you would in any other Lokalise project.
- When the translations are done, select the items you want to export to Contentful and click the “Export selected” button. The selected languages will be updated in your Contentful project.
For a detailed explanation of how the integration works and how to set it up, read through our how-to guide.
Bonus #3: How to translate your Zendesk website
Zendesk is a popular option for support documentation, help articles, and managing customer support tickets. Lokalise integrates with Zendesk Guide, which allows you to export and import posts from Zendesk to Lokalise for translation and vice versa.
To translate your help articles in Zendesk Guide via Lokalise:
- Create a Lokalise account if you don’t already have one.
- Connect Zendesk to Lokalise by navigating to the Apps page and finding the corresponding integration in the list.
- Click “Connect” again for your subdomain and enter your Zendesk subdomain (for example, mycorp_support). Then, allow Lokalise access.
- Once you authorize, the list of sections, categories, and articles will appear. Select the required items and press “Import selected” to import the chosen content for further translation.
- Translate as you would in any other Lokalise project.
- When the translations are done, return to the app page and select the items you want to export to Zendesk. Next, click the “Export selected” button.
For a detailed explanation of how the integration works and how to set it up, take a look at our Zendesk Guide integration tutorial.
Bonus #4: Translating your website with a live WYSIWYG editor
LiveJS is an in-context JavaScript editor that enables translators to modify text elements right on the webpage. All changes are shown in the browser and saved directly to Lokalise, not to your translation files or the database running your website.
In other words, once your translators are done with the texts on your website, you would need to handle how the changes will reach your translation files or database.
To translate your webpage with this in-context editor, paired with Lokalise:
- Create a Lokalise account if you don’t already have one.
- Prepare your site for translation with translation files containing key/value pairs.
- Include Lokalise LiveJS script at the end of your HTML.
- Adjust Lokalise LiveJS script parameters.
- Expose the key names in HTML. Depending on the plainKey parameter you have set when initializing the snippet, you either need to wrap the translated text in any HTML element with the data-lokalise attribute and set the data-key attribute, or just expose a wrapped key name.
- Translate by editing the HTML directly.
- Once a translator is done editing a translation (and hits ⌘/Ctrl-S to save), Lokalise LiveJS will automatically update the respective translation in Lokalise.
For a detailed explanation of how the plugin works and how to set it up, take a look at our LiveJS plugin tutorial.
Launch: Getting your translated website live
Once everything is translated and double-checked, it’s time to get rolling! Of course, the actual deployment process will vary depending on your technology stack, but you’ll probably want to notify your customers about the newly added language support and even launch a marketing campaign to attract new visitors.
Also, launching a new website doesn’t mean your work is done. On the contrary, you need to continuously improve your content, measure success, and iterate accordingly.
As a parting thought, a piece of advice: if you want to make sure your website translation project runs smoothly, you need a reliable, feature-rich translation management system. It can be a game-changer for your business.
For example, ActiveCampaign managed to save 16% on translations and significantly speed up the translation process. Here’s what Niamh Scallan, their Senior Localization Specialist, had to say about this:
“If we need to launch a site page and it needs to be done extremely quickly it could take just two days and that includes going through Lokalise, through our vendor, maybe a quick internal review, and then publishing.”
We invite you to try Lokalise for free. You get full access and we don’t ask you for your credit card. It’s completely risk-free!
FAQs: How to translate a website
1. Can I use Google Translate machine translation on my entire website?
Using Google Translate for your entire website is possible but not recommended. Results may lack accuracy and cultural relevance, leading to potential misunderstandings, or a loss of brand voice.
Human translation or specialized translation services are more reliable. However, machine translation (MT) can help you optimize costs and move faster, but it needs to be combined with human-post editing.
2. How much does it cost to translate a website?
On average, human translators charge around $0.22 per word, which means that translating a 2500-word article (which is not actually that lengthy) will cost $550. Some language pairs are more expensive than others.
One of the cheapest pairs is English -> Spanish, while some other languages are considered to be more “expensive” (like, Japanese or Chinese). This means that in reality you might need to pay anything from 10 cents to $0.50 per word. Translation and editing is, of course, more expensive and will cost around $0.30-$0.40 per word.
You can find a pricing overview in our blog post.
3. How expensive is machine translation?
With machine translations, prices are around $0.001 per word or $20 per million characters. The turnaround is minutes or even seconds, which is of course very impressive. However, bear in mind that these texts will have to be reviewed by a professional.
4. How long will it take to translate a website?
How long will a website translation take depends on the text length, its complexity, and its specialization. Very roughly speaking, it takes 2–3 days for a translator to complete a regular 2500-word text and up to a month to take care of a large user manual with 30k–40k words.
5. How do I measure performance of a translated website?
To measure the performance of a translated website, monitor key metrics such as traffic from the target region, user engagement (e.g., time on site, bounce rate), and conversion rates. Make sure to analyze local SEO performance by tracking keyword rankings in the target language and the visibility of localized content.