Implementing a proper localization workflow can be quite the complex task, especially when you have never done it before. There are numerous things for you to consider and keep in mind. In this article, we will discuss some of the most common localization issues/problems that we, as developers, face and how to solve them with the help of the Lokalise TMS (translation management system).
The concepts presented in this article were also discussed during one of our webinars. The recording is available on YouTube:
Our team members attended the LocWorld50 conference and have gained some additional insights into internationalization and localization processes in 2023.
Firstly, artificial intelligence's role has greatly increased. It's becoming more and more common to use AI for translation and reviewing. Thus, we are proud to announce Lokalise AI, which can help you with easily translating texts into multiple languages and perform text analysis to detect any potential issues. Moreover, our AI can follow your corporate style guide, so make sure to check out this new feature as well.
Secondly, internationalization is still a big issue for many companies, especially when recommended i18n best practices are not followed.
Teams that have not incorporated the right approaches to software i18n into their processes are struggling with bugs and losing lots of time because of this.
More advanced teams use continuous localization approaches to automate many routine tasks. In this article, we are going to cover using Lokalise apps to help you set up this process.
1. Synchronizing translations between the TMS and code repository
This task is probably the most common one for developers. We need to make sure that translation files are synchronized properly between the translation management system and the code repository hosted on a platform like GitHub or Bitbucket. But how do we achieve this? Do we export the translations from the code repo to the TMS manually? Should we create pull requests every time translators perform updates? You can't expect translators to perform these tasks themselves. Perhaps they aren't the most tech-savvy people, or they don't have experience in tasks outside their usual role, after all. However, doing this manually on your own is quite a tedious and error-prone process. Is there any way to alleviate this localization issue? The answer is yes!
Lokalise provides integrations with popular code hosting services Azure Repos, GitHub, Bitbucket, and GitLab. By employing these, you can easily import and export translations with just a couple of clicks. As an example, let's see how to set up and work with GitHub — the other three apps work in the same way.
Setting up a GitHub app
To get started, open Lokalise and navigate to a project for which you'd like to set up the integration. Click the Apps button, find GitHub in the list, click on it, and then press Install.
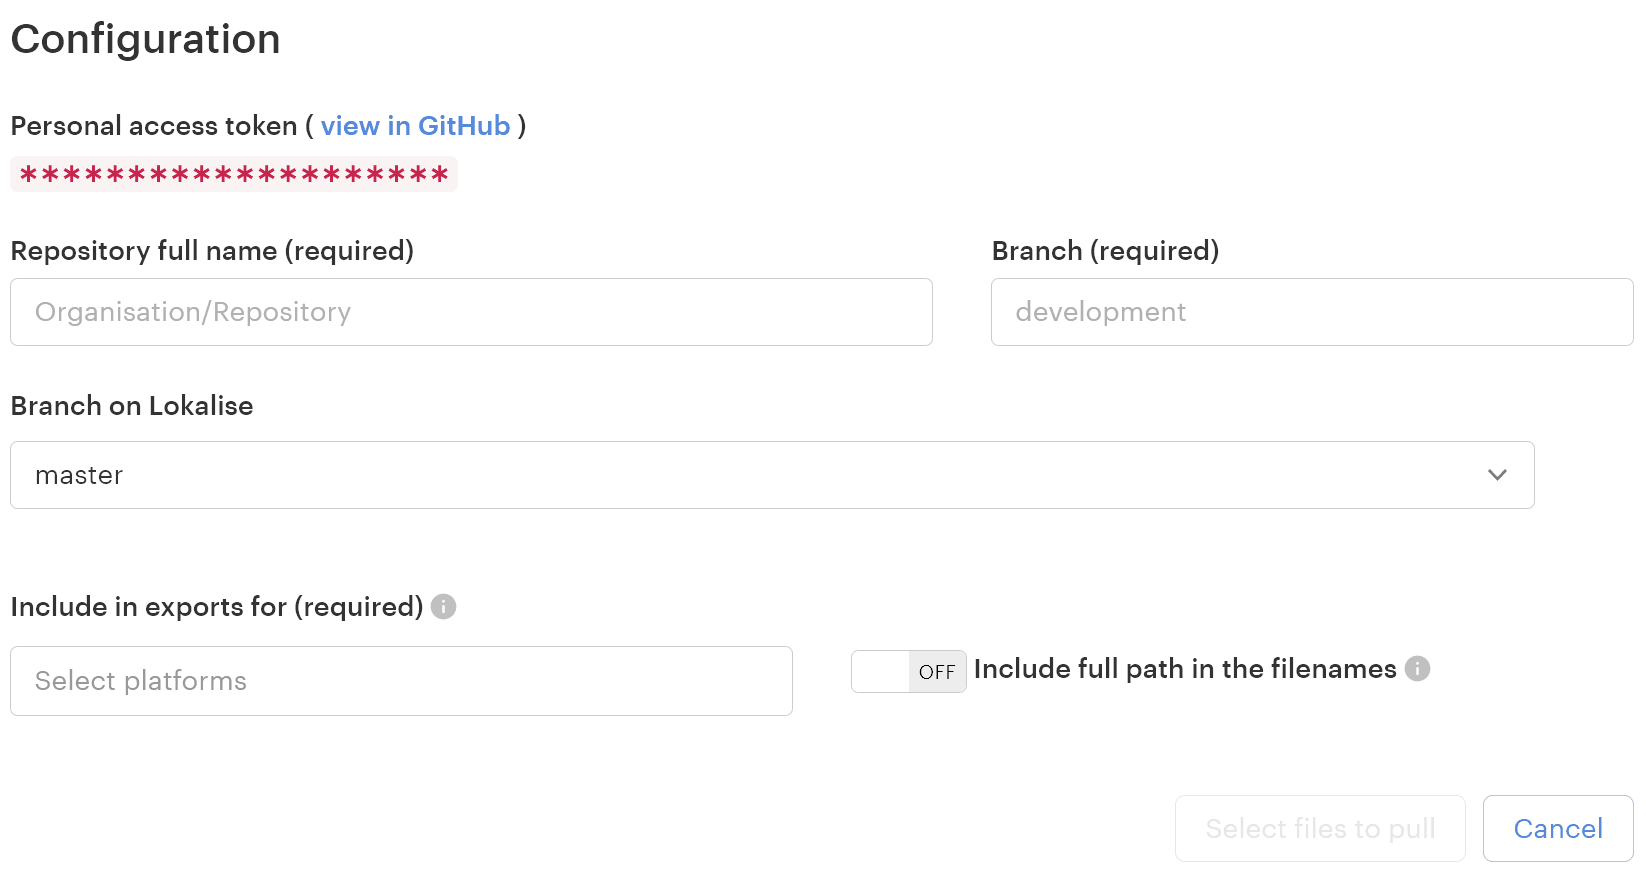
You'll be asked to log in via GitHub. After doing that, you'll be presented with the following dialog:
Here you can adjust the following options:
Repository full name — enter the GitHub repo name that you'd like to connect to Lokalise. For example, username/demo.
Branch — enter the branch name in the chosen GitHub repository. For instance, develop.
Branch on Lokalise — depending on your Lokalise project settings, you might or might not see this option. Lokalise projects also support branching, and here you'll be able to choose the branch to work with. Learn more about this feature in the docs.
Include in exports for — choose one or more platforms to assign the imported translation keys to. Lokalise supports four platforms: Web, Android, iOS, and Other. You can learn more about keys and platforms in the docs.
Include full path in the filenames — usually you'll want to keep this option disabled. When enabled, it will include the relative directory name in the filename. This option is useful if your localization directory has a complex subfolder structure.
When you are ready, click Select files to pull.
You'll see the below dialog:
Make sure to only choose your translation files!
Lokalise will try to automatically determine your translation file locales, but you can adjust these as needed.
Finally, click Confirm.
Using the GitHub app
Exporting translations from GitHub
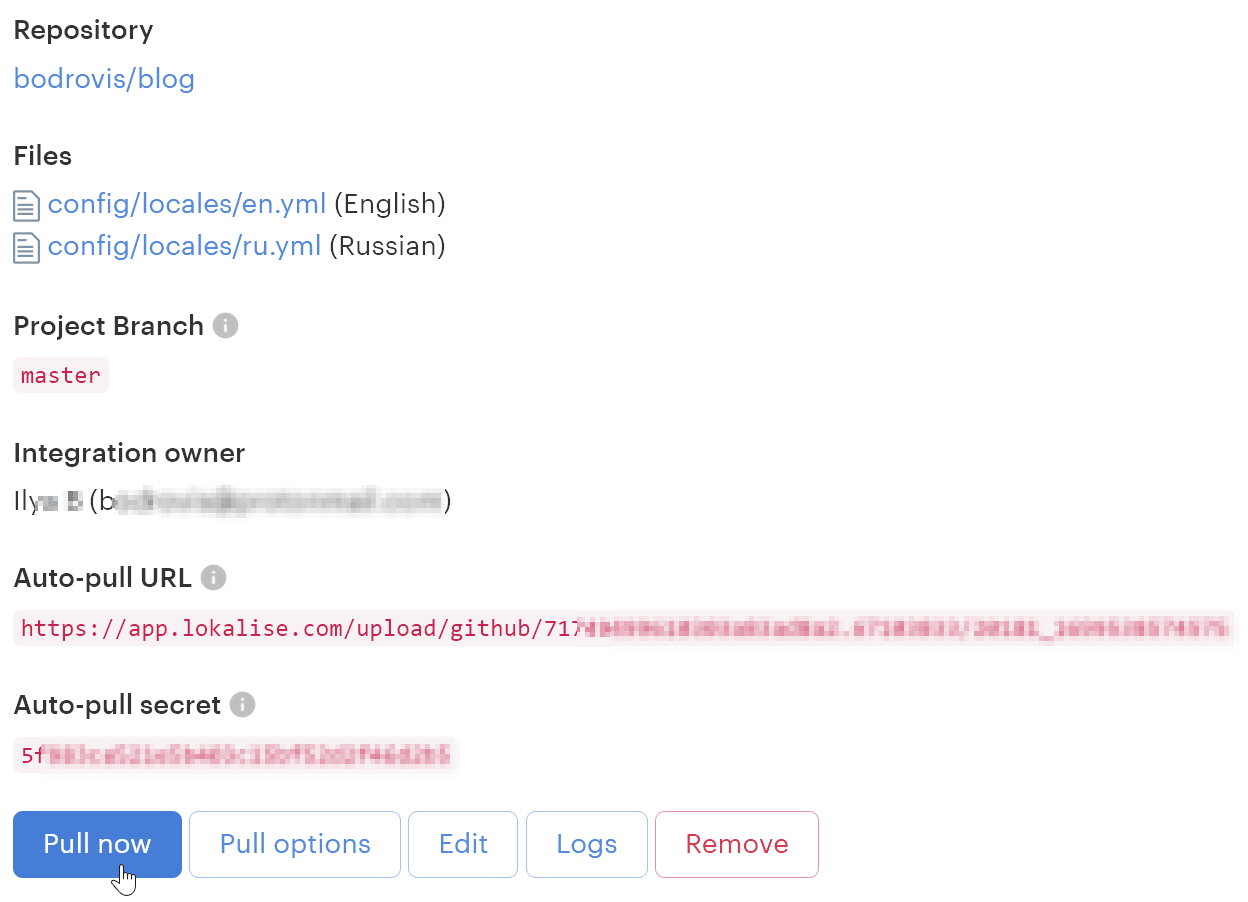
After completing the setup process, you can now export translations from GitHub to the Lokalise project. To do this, simply click Pull now:
It might also be a good idea to set up a webhook to automate pulling changes to Lokalise as you push to GitHub. For this, open GitHub, navigate to your repository settings and proceed to Webhooks. Copy/paste the Auto-pull URL provided in the Lokalise app configuration (see the above screenshot). You will need to provide the Auto-pull secret generated on the integration page as well, and choose Just the push event as the trigger.
Importing translations to GitHub
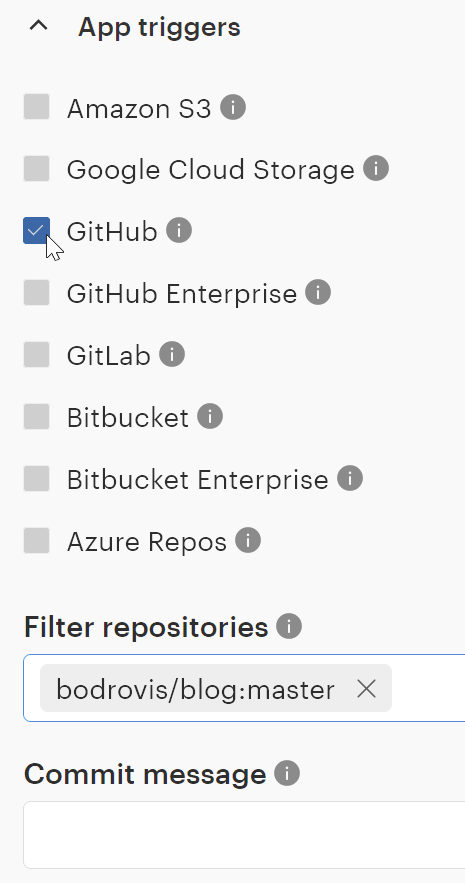
After the translations have been updated on Lokalise, you will need to synchronize them with GitHub. To do this, proceed to the Download page on Lokalise and adjust the download options as needed by choosing file format, languages, plural format, etc. Be sure to enable GitHub in the App triggers section:
Then click Build and download or Build only.
By pressing the latter button, the corresponding pull request will be created on GitHub, but the translations archive won't be downloaded to your PC. It is also a good idea to use the Preview button first, so you can see the resulting file/folder structure before triggering creation of the pull request.
After you start the build, the following process will take place:
A new branch is created from the last revision of the branch you chose in the app setup. The branch name will look like this: lokalise-2018-03-12_15-14-13.
A commit with all the chosen files is created in the new branch.
A pull request from the new branch to the previously chosen branch is created.
Then you may navigate to GitHub and merge the new pull request as usual. Piece of cake!
Alternatively, you can take advantage of the new actions for GitHub to facilitate push and pull operations. These actions are free and open source.
2. Automatically downloading new translations and monitoring for changes
The next localization issue faced by developers is the need to automatically download translation files to your application on a regular basis. Apart from that, some developers may need to monitor changes in their Lokalise project: for example, to check which translations were added or updated. To overcome these issues, Lokalise provides two powerful tools: the API and webhooks. Let's start by discussing the API.
Lokalise API
As you probably know, API means "application programming interface". It allows third-party applications to communicate with the given service and manage it by sending properly formed HTTP requests. Lokalise provides a feature-rich API that enables you to perform all main tasks, including file import and export, translation updates, contributor management, project creation, and many more. There are client libraries for major programming languages such as PHP, Go, JavaScript, Ruby, Python, and Elixir.
To get started with the API, you'll need to generate a special token under your Profile settings (API tokens section):
Remember that the token owner must have the proper permissions to perform the required tasks. For instance, you cannot add contributors if you are not a project admin.
After generating the token, you may send API requests. The code will vary greatly based on the programming language and your end goal, but I'm going to show you a small example written in Ruby. It illustrates how to download translation files from the given project.
Download the files and extract the bundle_url from the response. This URL points to the ZIP archive with your translation files.
Unzip the archive and process its contents.
Check the filename and make sure it has a .yaml or .yml extension.
The filename may contain slashes, meaning that the file is stored under a subdirectory. In this case, take only the filename, without the subdirectory part.
Read the file contents and process it as YAML.
Create or open an existing file under the locales directory. The filename was already generated in step #6.
Save translations to the file.
You can run the above script on a regular basis to download new translations to your application.
On top of that, you can take advantage of the Lokalise file manager for Ruby, which enables you to easily exchange translation files between Lokalise and any Ruby app. Also, there's a lokalise_rails solution that adds special Rake tasks to enable easy uploading and downloading of translation files.
A webhook is a mechanism that sends an HTTP request to the specified URL once a given action has taken place. With the help of Lokalise webhooks, you may notify your application about certain events.
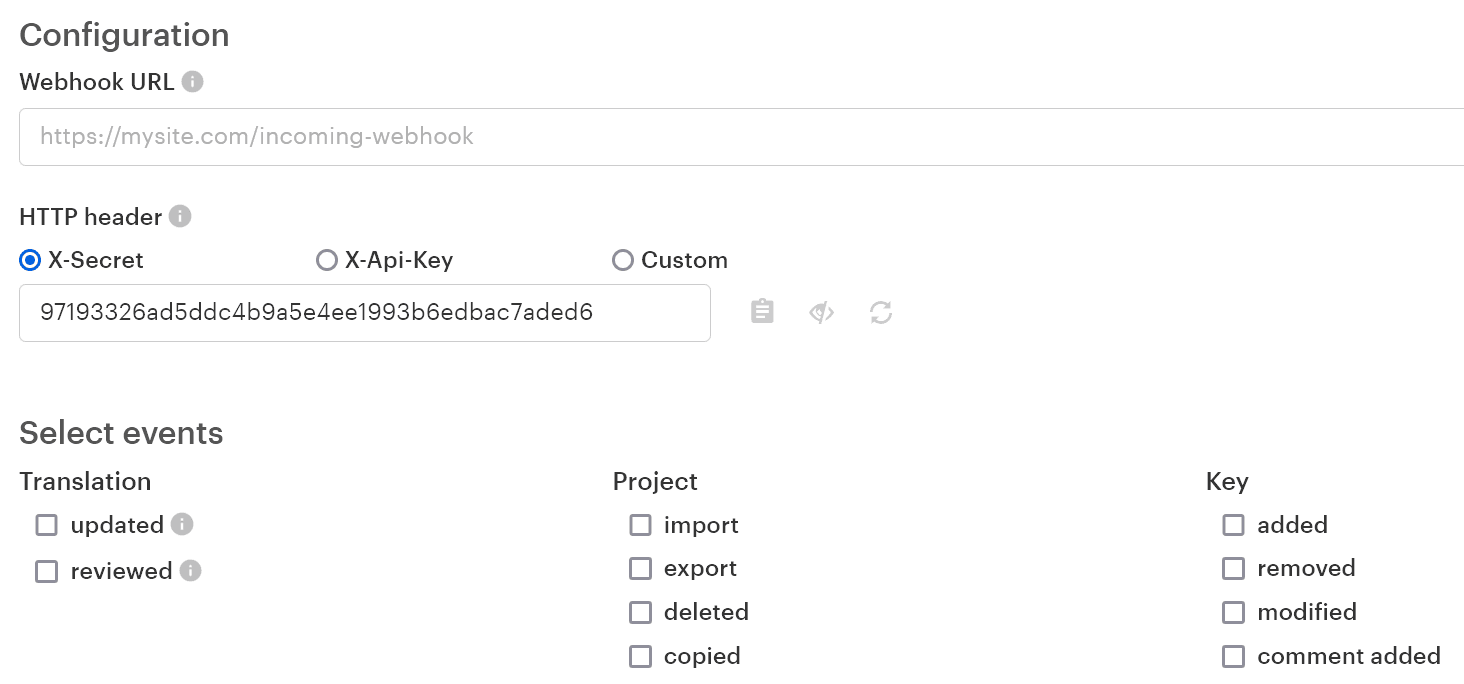
To add a new webhook, open your Lokalise project and proceed to Apps. Find Webhooks in the list, click on it, and press Install.
Next, enter the Webhook URL to which you want to send notifications. Take a note of the X-Secret header, which can be used in your application to make sure that the request comes from a trusted source. Alternatively, you can use an X-Api-Key or provide a custom header name. Finally, choose one or more events to send notifications about.
Now, when a chosen event takes place, the corresponding notification, in the form of an HTTP POST request, will be automatically sent to the provided URL. Here is an example of a "translation updated" notification:
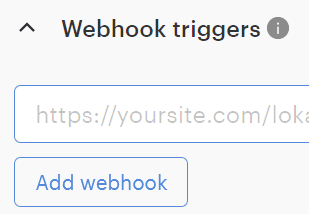
Also note that you can send a notification using webhooks when exporting translation files. For this, simply navigate to the Download page and click Add webhook under the Webhook triggers section:
In this case, the notification will contain a path to the ZIP archive with your translations.
3. Downloading translations with the proper formats and structures
Translation file formats will vary widely depending on the technology you are using. For instance, Ruby on Rails uses the YAML format, and Angular apps require XLIFF files, whereas Android employs XML. We need an easy way to download translations in different formats for different platforms. Luckily, Lokalise provides a simple solution to this issue.
Assigning keys to platforms and files
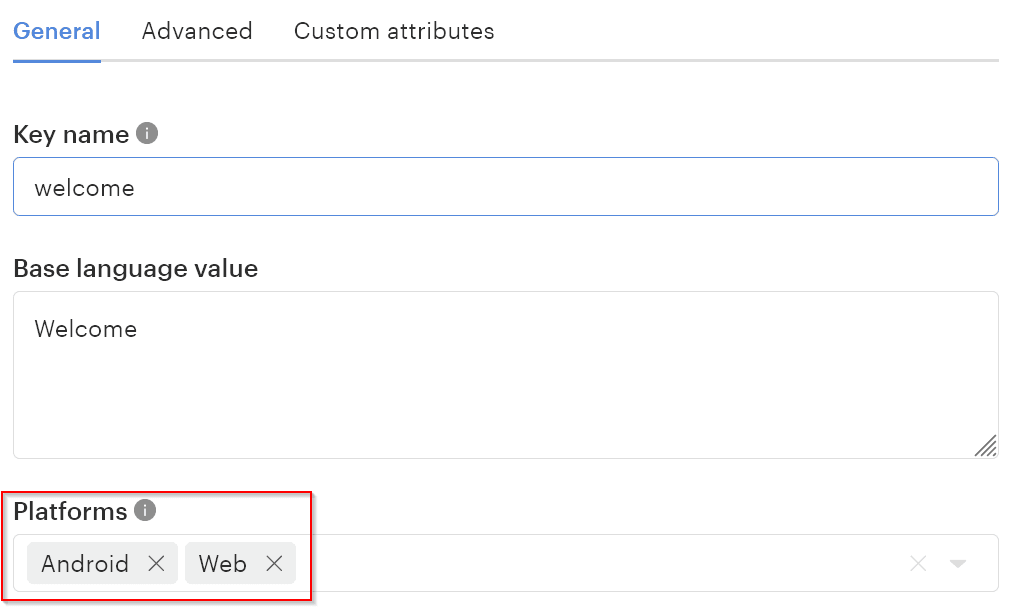
First of all, you can assign translation keys to one or more platforms, namely Web, Android, iOS, and Other. This way, you can control which keys to download for specific formats. For example, if a key is assigned to the Web and iOS platforms, it will be exported when choosing the JSON and Apple XLIFF formats. Likewise, it won't become a part of the bundle when choosing Android XML.
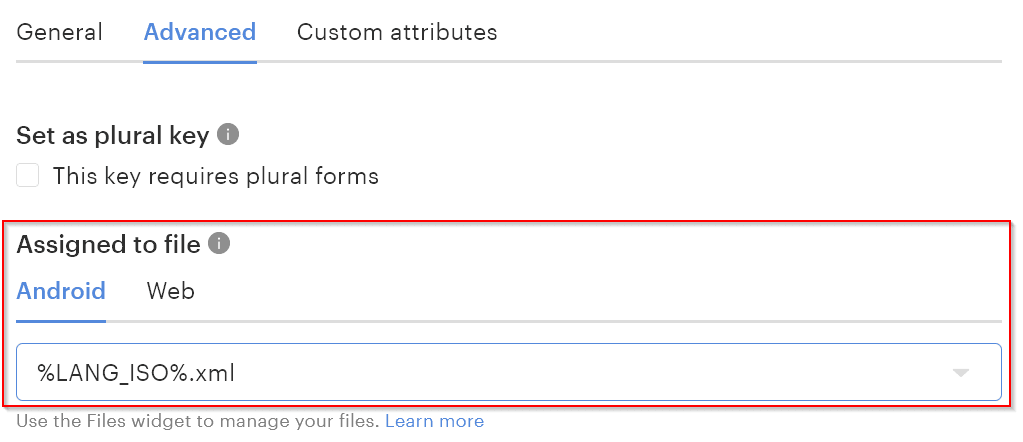
You can assign translation keys to separate files. Moreover, if the key belongs to multiple platforms, file names can be customized separately. Using this feature, you may control which key should be placed into which file during export.
Download options
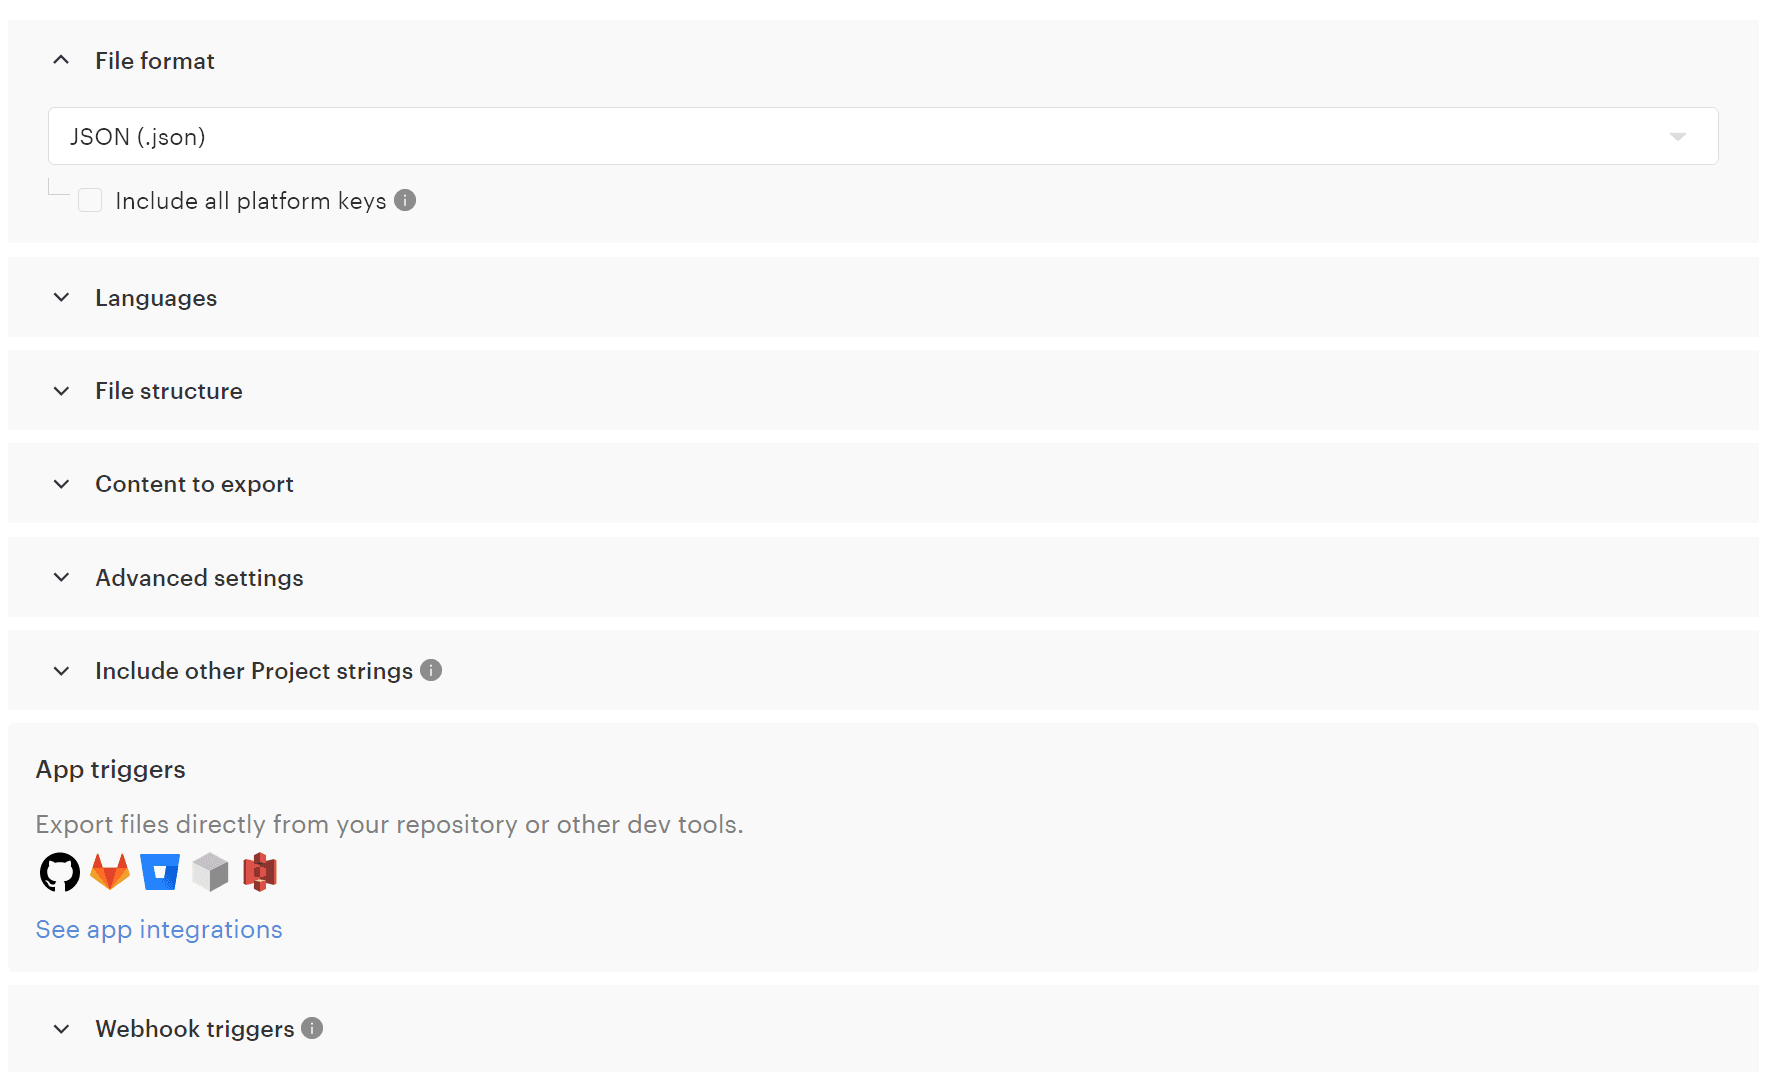
Upon opening the Download page, you will be presented with numerous options to customize the export:
In-depth explanations for each option can be found in the documentation, but let's discuss the most important ones:
File format — here you may choose one of the file formats to use. These formats are separated by platform (Web, Android, iOS, Other). Therefore, if a key only has the Web platform selected, it won't be exported for Android (though you may export all keys regardless of their platform).
Languages — choose one or more languages to download translations for.
File structure — pick how your translations are organized: place all translations in a single file per language or utilize previously assigned filenames. Here you may also provide directory prefixes, which is convenient when translation files for different languages should be placed into different folders.
Content to export — here you can choose to omit untranslated or unreviewed strings, and filter your keys by tags, filenames, and other criteria.
Advanced settings — adjust placeholder and plural formats, indentation, and so on.
Then, after setting up the options, click one of the buttons at the bottom of the screen:
Build and download — download a ZIP archive with all the chosen translations to your PC. This will also trigger export webhooks and any other integrations chosen in the options (e.g., GitHub).
Build only — trigger all export webhooks and chosen apps. The archive won't be downloaded to your PC.
Preview — clicking this button allows you to preview the directory structure and your translation file contents right in the browser. The archive won't be downloaded, and nothing will be triggered.
4. Finding duplicate translations
When a team of developers works on the same project, they may end up producing duplicated translations. For example, you create a new page with a license agreement and add an "OK" button to it. Next, you have to create a translation key named "license_ok" with an "Ok" value. However, your fellow developer may also introduce another translation key, "accept", with the same "Ok" value. This means this value has to be translated twice, which is not ideal. Moreover, you may have multiple translation files for different platforms that have the same translation values but different key names. This could result in a total mess really quickly. But not to worry, Lokalise is here to save the day once again!
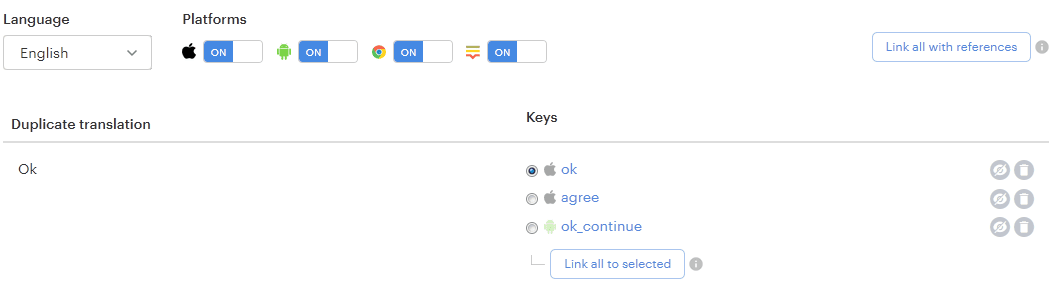
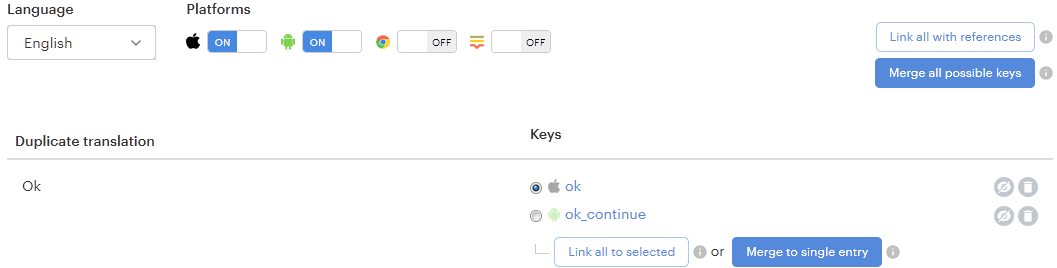
After opening the Duplicate finder, you will see all duplicated translations. Using the top menu controls, you can adjust the language and choose the platforms:
There are two ways of dealing with duplicates: linking and merging. Therefore, we'll discuss these approaches separately.
Linking keys
Linking keys means establishing a reference between two entries. One entry will serve as a parent and the other one will become a child. Whenever the parent translation is modified, the child will be modified as well. You may also create multiple children for the same parent. When these translations are exported, all child keys are provided with the proper values from the parent.
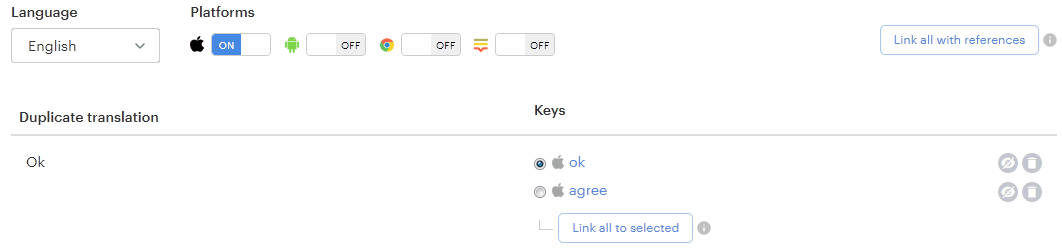
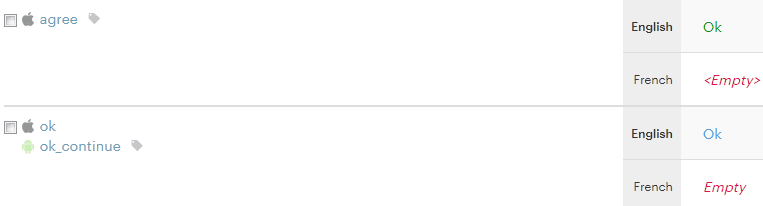
For example, here are two duplicate iOS translations:
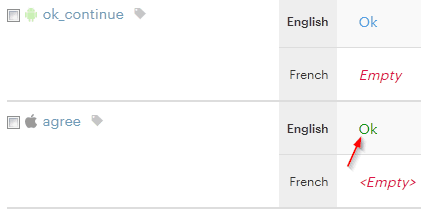
If you press Link all to selected, the chosen key, "ok", will become parent, while the "agree" key becomes the child. Return to the project editor:
The "Ok" translation for the "agree" key is now highlighted in green meaning that it references another key. The reference is established by providing the following translation value: [%key_id:123%], where 123 is the parent key ID. To break the link, simply remove this construct.
Merging keys
Merging keys means creating a single entry from multiple translation keys. Following the example above, I've enabled the Per-platform key names option in the project settings and returned to the Duplicate finder:
Now you can choose one of the keys and merge all other entries to it. In the screenshot above, the merge target is the "ok" key. The "ok_continue" key will be removed and merged to it. As long as I've enabled the Per-platform key names, the "ok_continue" key name will be preserved for the Android platform. Note, however, that a single key cannot have different translations and therefore merging may not always be the best solution.
After clicking Merge to single entry, let's return to the editor:
The established link is still present, and the two duplicated entries were merged into one. Moreover, the key names were preserved for each platform! When you download your translations again, all three keys will be exported with the proper translations. This means that even though we have taken care of the duplicates, the corresponding keys have not gone anywhere and will still be exported. This is quite important because your code already relies on those keys and you probably don't want to just remove them. Still, it is actually possible to completely remove duplicates on the Duplicate finder page by clicking on the trash bin icon.
5. Allowing translation teams to work on different features in parallel
We developers love version control systems like Git. They allow us to have a base version of the project and work on new features in other branches without affecting the main branch. Also, we can have different developers working on separate features in parallel, which is crucial for larger teams. Can this approach be applied to a TMS? But of course! In Lokalise, you can create as many branches inside the project as needed and switch between them in just two clicks.
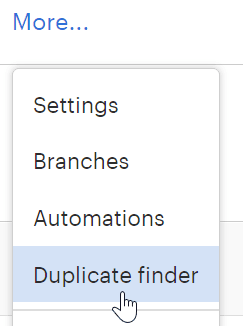
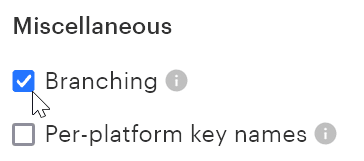
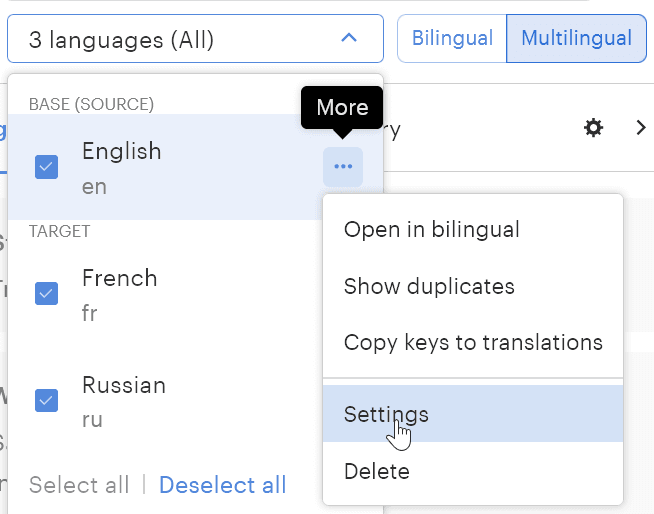
So, to get started, open your project, click More and proceed to Settings. Here, in the Miscellaneous section, enable the Branching option and click Save:
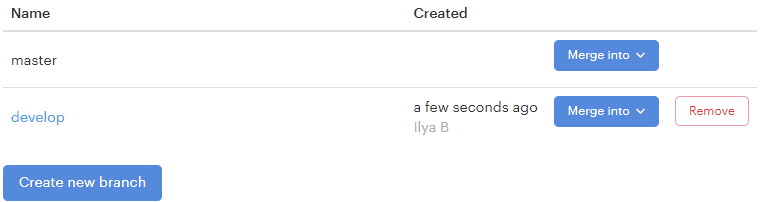
The master branch of the project will be created automatically. You can add more branches by clicking the dropdown:
To manage branches, choose Branches from the dropdown. Here you can rename, delete, and create branches. Note that the master branch cannot be renamed or deleted.
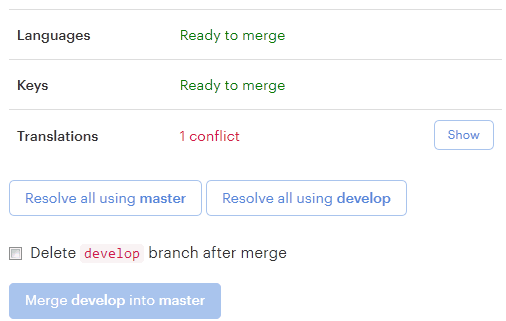
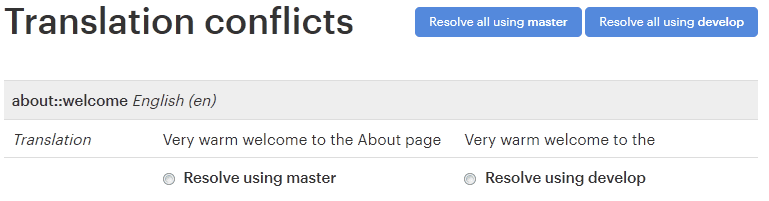
To merge the branch, click Merge into and choose the destination. If any conflicts are detected, you'll have to resolve them before merging. Either resolve all conflicts in one go using either target or destination, or take care of them one by one.
To view the conflicts, click the Show button.
Note that some aspects of your project are global for all branches. These are settings, contributors, comments, glossary, history, and screenshots.
6. Working with placeholders
Universal placeholders
Another common localization issue is proper usage of placeholders. As you probably know, placeholders allow you to insert dynamic values right into the translations. The thing is, different formats require different placeholders. If you are using the same translations for multiple platforms, this may become an issue as you'll have to adapt your placeholders somehow. But with Lokalise, this no problem at all because you can take advantage of universal placeholders.
Suppose you are uploading a YAML translation file as below:
en:
  welcome: "Hello, %{username}"
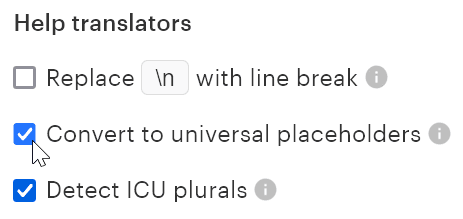
Such files are used in Ruby on Rails applications. However, if you also need to export this translation for Android, the %{username} placeholder should be replaced with %1$s. Of course, you don't want to make this change manually, right? Therefore, before importing your initial translation file, enable the Convert to universal placeholders option on the Upload page:
When this option is checked, all your platform-specific placeholders will be converted to universal ones. For example, %{username} becomes %1$s:username. Yet, the real magic happens when you download your translations again for the specific platforms. During export, the universal placeholders will be replaced with the platform-specific ones automatically! This means that the same translations can be utilized on multiple platforms without any more worrying about the placeholders.
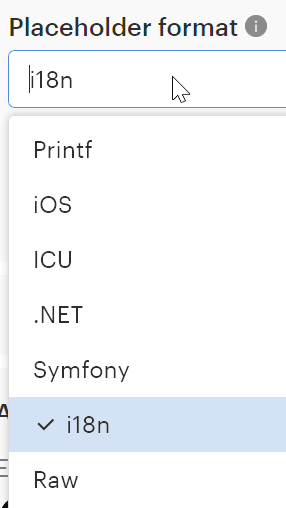
In the export options under Advanced settings, you can always choose how to format placeholders (these options will vary depending on the chosen file format):
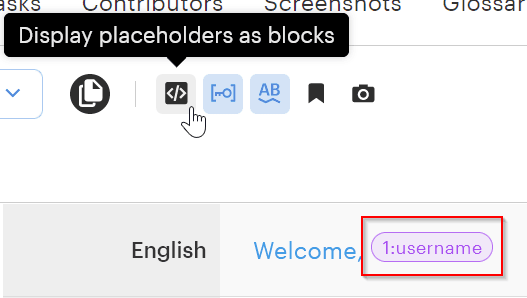
Showing placeholders as blocks
Unfortunately, sometimes translators might mess with your placeholders. They might remove parts by mistake or even try to translate them. Therefore, we need an easy way to show that the placeholder is a special construct and should not be modified in any way. Lokalise allows you to display placeholders as blocks in the graphical editor. When this option is checked, all placeholders will be displayed in the following way:
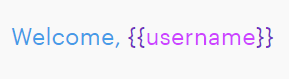
Plus, even if this option is not enabled, placeholders will still have special highlighting, for instance:
7. Working with plural keys
Placeholders are not the only things that are platform-specific; unfortunately, plural keys have very different formatting rules as well. Moreover, different languages have different plural forms. For example, in English there are two plural forms, whereas in Russian there are four. You can't possibly know all these specifics, and there's no need to as Lokalise is here to assist you. Our service automatically exports plural keys in the proper formats, and has built-in support for virtually any language on Earth, including their plural forms.
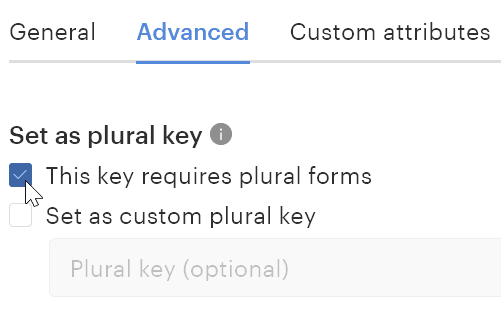
To make a key plural, open its settings by clicking on it, proceed to the Advanced tab, and check the This key requires plural forms option:
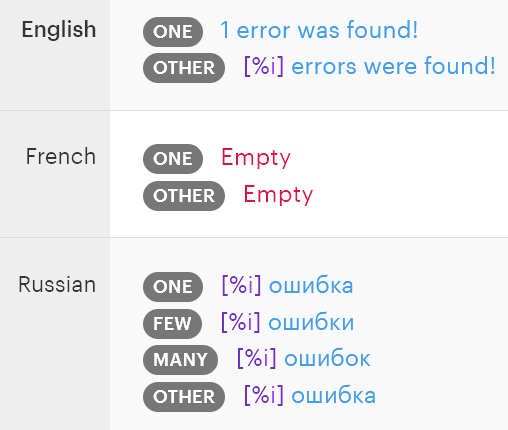
The plural forms will be provided automatically for each added project language:
If you need to change the default plural forms, click on the languages dropdown in the top menu, find the desired language, and open its Settings:
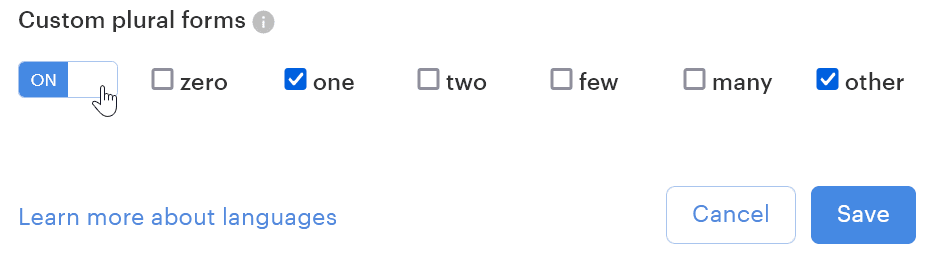
Next, enable the Custom plural forms option and choose as many forms as you need:
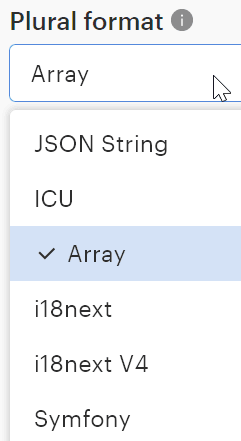
During export, you can choose the plural format to apply (these options will vary depending on the chosen file format):
8. Previewing translations in the design stage
This localization issue affects both developers and designers. You need to make sure that translations for different languages fit properly within your design. This is very important because certain phrases in some languages may become significantly longer or shorter, thus breaking the layout. Lokalise provides Adobe XD and Figma integrations to overcome this problem. These integrations work in the same way, so I will briefly show you how to get started with Figma.
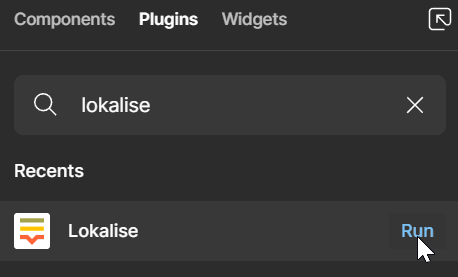
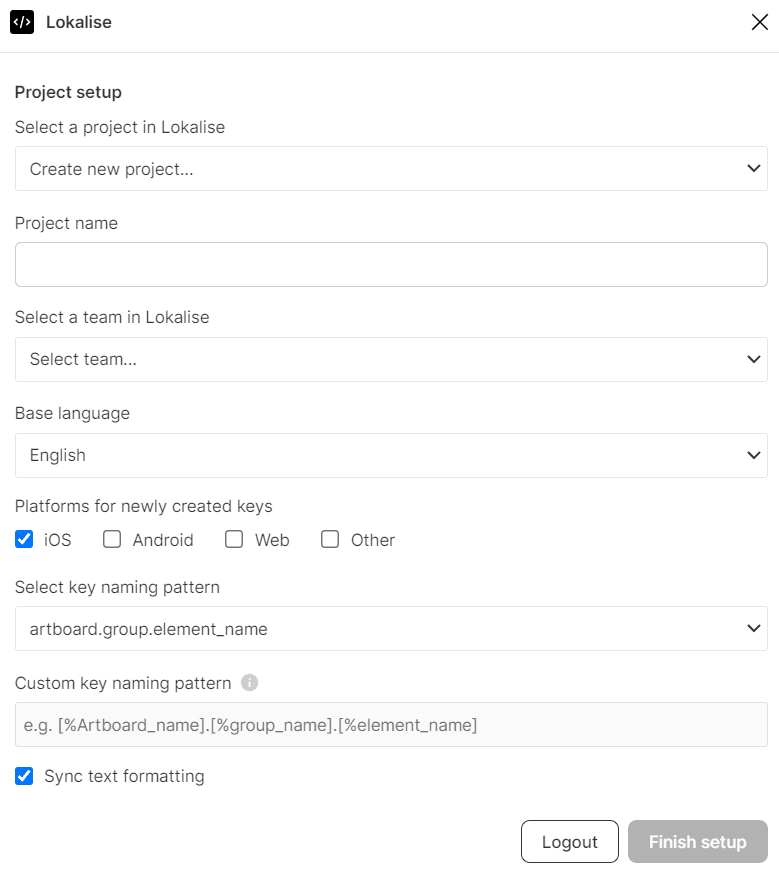
First of all, open your Figma project and install the Lokalise plugin from Menu > Plugins > Find more plugins. Here, simply search for "lokalise" and click Run:
Next, open Menu > Plugins > Lokalise. Connect your Lokalise account and choose the translation project from the dropdown (it is possible to create a new one as well).
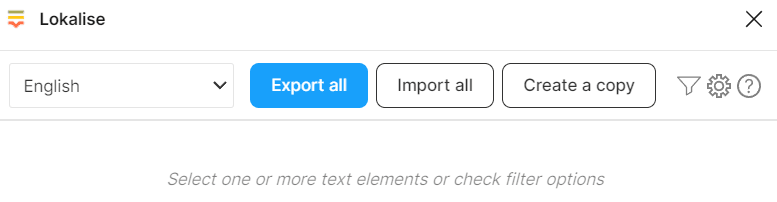
Choose the Figma text elements to push to Lokalise or simply click Export all:
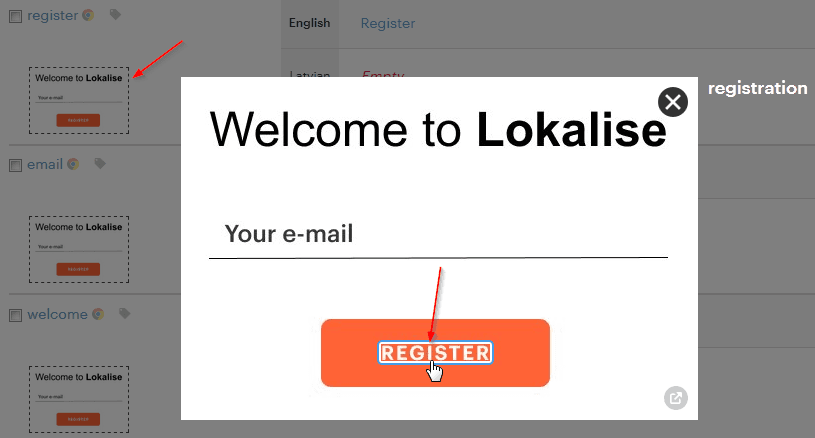
The chosen texts will be exported to Lokalise. If the text is already present in the Lokalise project, it won't be duplicated by default. Rather, the existing key will be linked to the Figma text element (but this behavior can be further customized). Additionally, for each key, a separate screenshot will be displayed showing where exactly the text is located. This is very convenient and allows you to provide your translators with context.
After the keys are exported and translated, you may preview the localized design in Figma. To achieve this, simply choose a different language from the dropdown (see the screenshot above). Your texts will be translated almost instantly!
For an overview of what the design-led localization workflow looks like at a high level, check out tip #21 in this guide on mobile app localization.
9. Providing context for translators
The last localization issue that I would like to tackle today is providing context to your translators. You're probably aware of the old joke: "Are you really a translator? Say something in your language then!" — "Well, I need a context for that…". It might sound funny, but in reality translators do require context in order to deliver quality results. They need to understand the specifics of your app, where and how the given texts are utilized, what their purpose and functions are, and so on. Therefore, Lokalise has three main features that allow you to add more information about your translation keys.
Comments
The simplest way of providing some general context is by using key comments. To add a comment for any key, click on the "Comments" button just below its name, as below:
After pressing this button, you will see a simple text box where you can add any comments as needed. For example, you can explain where this translation key will be displayed, whether the translation should be formal or informal, etc.
Screenshots
As the old saying goes, "a picture is worth a thousand words." Therefore, showing exactly how and where the text is to be displayed is very useful. Lokalise enables you to upload screenshots and link them to translation keys. Additionally, you can enable automatic key detection. This feature will try to recognize text on the uploaded image and link these portions of text to existing keys.
After the keys have been linked to the screenshot, the corresponding images will appear under each key. The chosen area will be highlighted on the image, showing where exactly the text is located, for instance:
LiveJS is an in-context JavaScript editor that lets your translators or copywriters edit your website texts and translations right on the webpage. All changes are shown in the browser and saved directly to Lokalise, not to your localization files or the database running your website.
Getting started with the LiveJS editor is easy. First of all, include the LiveJS script in your page:
<script> window.LOKALISE_CONFIG = { projectId: "18302045592fa799a35d20.15846093", locale: "en" }; (function () { var a = document.createElement("script");a.type = "text/javascript";a.async = !0; a.src = ["https://app.lokalise.com/live-js/script.min.js?", (new Date).getTime()].join(""); document.body.appendChild(a) })();</script>
Next, expose key names in the HTML because the editor must understand what text element corresponds to what key. This is achieved by adding data-lokalise and data-key attributes:
<span data-lokalise data-key="index.hero.title">Translation platform for developers</span>
And that's it! Now when opening the webpage, you'll see the in-context editor and will be able to use it to perform translations. After hitting Save, all the changes will be forwarded to the specified Lokalise project.
Conclusion
So, in this article we have discussed some common localization issues faced by developers, and have also seen how to fix them. Hopefully by now you are feeling more confident about implementing localization workflows in your projects! I thank you for stopping by today, and until next time.
Ilya is the lead for content, documentation, and onboarding at Lokalise, where he focuses on helping engineering teams build reliable internationalization workflows. With a background at Microsoft and Cisco, he combines practical development experience with a deep understanding of global product delivery, localization systems, and developer education.
He specializes in i18n architectures across modern frameworks — including Vue, Angular, Rails, and custom localization pipelines — and has hands-on experience with Ruby, JavaScript, Python, Elixir, Go, Rust, and Solidity. His work often centers on improving translation workflows, automation, and cross-team collaboration between engineering, product, and localization teams.
Beyond his role at Lokalise, Ilya is an IT educator and author who publishes technical guides, best-practice breakdowns, and hands-on tutorials. He regularly contributes to open-source projects and maintains a long-standing passion for teaching, making complex internationalization topics accessible to developers of all backgrounds.
Outside of work, he keeps learning new technologies, writes educational content, stays active through sports, and plays music. His goal is simple: help developers ship globally-ready software without unnecessary complexity.
The international SEO checklist: Go global without growth pains
International SEO is just SEO set on difficulty level: hard. Pick the wrong URL structure? Rebuild everything from scratch. Misunderstand local search behavior? Watch your content strategy crumble. Skip proper hreflang implementation? Google shows Hindi content to German users. The brands winning at international SEO don’t simply wing it. They follow a systematic approach to handle market research, technical setup, localization, and more. That’s why we created th
5 best translation management systems to make projects easy
The traditional translation management system (TMS) is dead. It doesn’t support the many moving parts of the multilingual content lifecycle, such as managing linguistic assets and syncing with design systems to integrating with codebases, automating QA, and coordinating stakeholders across functions. Modern TMS solutions go far beyond translation. They bring together translators,